Overview
Appsmith is a low-code development platform that enables the rapid creation of web applications through an architecture that supports reactive bindings and MVC-like separation. The platform revolves around widgets, datasources, queries, and JavaScript, each serving a unique role in the application's structure.
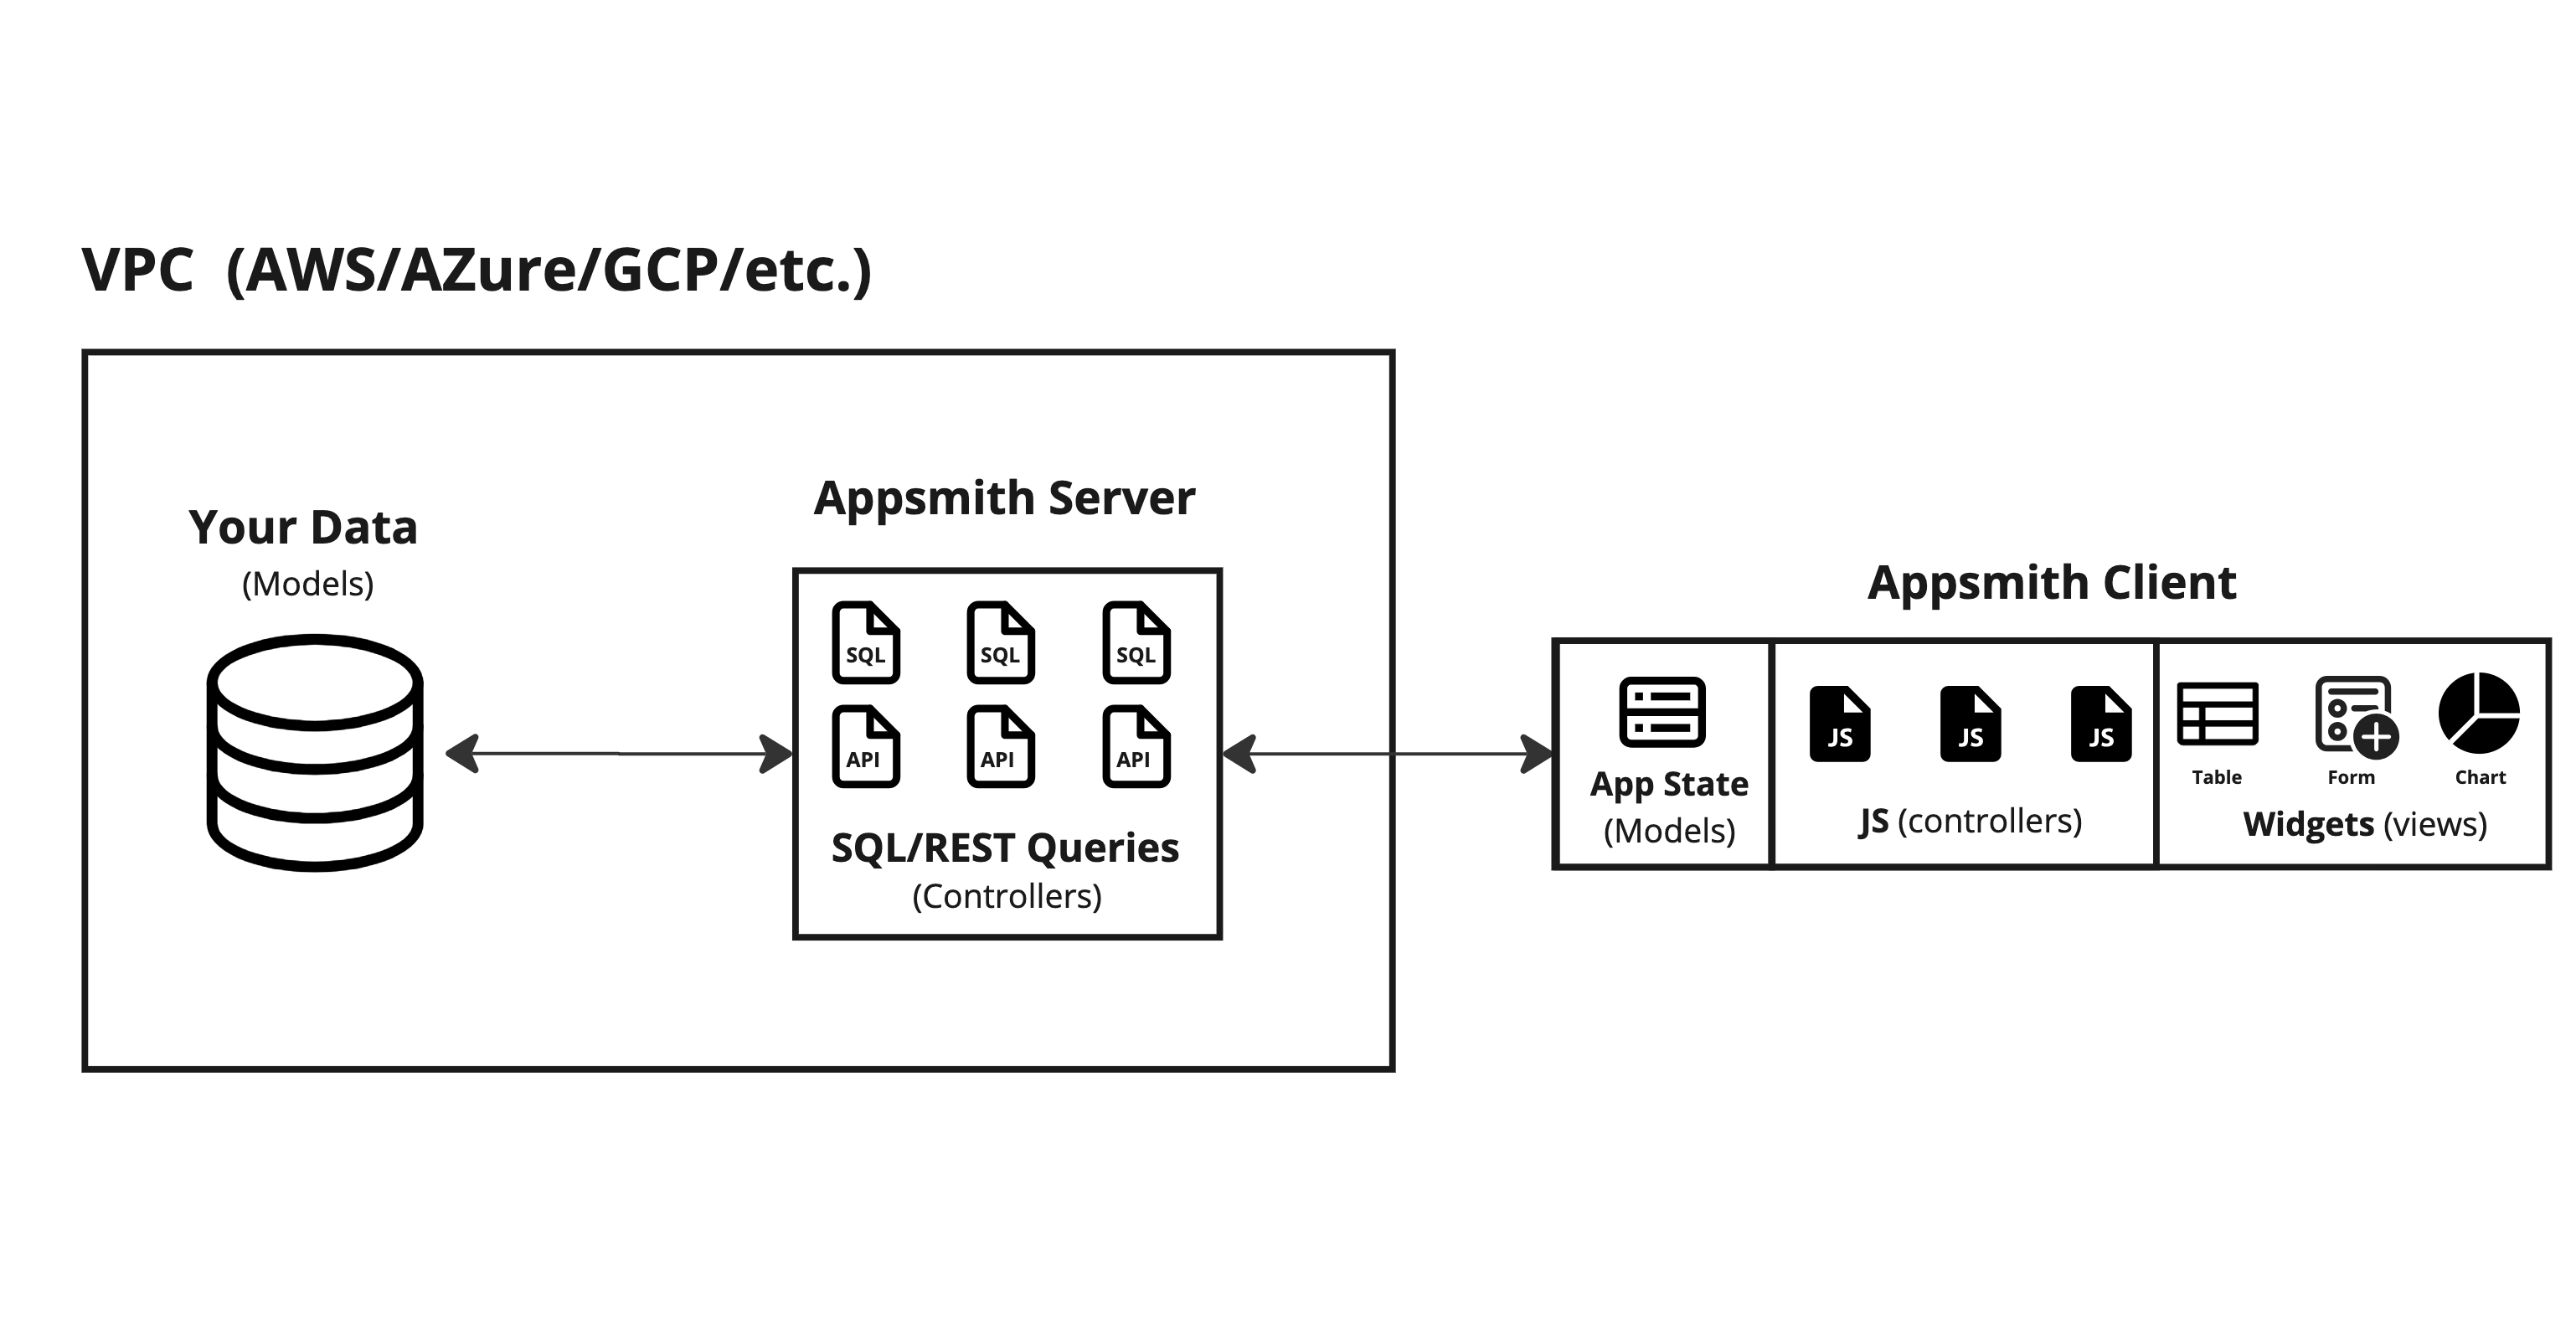
Datasources (server data models)
Datasources encapsulate the connections to databases, APIs, and other services, and are shared across all applications within a workspace. This allows developers to securely connect to the data models in their databases.
Widgets (views)
Widgets are the visual components of an Appsmith application; they represent the 'views' in the architectural framework. From input fields to tables and charts, widgets provide the means for user interaction and data presentation. Widget properties can be either statically assigned or dynamically controlled through JavaScript expressions, which adapt to changes in the application's state.
Queries and JavaScript (controllers)
Queries function as 'controllers', shaping the flow of data between views and models. They can retrieve, update, and submit data to the datasources based on interactions with the application's widgets. JavaScript can be embedded within these queries using mustache binding syntax ({{...}}), providing dynamic data manipulation and interaction within the application.
Appsmith stores the last response from a query execution within the query object's data property, thus bringing the server data models to the client as application state and making them accessible to the widgets (views).
Reactive bindings
Appsmith's framework is inherently reactive, which means that changes in the state of any entity like widgets, queries, or JSObjects automatically trigger updates throughout the application. This reactivity eliminates the need for imperative command sequences to keep the user interface in sync with the application's state. Developers can describe the desired state of a widget through expressions that reference other entities in the application. For example, to hide or show a widget based on the existence of a selected row in a table, one might use:
{{ Table1.selectedRow !== undefined }}
This reactive binding ensures that the visibility of the widget is automatically managed by Appsmith, without needing to write explicit event handlers or rely on callback functions which can be quite difficult to maintain.
Data flows in Appsmith
Most applications are a combination of read or write data flows.
- Read data flows (Model -> Controller -> View): Data from a datasource (server data model) is fetched and transformed using a query & javascript (controller) and displayed on a widget like a table (view).
- Write data flows (View -> Controller -> Model): Data captured from a widget like a form (view) is validated, sanitized and sent using a query & javascript (controller) to update a datasource (server data model).
Mastering these data flows allows developers to create applications that can seamlessly read and write data, creating a dynamic and reactive user experience. Understanding and utilizing these patterns is the key to efficiently building robust applications with Appsmith.
Get started
Get started with building applications using Appsmith by exploring the following resources: