Workflow Triggers
Workflow triggers start workflow runs based on specific conditions or events. This page provides information about the workflow triggers available in Appsmith, including their configurations, parameters, and usage examples.
Webhook trigger
A webhook trigger allows external services to start a workflow by sending a POST request to a specific URL. This trigger is useful for integrating with applications and services that can send HTTP requests when certain events occur. For example, you can set up a webhook trigger to automatically start a workflow whenever a user signs up on your website, allowing you to send a welcome email or update a database in real time.
Enable webhook trigger
Toggle the switch to enable the webhook trigger. Once enabled, Appsmith generates a unique identifier URL for the workflow.
URL
The unique webhook endpoint used to trigger the workflow. This URL includes an embedded API key for authentication and must be used in an external service’s HTTP POST request to start the workflow. The embedded API key can also be extracted and used as a Bearer token in the Authorization header.
If the original webhook URL is lost, you can generate a new one. This action invalidates the previous URL, and any external services or integrations must be updated to use the new endpoint.
Response Handling
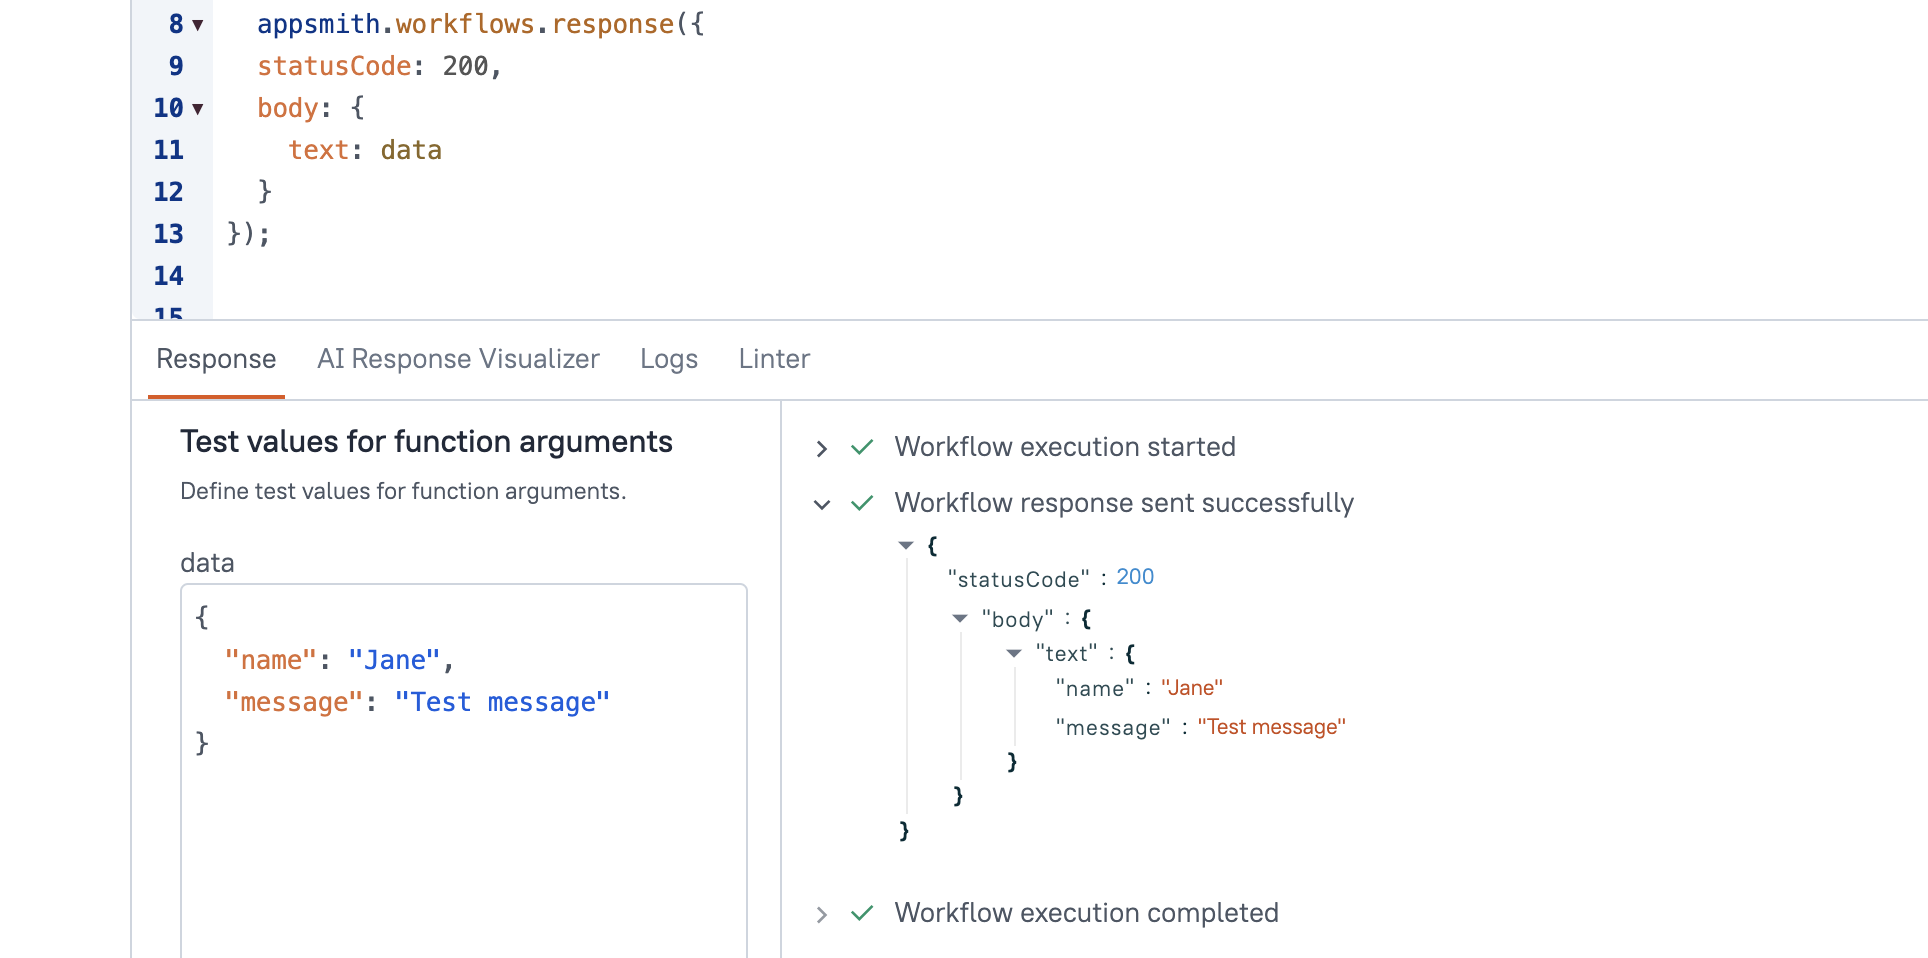
Appsmith workflows can send a response back to the service that triggered the webhook. Use the appsmith.workflows.response() function to return an HTTP status code and a response body. This is helpful when the calling service expects a confirmation or a specific output after the workflow runs.
Example:
appsmith.workflows.response({ statusCode: 200,
  body: {
    text: data,
  },
});

Scheduled trigger
A scheduled trigger starts a workflow at specific times or regular intervals, making it useful for automating tasks that need to run on a fixed schedule. For example, you can set up a scheduled trigger to automatically send a daily report summarizing sales performance to the sales team.
Timezone
Select the appropriate timezone from the dropdown menu. The default value is the system's timezone, such as UTC+05:30 - Asia/Kolkata. Ensure that the selected timezone aligns with when the workflow runs.
Set schedule
The workflow schedule uses a standard 5-field cron expression to define when the workflow runs. To schedule a workflow, configure the fields—Minute, Hour, Day of Month, Month, and Day of Week.
You can use the following syntax in each field to configure the schedule:
-
Asterisk (
*): Allows you to include a wildcard that represents all possible values in a field. For example, when set for all fields, the expression (* * * * *) means the workflow runs every minute of every hour, on every day, in every month, and on every day of the week. -
Comma (
,): Allows you to set more than one value in a field. For example, when set to0,30in Minute and an asterisk for the others, the expression (0,30 * * * *) means the workflow runs at minute0and30of every hour. -
Hyphen (
-): Allows you to define a range of values in a field. For example, when set to0in Minute,1-5in Hour, and an asterisk for the others, the expression (0 1-5 * * *) means the workflow runs every hour from1 AMto5 AM. -
Slash (
/): Used to specify intervals for a field. For example, when set to*/5in Minute and an asterisk for the others, the expression (*/5 * * * *) means the workflow runs every 5 minutes, starting from minute0and running at 5, 10, 15, and so on.
Popular cron expressions
| Schedule | Cron expression | Minute | Hour | Day of Month | Month | Day of Week |
|---|---|---|---|---|---|---|
| Every minute | * * * * * | * | * | * | * | * |
| Every hour at minute 0 | 0 * * * * | 0 | * | * | * | * |
| Every day at noon | 0 12 * * * | 0 | 12 | * | * | * |
| Every Sunday at midnight | 0 0 * * 0 | 0 | 0 | * | * | 0 |
For more help with generating cron expressions, you can use the Appsmith Cron App.
Save schedule
After configuring the schedule, click the Save Schedule button to confirm your changes.
Enable scheduled trigger
Once you have saved the schedule, toggle the Schedule Trigger switch to enable it. This ensures that your workflow runs at the specified times or intervals.
See also
- Debug workflow - Learn to debug workflows during development.
- Workflow queries - Understand available queries within your workflows.