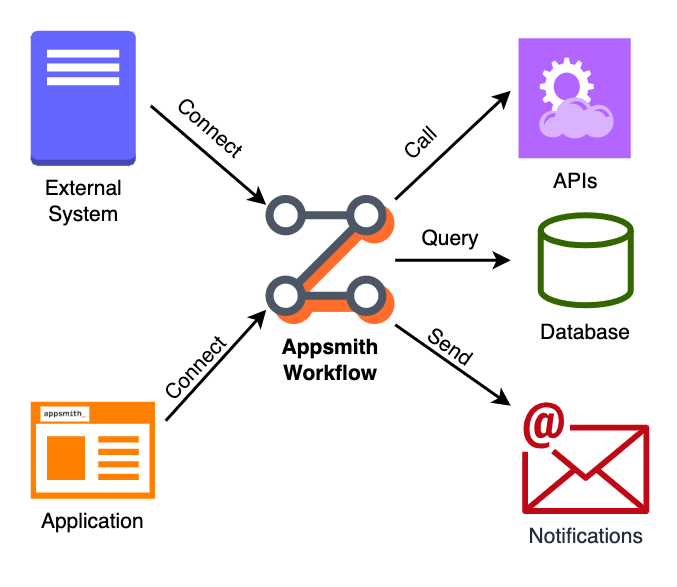
Creating Workflows
When you build an app on Appsmith, you write code to add, update, delete, and retrieve data, and define actions on event triggers. You can use JavaScript functions, and database or API queries to build different workflows.
Trigger actions with event listeners
Actions in Appsmith are built-in functions that provide a way to perform specific operations in response to user interactions or other events in your application.
You can trigger actions by binding them to Events(Async fields). For example, if you want to run a query on button click, you can bind the query's run() method on the button's onClick
event.

Handle query success or error
The property pane provides a way to configure an action to be performed when a query returns with a success or an error post execution. The HTTP status code or the query response status can help determine the success or error message returned by the query.
For example, you can display a success message when the query has executed successfully or an error message when there are issues with the execution using the showAlert()
action.

Complex workflows
The Appsmith GUI is limited to a single onSuccess
or onError
callback, while the underlying framework has no limitation. To write complex workflows, you can enable JavaScript by clicking the JS
toggle next to the event listener. You can perform operations such as chaining multiple queries and executing them in a specific order or conditionally executing a query based on the result of another query.
Every query object has a run() method used to execute the query.
Once you have configured actions using the GUI, you can click the JS
icon next to the event to view the JavaScript equivalent of your configuration and then modify the code per your requirement.
Conditional execution
You can chain queries to execute conditionally based on the value of a widget or the response from another query or a JS function.
Example
This example shows how the queries execute conditionally based on the option chosen in the Select widget.
{{
Query_Selector.selectedOptionValue === 'Movies' ? fetch_movies.run() : fetch_users.run();
}}
This example shows multiple conditional statements that execute queries based on the option chosen in the select widget and also display relevant messages based on the response from the fetchPendingUsers
query.
{{
statusDropdown.selectedOptionValue === "Pending" ?
fetchPendingUsers.run(() => {
fetchPendingUsers.data.length === 0
? showAlert("No Users Pending Approval", "info")
: showAlert("Fetched Users", "success");
})
: fetchApprovedUsers.run();
}}
Parallel execution
The run() method is asynchronous, and you can execute multiple queries in parallel. To execute multiple queries, you have to separate the run() method in the buttons onClick handler with a semicolon(;).
Example
{{ Query1.run(); Query2.run(); Query3.run(); }}
Serial execution
Serial execution means that the queries are executed one after the other in a specific order. This can be useful when the results of one query depend on the results of another.
Example
This example shows how to execute query1
, then query2
and finally query3
.
{{
query1.run()
.then(() => query2.run())
.then(() => query3.run());
}}
This example shows how to chain queries and actions to execute one after the other, and other actions, such as showing messages and closing modals, are executed using callbacks.
{{
updateUsers.run()
.then(() => fetchUsers.run()
.then(() => {
showAlert('User Updated');
closeModal('Modal1');
})
.catch(() => showAlert("Fetch Users Failed"))
).catch(() => showAlert("Update User Failed", "error"))
}}
Fetch API
The Fetch API provides an interface for executing network calls programmatically. You can use fetch()
to programmatically configure and execute a REST API.
Examples
GET request
const questions = await fetch("https://opentdb.com/api.php?amount=10")
return questions.json()
POST request
fetch("https://63772c9a5c477765121615ba.mockapi.io/users", {
method: "POST",
headers: {
"Content-Type": "application/json",
},
body: JSON.stringify({
name: "Alex",
email: "alex@appsmith.com",
}),
}).then((response) => {
console.log("Success:", response.json());
}).catch((error) => {
console.error("Error:", error);
});
File upload
const formData = new FormData();
formData.append("file", FilePicker1.files[0]);
let response = await fetch('https://httpbin.org/post', {
method: 'POST',
body: formData
});