REST API
This page describes how to connect your application to a REST API and use queries to read and write data in your applications.
Use this datasource to create a single query for an API that doesn't need complex authentication settings. If you plan to create multiple queries for the same API, you may want to use an Authenticated API datasource. Every query created from an Authenticated API datasource shares configuration (root URL, authentication, headers, and so on) to avoid re-entering details.
Query REST API
The following section is a reference guide that provides a description of the parameters to create REST API queries.
Method
GET, POST, etc.) to use for the request.URL
Headers
Params
Body
Appsmith supports a variety of encoding types for sending data in API queries. The encoding type can be selected via the Body dropdown on the API editor. For step-by-step instructions on uploading files using an API, see Upload Files using API guide.
- None: Omits a body from the request.
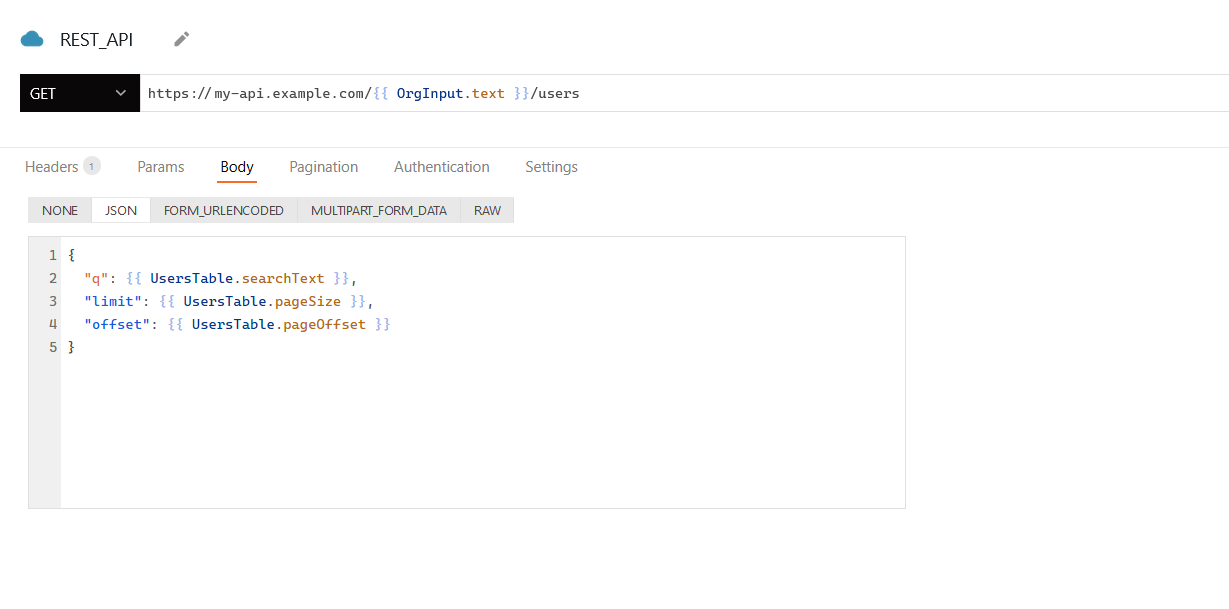
- JSON: Expects a JSON object to send as the body.
    {
      "q": {{ UsersTable.searchText }},
      "limit": {{ UsersTable.pageSize }},
      "offset": {{ UsersTable.pageOffset }}
    }
In the example above, values are collected from a Table widget and passed into a JSON object.
- FORM_URLENCODED: Expects key/value pairs to be encoded into FORM_URLENCODED format as the body.
| Key | Value |
|---|---|
| query | {{ UsersTable.searchText }} |
| limit | {{ UsersTable.pageSize }} |
| offset | {{ UsersTable.pageOffset }} |
// result
"query=arjun&limit=10&offset=20"
Selecting FORM_URLENCODED (for application/x-www-form-urlencoded) automatically encodes your key/value pairs for sending in the request body.
- MULTIPART_FORM_DATA: Expects key/value pairs with a data type to be encoded into MULTIPART_FORM_DATA format as the body. Multipart requests can include several different types of data within them, such as a file along with some other related metadata.
| Key | Type | Value |
|---|---|---|
| user | Text | {{ appsmith.user.email }} |
| filename | Text | {{ FileNameInput.text }} |
| file | File | {{ Filepicker.files[0] }} |
// result
"query=arjun&limit=10&offset=20"
Above, values of multiple types are pulled from widgets and added to the query, including file data from a Filepicker widget.
When uploading file data, check that your Filepicker widget's Data Format property is set correctly. When uploading as multipart/form-data, this should usually be set to Binary.
- BINARY: For any Base64 upload, including text files, images, videos, and more, ensure that you include the file data in the body. If you're using Binary to upload files, remember to set the Data Format property of the Filepicker widget to
Base64. This ensures that the file data is encoded correctly before transmission. Moreover, if the API you are connecting with expects additional key/value pairs, you can include them along with file data in the body.
{{ imgFilepicker.files[0].data }}In the above example, if the API expects to supply only the image data, use the data property of the Filepicker widget to send the data of the selected image file.
- RAW: Expects raw binary file data to be sent as the body.
{{ Filepicker1.files[0]?.data }}
Use RAW if your endpoint can't accept multipart-encoded data and requires raw body binary instead. Above, the data property of the file is passed to the query instead of the file object itself because the endpoint expects only raw binary data.
Be sure to turn off JSON Smart Substitution for this query in the query settings. This option usually helps cast data into correct JSON, but it is problematic when used with RAW binary.
Pagination
- None: Doesn't use any pagination.
- Paginate with Table Page No: Use when your API expects an offset or increment value to determine which set of records to return. Follow the instructions that appear on the platform, or see Offset-based pagination for more information.
- Paginate with Response URL: Use when your API returns cursor values to page through data. The Previous URL and Next URL fields expect the cursor values from the query response. For more information, see Cursor-based pagination.
Authentication
Troubleshooting
If you're experiencing difficulties, you can refer to to the Datasource troubleshooting guide, or contact the support team using the chat widget at the bottom right of this page.
See also
- Download Files - Learn how to download files using a URL with API integrations.
- Upload Files using API - Step-by-step guide on how to upload files via API using the Filepicker widget.
- Setup Server-Side Pagination - Learn how to efficiently handle large datasets by implementing Server-side pagination in Table.