Setup Multiple Datasource Environments
This page shows how to set up and manage multiple datasource environments for your application. For more details see datasource environments.
Configure an environment
This section shows how to configure the environments in Appsmith.
-
Click the Queries tab on the Entity Explorer to the screen's left.
-
Click the + New query / API button and select your datasource.
SaaS integrations such as Google Sheets, HubSpot, Twilio, and Airtable do not support datasource environments.
-
Configure Production, Staging and Custom datasource connection parameters in the respective tabs. For a complete description of the connection parameters, see the Reference guide for your datasource.
-
Test and save the configurations for all the environments.
Switch environments
You can switch between Staging and Production environments to configure the application to execute queries in the selected environment.
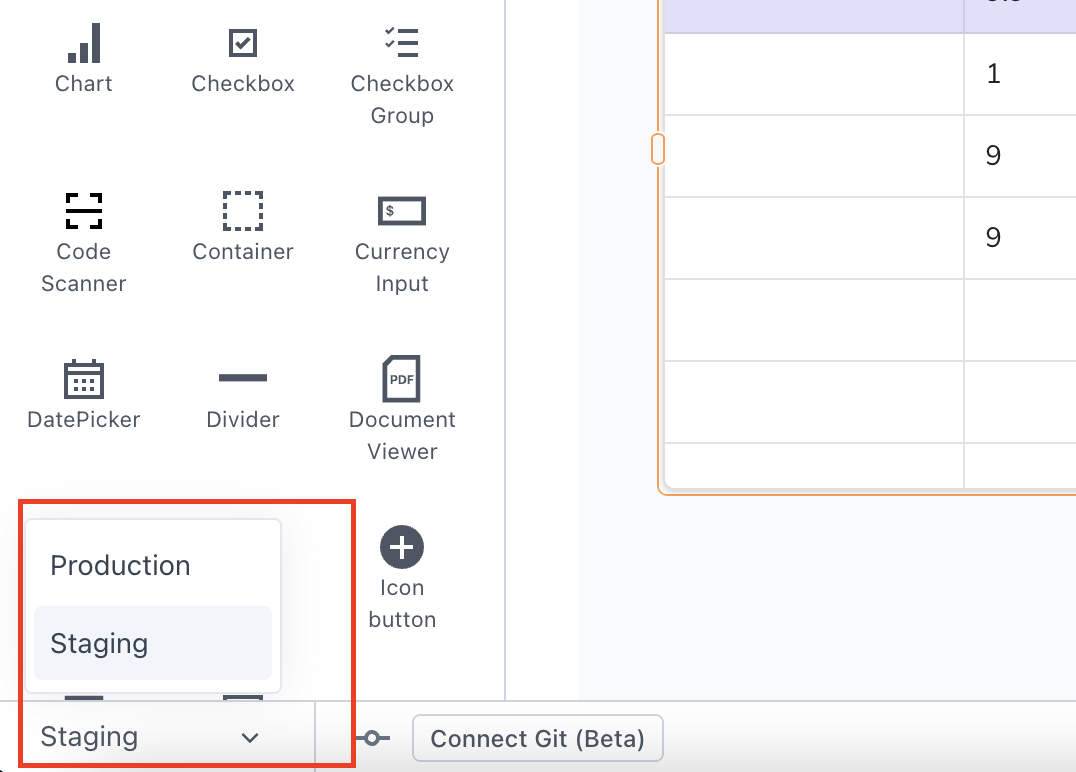
Switching in Edit Mode
In Edit and Preview modes, select the environment from the bottom left corner of the screen. Switching the environment in Edit mode does not affect the deployed version of the application. The Production environment is always used in the deployed version.
Switching in View Mode
In View mode, you can switch environments by adding a query parameter to the application URL:
- To use the Production environment, append the following query parameter to the app URL:
?environment=production
// Example: https://app.appsmith.com/app/customer-dashboard?environment=production
- To switch to the Staging environment, append the following query parameter to the app URL:
?environment=staging
// Example: https://app.example.com/app/customer-dashboard?environment=staging
Access to environments is restricted based on user permissions, ensuring that only authorized users can view or interact with the data. For more information on permissions, you can refer to the Granular Access Control.
Custom environments
Appsmith provides two environments by default: Production and Staging. However, if you want to create and manage your own environments, follow these steps:
-
On the applications home page, click the Menu icon (three dots) in the workspace where you want to create a custom environment.
-
Select Environments from the menu dropdown.
-
Click the + Create new button and create a new environment.
Once you've successfully created a Custom environment, you can modify roles and configure the settings by clicking on the edit icon.
Use Git with Datasource Environments
Using Git with environment configurations allows you to connect your application to version control and work on different branches, ensuring that changes made during development do not affect the production environment. This approach enables you to thoroughly test changes on Staging data before merging them into the master branch for deployment.
You can create a new branch for each feature you're working on and commit changes to that branch as you make progress. Once a feature is stable and ready for deployment, you can merge it into the master branch.
To use environments with Git, you can follow these steps:
- If you haven't done it already, connect your application to Git.
- Connect to a datasource and configure the Staging and Production environments.
- In the Staging environment, create and switch to a
featurebranch. See Setup Branches to create a branch. - Use the Staging environment to make edits to your application so that you can test the changes without affecting production data.
- Once you have tested your changes and are ready to deploy to production, commit your changes and merge into the
masterbranch.
When you merge changes into the master branch, the production data remains unchanged, ensuring that end-users continue to view the same data they did before the changes were made.