AWS ECS on EC2
This page provides steps to install Appsmith on a single node EC2 Linux + Networking ECS Cluster using an EC2 instance.
Prerequisites
- An Amazon Web Services (AWS) account. If you don’t have one, Create an AWS Account.
- An Amazon EC2 key pair. If you don’t have one, follow the guide to Generate an SSH Key pair.
- An Amazon Security Group with the following rules:
- Inbound: Allow traffic on ports 80, 443, and 22. Follow the guide to Create a Security Group and add an inbound rule.
- Outbound: Allow outbound traffic. Customize rules if specific restrictions are needed.
- External MongoDB (Version 5.0 or later) is required. The built-in MongoDB cannot be used with EFS, as it may cause Appsmith to crash. See External MongoDB.
- Whitelist
cs.appsmith.comin your security group’s outbound rules to allow outbound HTTPS traffic. If using a custom firewall, ensure these domains are permitted.
Create EFS volume
- Navigate to the Elastic File System section of the AWS Management Console and click the Create file system button.
- Provide a meaningful name to your file system, configure the VPC settings as required, and click Create.
- Select the file system you created above from the list and switch to the Network tab.
- Click the Manage button, and assign the security group that allows NFS access on port 2049. If you don't have such a security group:
- Follow the Create a Security Group guide and include an inbound rule for NFS access on port 2049.
- Once created, attach this security group to your EFS.
Install Appsmith
To deploy Appsmith on the Amazon ECS cluster that has a single node, you need to complete the below essential steps:
Create ECS cluster
- From the AWS Management Console, navigate to the Elastic Container Service (ECS) section.
- If you already have a single-node EC2 Linux + Networking ECS Cluster with 1 instance, you may skip to creating task and container definitions. If not, continue with the following:
- Click Clusters in the left sidebar, then click the Create Cluster button.
- Cluster name - Give a meaningful name to your cluster. For example,
appsmith-ecs-ec2-cluster. - Configure the Infrastructure settings as follows:
- Choose Amazon EC2 instances
- Provisioning Model: Choose On-demand
- Auto Scaling Group: Keep default selection
- Operating system/Architecture: Amazon Linux 2
- EC2 instance type: Select at least a
t3.largeinstance type (2 vCPU, 8 GB of memory) as an entry-level baseline for evaluation and low-traffic workloads. For production sizing guidance, see Infrastructure and capacity planning. - Desired Capacity: Give Minimum as 1 and Maximum as 2
- SSH Key pair: Use the key pair created in the Prerequisites section Keep default settings for other attributes.
- Configure the Network Settings for Amazon EC2 instances section as shown below:
- VPC: Choose your existing VPC or create a new one VPC
- Subnets: Select subnets that provide public access
- Security group: Use the security group created earlier in the [Prerequisites] section
- Auto-assign public IP: Choose Turn on
- Configure the Monitoring section by toggling on the Use container insights setting
- Click the Create button to create your cluster. You'll see the ECS cluster under Clusters.
Create task and container definition
- Go to Task definitions from the ECS section in the sidebar of the AWS Management Console.
- Click the Create new task definition button and select Create new task definition from the dropdown.
- Under the Task definition configuration, give a meaningful name to the task definition by adding the name in the Task definition family field. For example, appsmith-ecs-ec2-cluster-task-def
- Configure the Infrastructure requirements as shown below:
- Launch type - Amazon EC2 instances
- Network mode - default
- Task role and Task execution role as default. For all other fields keep the default settings.
- Configure the Container-1 as shown below:
- Name - Give a meaningful name. For example,
appsmith - Image URI -
index.docker.io/appsmith/appsmith-ee:<version>, replacing<version>with a release tag from Appsmith on GitHub. Use a pinned tag so task revisions pull a known image. - Add the port mappings for Port
80as follows:- Container port -
80 - Protocol - HTTP
- Port name - Give a meaningful and unique name.
- App protocol - HTTP
- Container port -
- Add the port mappings for Port
443as follows:- Container port -
443 - Protocol - HTTP
- Port name - Give a meaningful and unique name.
- App protocol - HTTP
- Container port -
- Under the Environment variables section, click the Add environment variable button, and add the below environment variables in the Key and their values in the Value fields:
APPSMITH_ENCRYPTION_PASSWORD: Add a password to encrypt all credentials in the database. It's recommended to use a random password.APPSMITH_ENCRYPTION_SALT: Use encryption salt to encrypt all credentials in the database. It's recommended to use a random password.APPSMITH_DB_URL: Enter the URI of the external MongoDB (v5.0 or later) instance.APPSMITH_ENABLE_EMBEDDED_DBto0. This disables embedded mock databases on EFS volume.
- Name - Give a meaningful name. For example,
- Configure the HealthCheck section as shown below:
- HealthCheck Command -
CMD-SHELL, curl http://localhost/ || exit 1 - Interval - 10
- Timeout - 2
- Start period - 160
- Retries - 3
- HealthCheck Command -
- Keep the default settings for other sections, and scroll down to Storage. Click Add volume button and configure Volume-1 as shown below:
- Volume type- EFS
- Configure the Storage configurations as show below:
- Volume name- Give a meaningful name. For example,
appsmith-ecs-ec2-cluster-efs-volume - EFS File System ID: Select the EFS file system created in the Create EFS volume section
- Root directory:
/
- Volume name- Give a meaningful name. For example,
- Configure the Container mount points as shown below:
- Container- Choose appsmith
- Source volume- Choose appsmith
- Container path- add the path as
/appsmith-stacks
Do not share the EFS across ECS services, as doing so will cause Appsmith services to crash.
- Keep the default settings for all other sections, and click the Create button to create the task definition.
Create and run ECS service
- Navigate to the Clusters dashboard in the ECS section and select your cluster.
- Under the Services tab, click the Create button.
- Configure the Environment section with the following settings:
- Compute options- select option as Launch type
- Launch type- select EC2 from the dropdown
- Configure the Deployment configuration section with the following settings:
- Application type- Select Service
- Set up the Task definition as follows:
- Family- Choose the task definition you created in the Create task and container definition section
- Revision- Keep the default selection
- Service name- Give a meaningful name to the service. For example,
appsmith-ecs-ec2-cluster-service - Service type- Choose DAEMON
- Keep the default setting for all other sections, and click the Create button to create a service. It will take about five minutes for Appsmith to be up and running. The Last status shown as Running means that the service is up and running.
Verify Appsmith installation
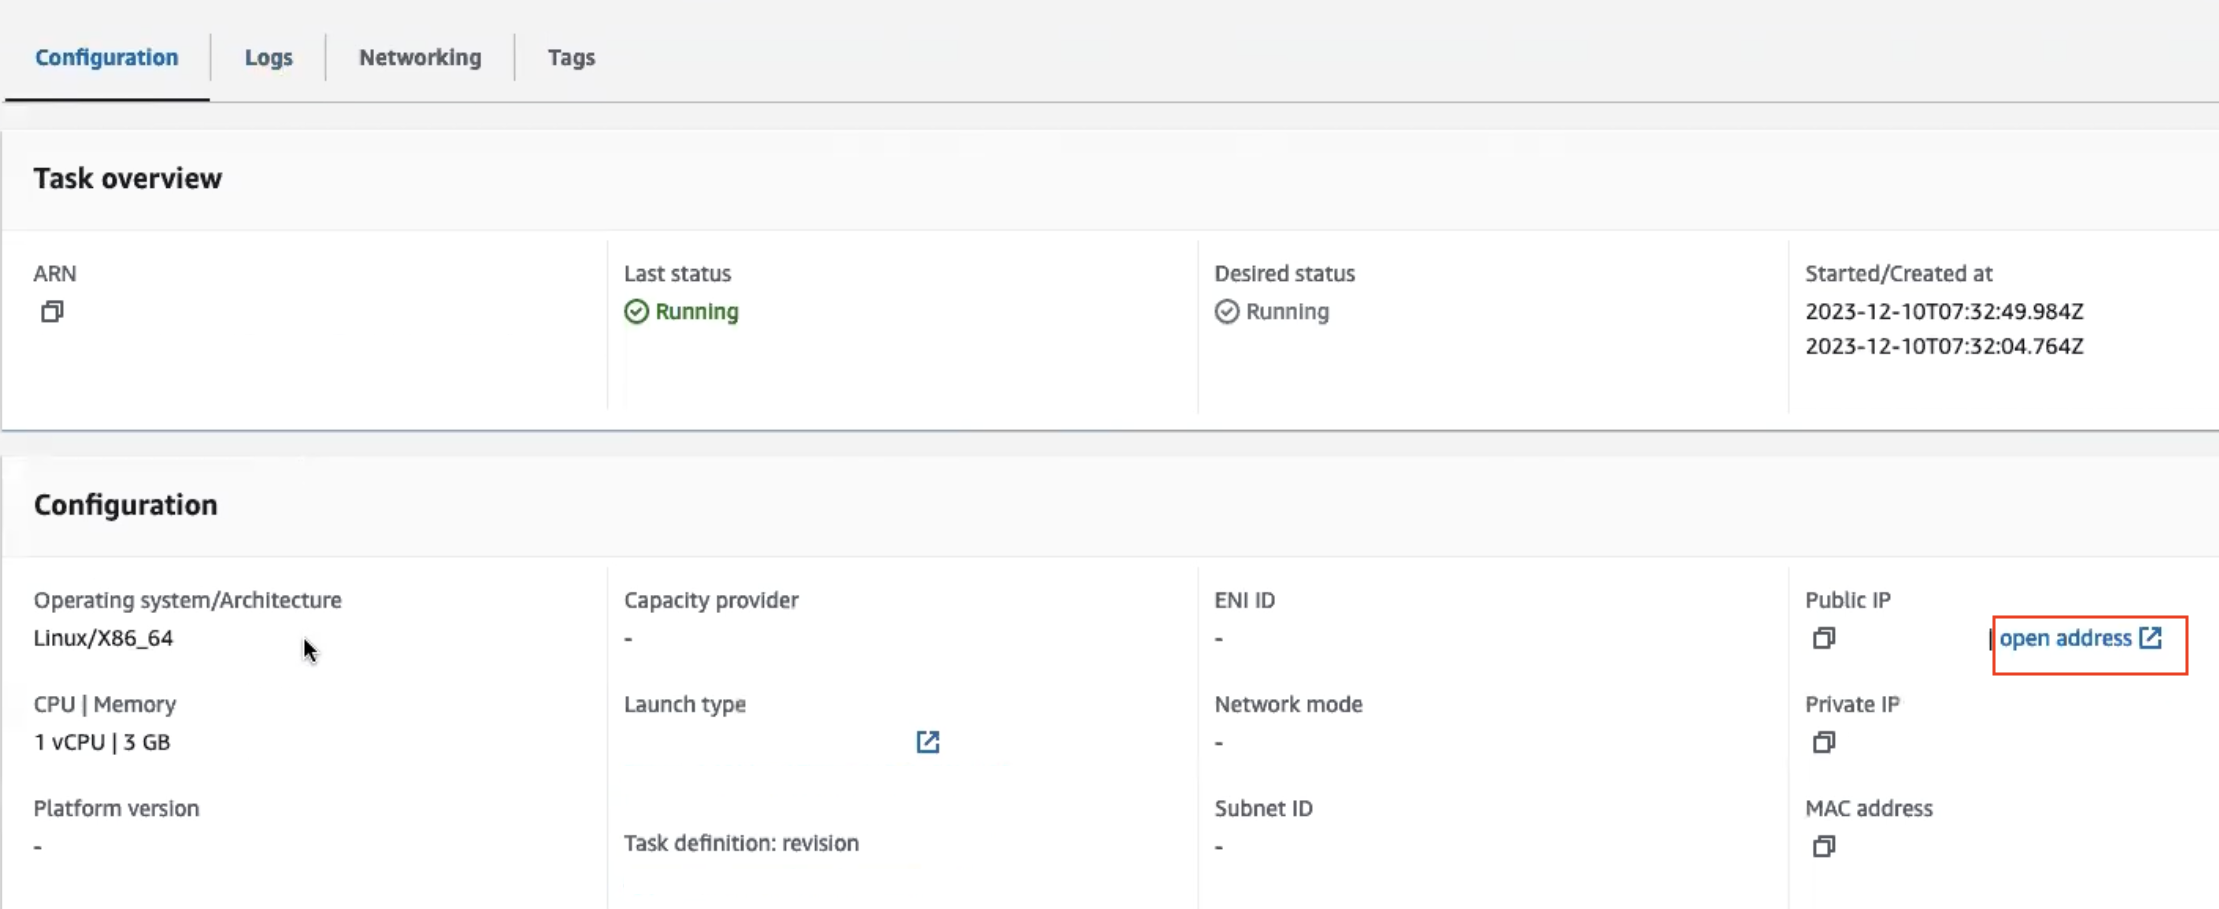
- Select your cluster from the Clusters section, and open the Tasks tab
- Locate the relevant task and click its EC2 instance id
- Click the Open address link available next to the Public IP field to access Appsmith
- Fill in your details to create an administrator account
- Once you've created an account, you can either start with the free plan or activate your instance with a license key. If you want to generate a license key, sign up on customer.appsmith.com to create one, and then proceed to activate your instance using the newly generated license key.
Install Appsmith Community
For the Appsmith open source edition (Appsmith Community), substitute appsmith/appsmith-ee with appsmith/appsmith-ce in the Image URI for Container-1 in the Create task and container definition section on this page, and keep the same :<version> suffix.
Post-installation configuration
Once you have completed the installation process, consider performing the tasks below to configure and manage your Appsmith instance, enhancing its security and performance, specifically if it's intended for production use.
Configure SSO to allow users to sign in using your identity provider. Learn more about configuring SSO.
Set up an email service to enable Appsmith to send notifications and alerts. Learn more about configuring email services.
Set up a custom domain for your Appsmith instance and secure it with SSL. Learn more about setting up custom domains and SSL.
Ensure the safety of your Appsmith instance data by regularly backing up and restoring it when needed. Learn more about Backup and Restore.
Troubleshooting
If you are facing issues during deployment, refer to the guide on troubleshooting deployment errors. If you continue to face issues, reach out to the support team via the chat widget on this page.
See also
- Manage Installation: Learn how to manage your Appsmith instance.
- Upgrade Installation Guides: Learn how to upgrade your Appsmith installation.