SendGrid
This page provides steps for configuring SendGrid as an email service provider on your self-hosted Appsmith instance.
Prerequisites
- A self-hosted Appsmith instance. See the installation guides to set up your Appsmith instance.
- A SendGrid account. Sign up on the SendGrid Website if you don't have one.
- A sender identity on SendGrid. You need this to send emails via SendGrid. See the Adding a Sender guide on the SendGrid official documentation.
Configure SendGrid to use SMTP Relay
- Log into your SendGrid account.
- Select Email API > Integration Guide from the left nav bar.
- Choose SMTP Relay on Integrate using our Web API or SMTP Relay screen.
- Click Choose button.
- On How to send email using the SMTP relay screen:
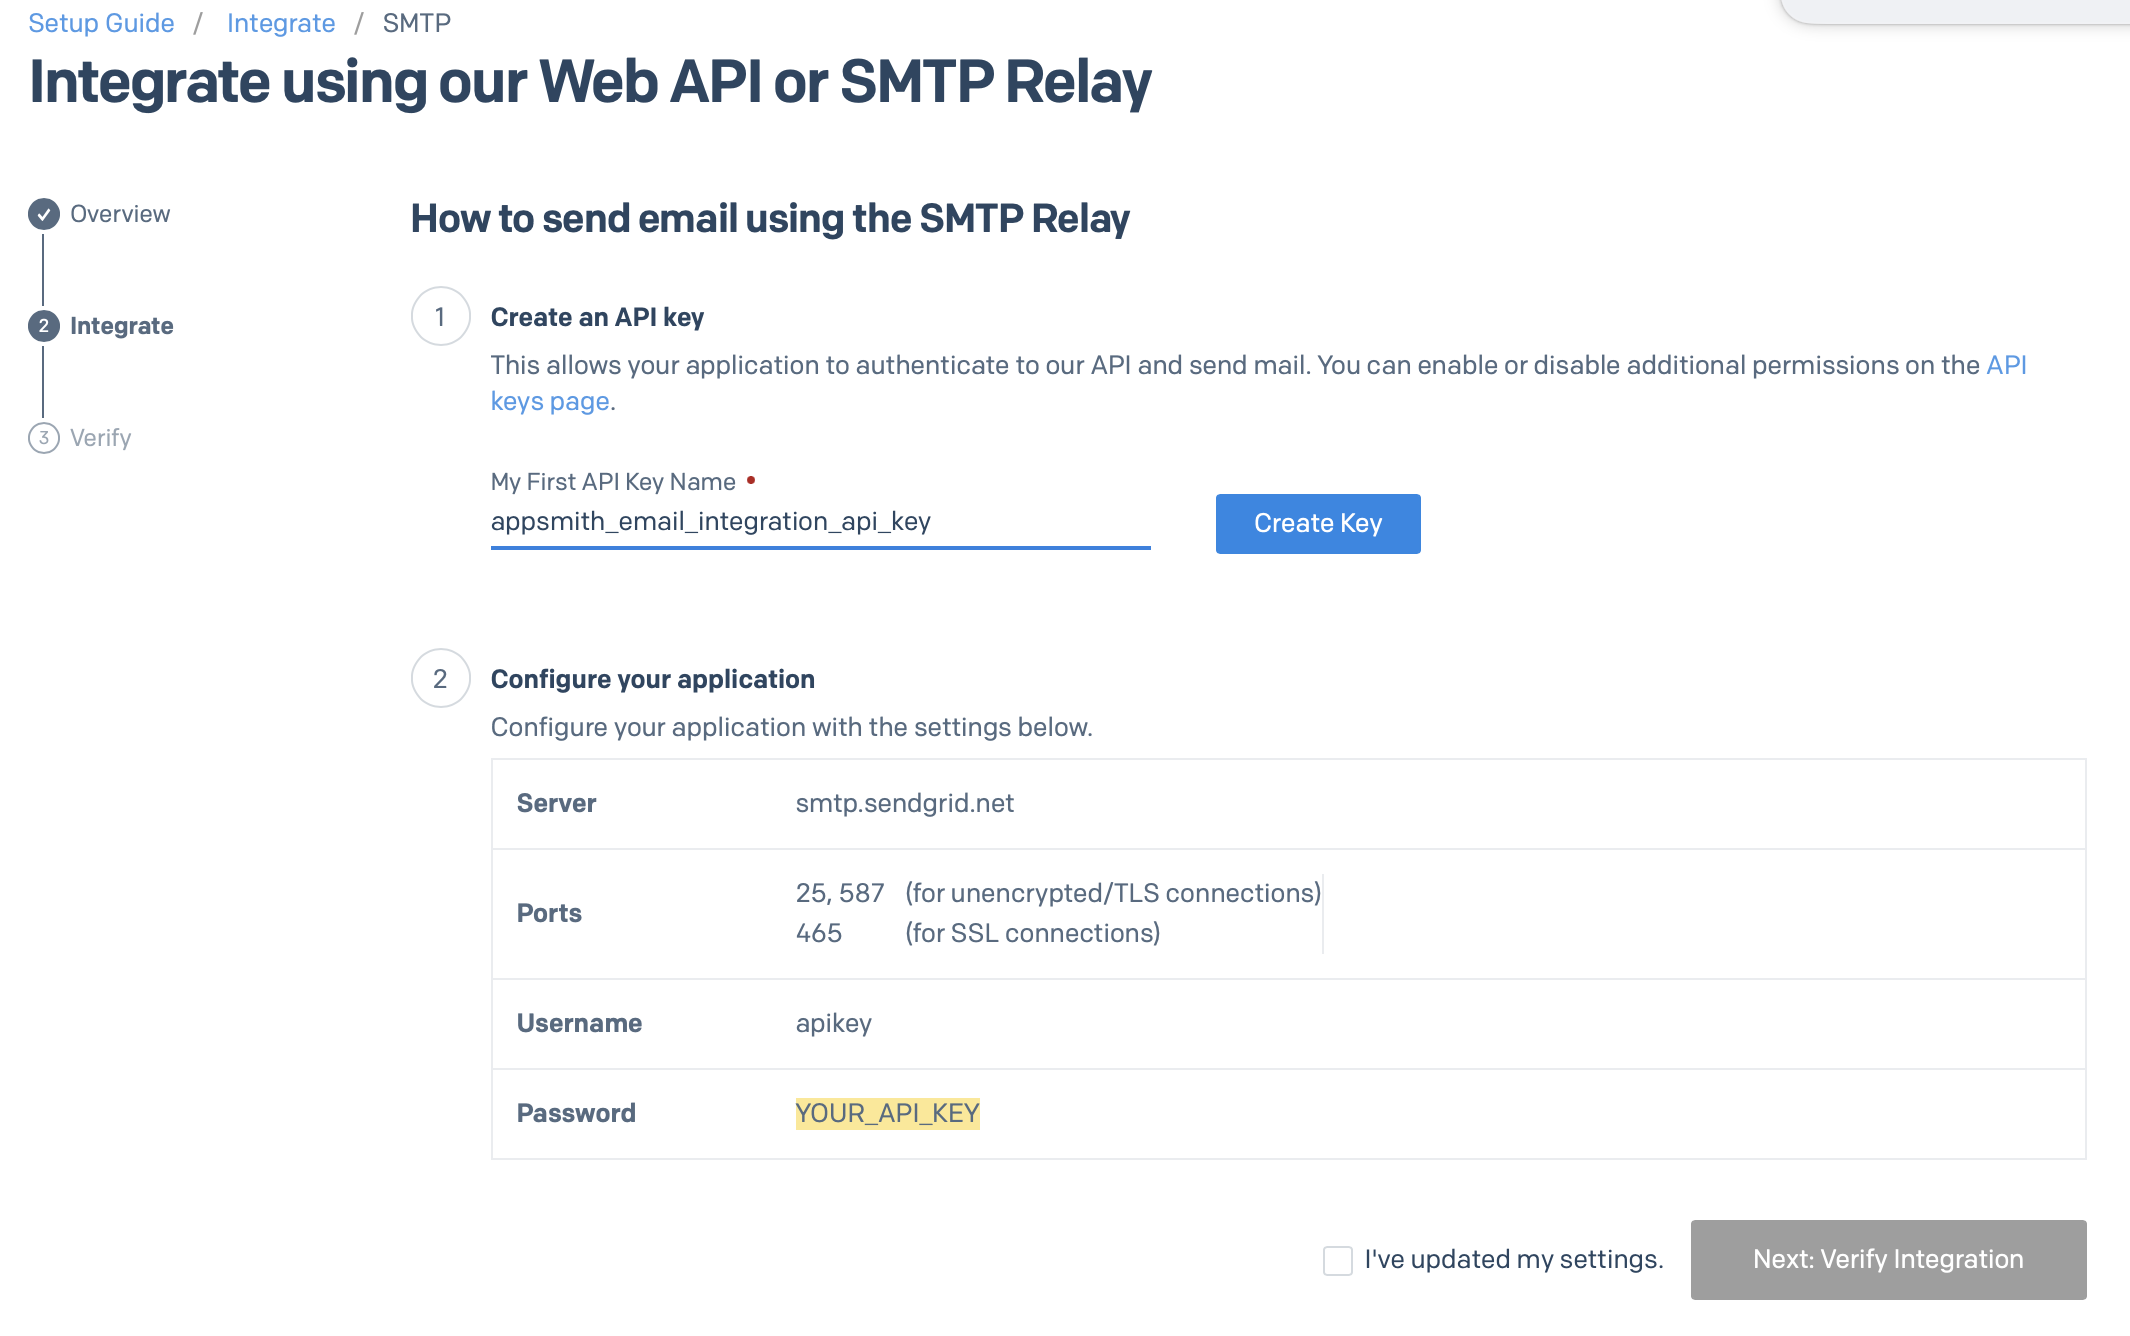
a. Enter a unique name for My First API Key Name field.
b. Click the Create Key button. SendGrid generates a new key. Make sure to copy and save it for later use.
- The API key generated is also shown in the Password field under the Configure your application section.
- Keep the SendGrid configuration screen open and proceed to the Configure SendGrid on Appsmith section.
Configure SendGrid on Appsmith
On Appsmith, you can configure SendGrid by using one of the following ways:
Admin settings
If you have configured email using environment variables for your instance, it takes precedence over the configuration provided through the Admin Settings UI.
Follow these steps to configure SendGrid using Admin Settings:
-
Log into your Appsmith instance as a superuser.
-
Go to the Admin Settings screen.
-
Select Email from the left nav bar.

- Add the configuration details for SendGrid as follows:
- SMTP host
- Add the SMTP host as
smtp.sendgrid.netfor SendGrid. - SMTP port
- Add the SMTP port as
587for using Transport Layer Security (TLS) protocol and25for sending emails without encryption. - From address
- Add a verified email address to be shown in the From field when users receive an email.
- Reply-to address
- Add a verified email address so users can contact you.
- Enable TLS protected connection
- This option is turned off by default. Toggle it to enable the Transport Layer Security protocol.
- SMTP username
- Add the username as apikey for accessing the SMTP service provider. Note that this is the literal string apikey and not the value of the created API key. The username is only needed when the Transport Layer Security protocol is turned on.
- SMTP password
- Add the API Key you created in Configure SendGrid to use SMTP Relay. The password is only needed when the Transport Layer Security protocol is turned on.
- Click the SEND TEST EMAIL button to verify the configuration. A toast message appears at the top of the page, indicating the success or failure of the test. Additionally, a test email is sent to your inbox on successful verification.
- Click the SAVE & RESTART button to save the configurations and restart the instance with the updated settings.
- Proceed to the Verify SendGrid integration section to complete the configuration on SendGrid.
Environment variables
Follow these steps to configure SendGrid using environment variables:
- Go to your Appsmith instance configuration file, such as the
docker.envfile for Docker or thevalues.yamlfile for Kubernetes. - Update the values of the environment variables as shown below:
- APPSMITH_MAIL_ENABLED
- Set it to
trueto enable the email service. - APPSMITH_MAIL_FROM
- Set it to the verified email of the sender.
- APPSMITH_REPLY_TO
- Set it to the email that should receive replies by default.
- APPSMITH_MAIL_HOST
- Set it to
smtp.sendgrid.netfor SendGrid. - APPSMITH_MAIL_PORT
- Set it to
587for using Transport Layer Security (TLS) protocol and25for sending emails without encryption. - APPSMITH_MAIL_SMTP_TLS_ENABLED
- Set it to
trueto enable Transport Layer Security. - APPSMITH_MAIL_SMTP_AUTH
- Set it to
trueto share theAPPSMITH_MAIL_USERNAMEandAPPSMITH_MAIL_PASSWORDwith the SMTP server. - APPSMITH_MAIL_USERNAME
- Set it to the username as apikey for accessing the SMTP service provider. Note that this is the literal string apikey and not the value of the created API key. The username is only needed when the Transport Layer Security protocol is turned on.
- APPSMITH_MAIL_PASSWORD
- Set it to the API Key you created in Configure SendGrid to use SMTP Relay. This is only needed when the Transport Layer Security protocol is turned on.
- Save the changes and restart the Appsmith instance.
- Proceed to the Verify SendGrid integration section to complete the configuration on SendGrid.
Verify SendGrid integration
Follow these steps to verify your SendGrid integration:
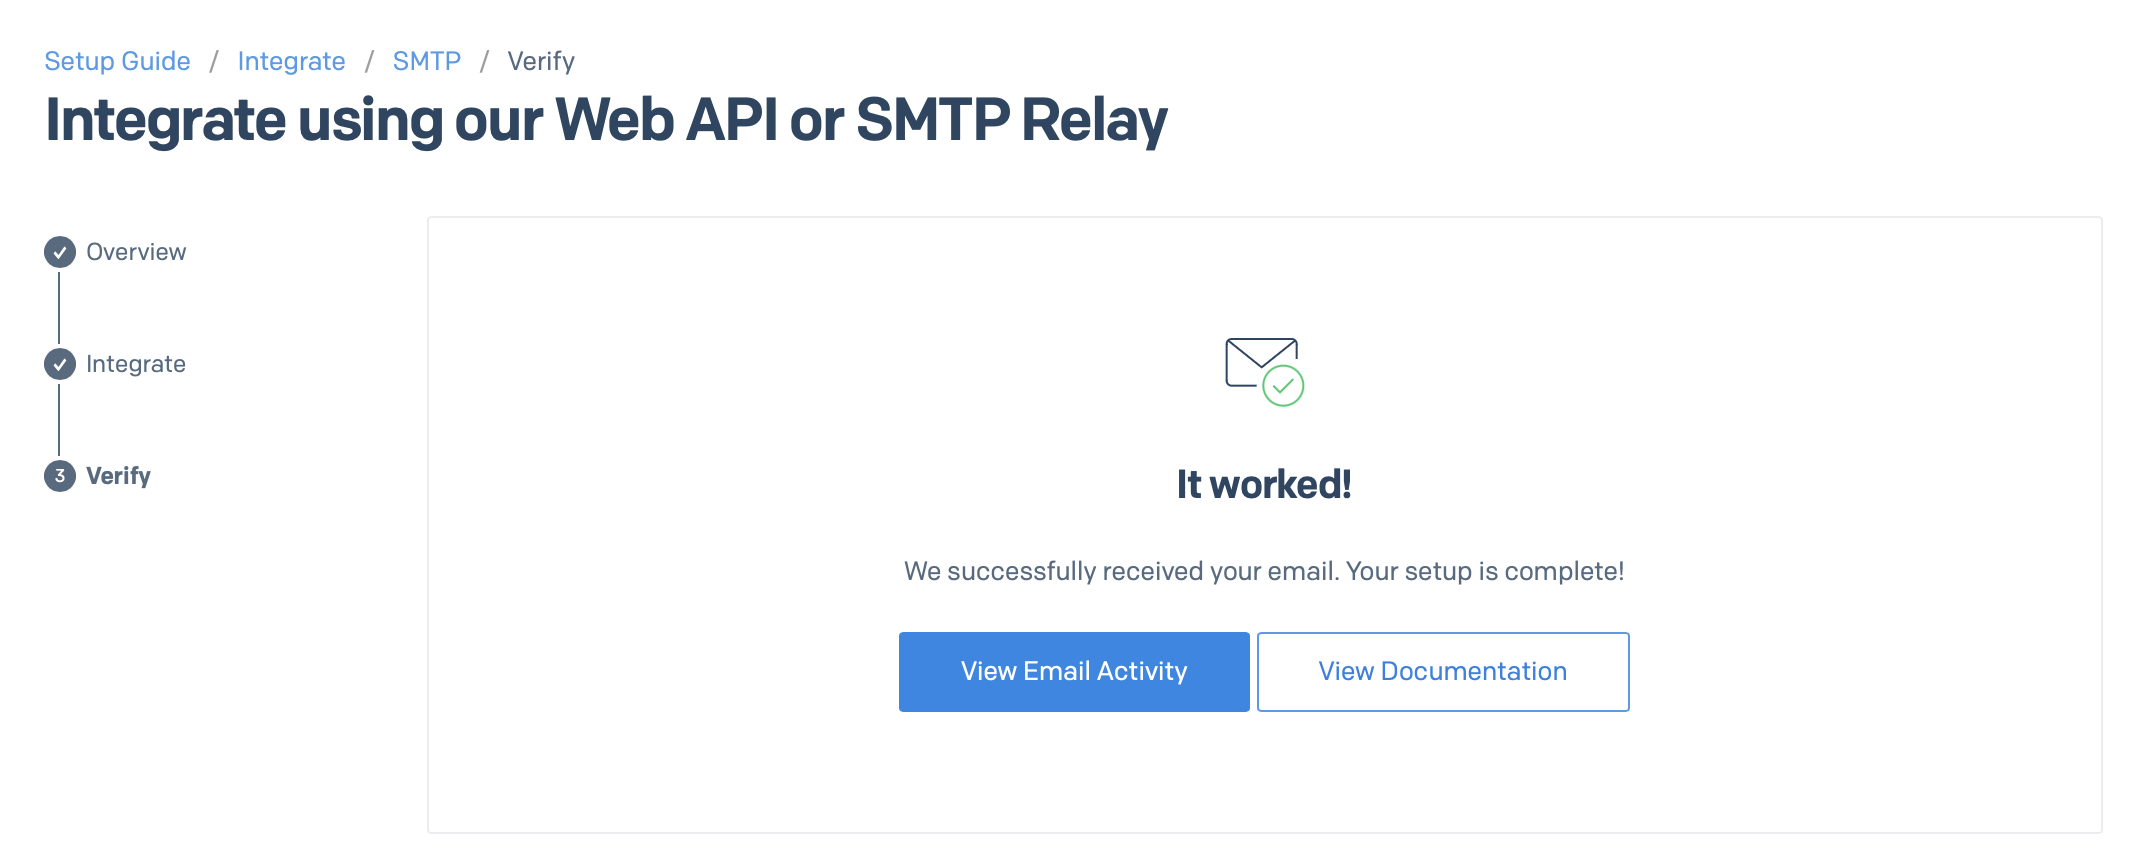
- After triggering a test email, return to the SendGrid screen Integrate using our Web API or SMTP Relay.
- Check I've updated my settings checkbox, and click the Next: Verify Integration button.
- Click the Verify Integration button on the next screen and wait for SendGrid to verify the test email.
- A screen with the message It worked! is displayed on successful verification.