Google OAuth
This page shows how to configure Appsmith to use Google OAuth 2.0 as an authentication provider. By integrating with Google OAuth 2.0, Appsmith enables end users to sign in to their Appsmith accounts using their Google credentials.
Prerequisites
- A self-hosted Appsmith instance. See the installation guides for installing Appsmith.
- A Google Workspace account.
- Before setting up Google Auth, ensure that you have already configured a custom domain for your instance.
- In Appsmith, go to Admin Settings > Authentication and click Enable on Google.
Configure Google API console
- Open the Google API console to obtain the authorization credentials needed for Appsmith to connect with Google’s OAuth 2.0 server.
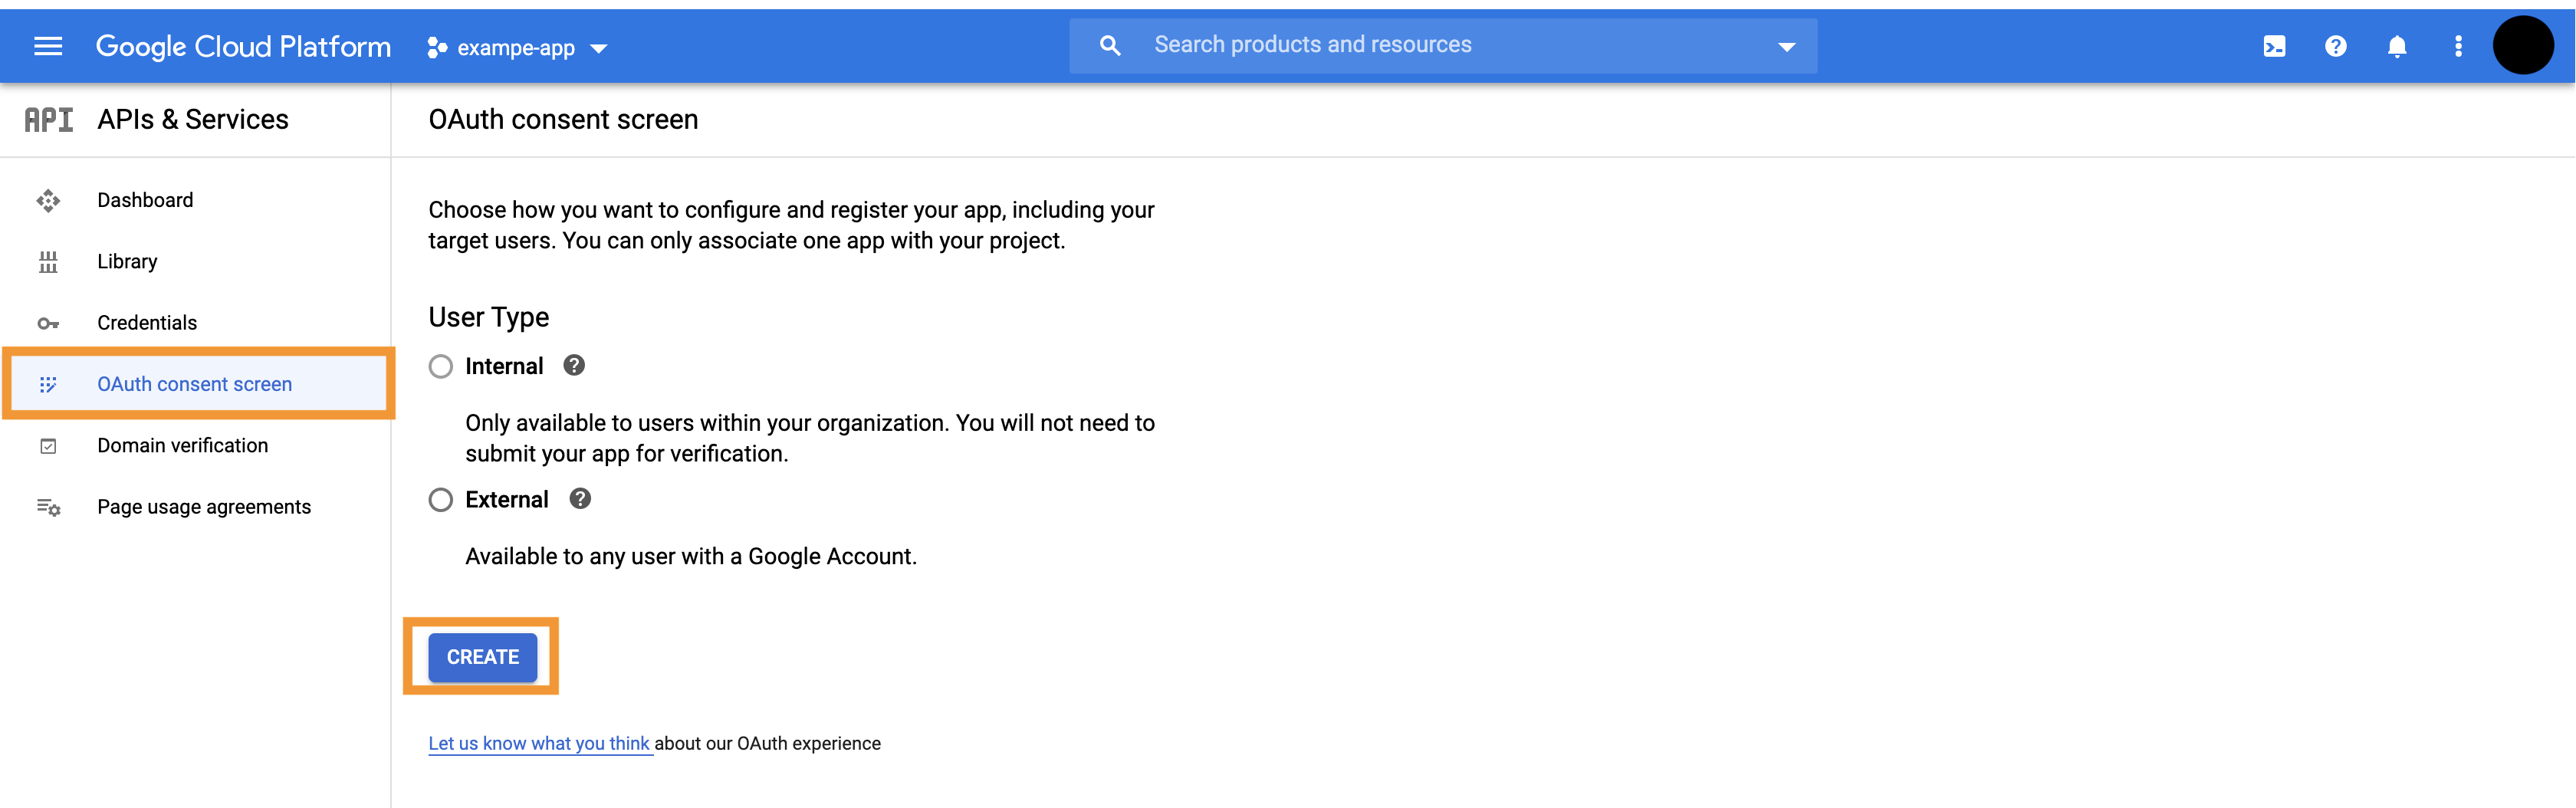
-
Create a new project, and navigate to the OAuth consent screen under APIs & Services. Configure and register your app based on your target users, and click Create.
-
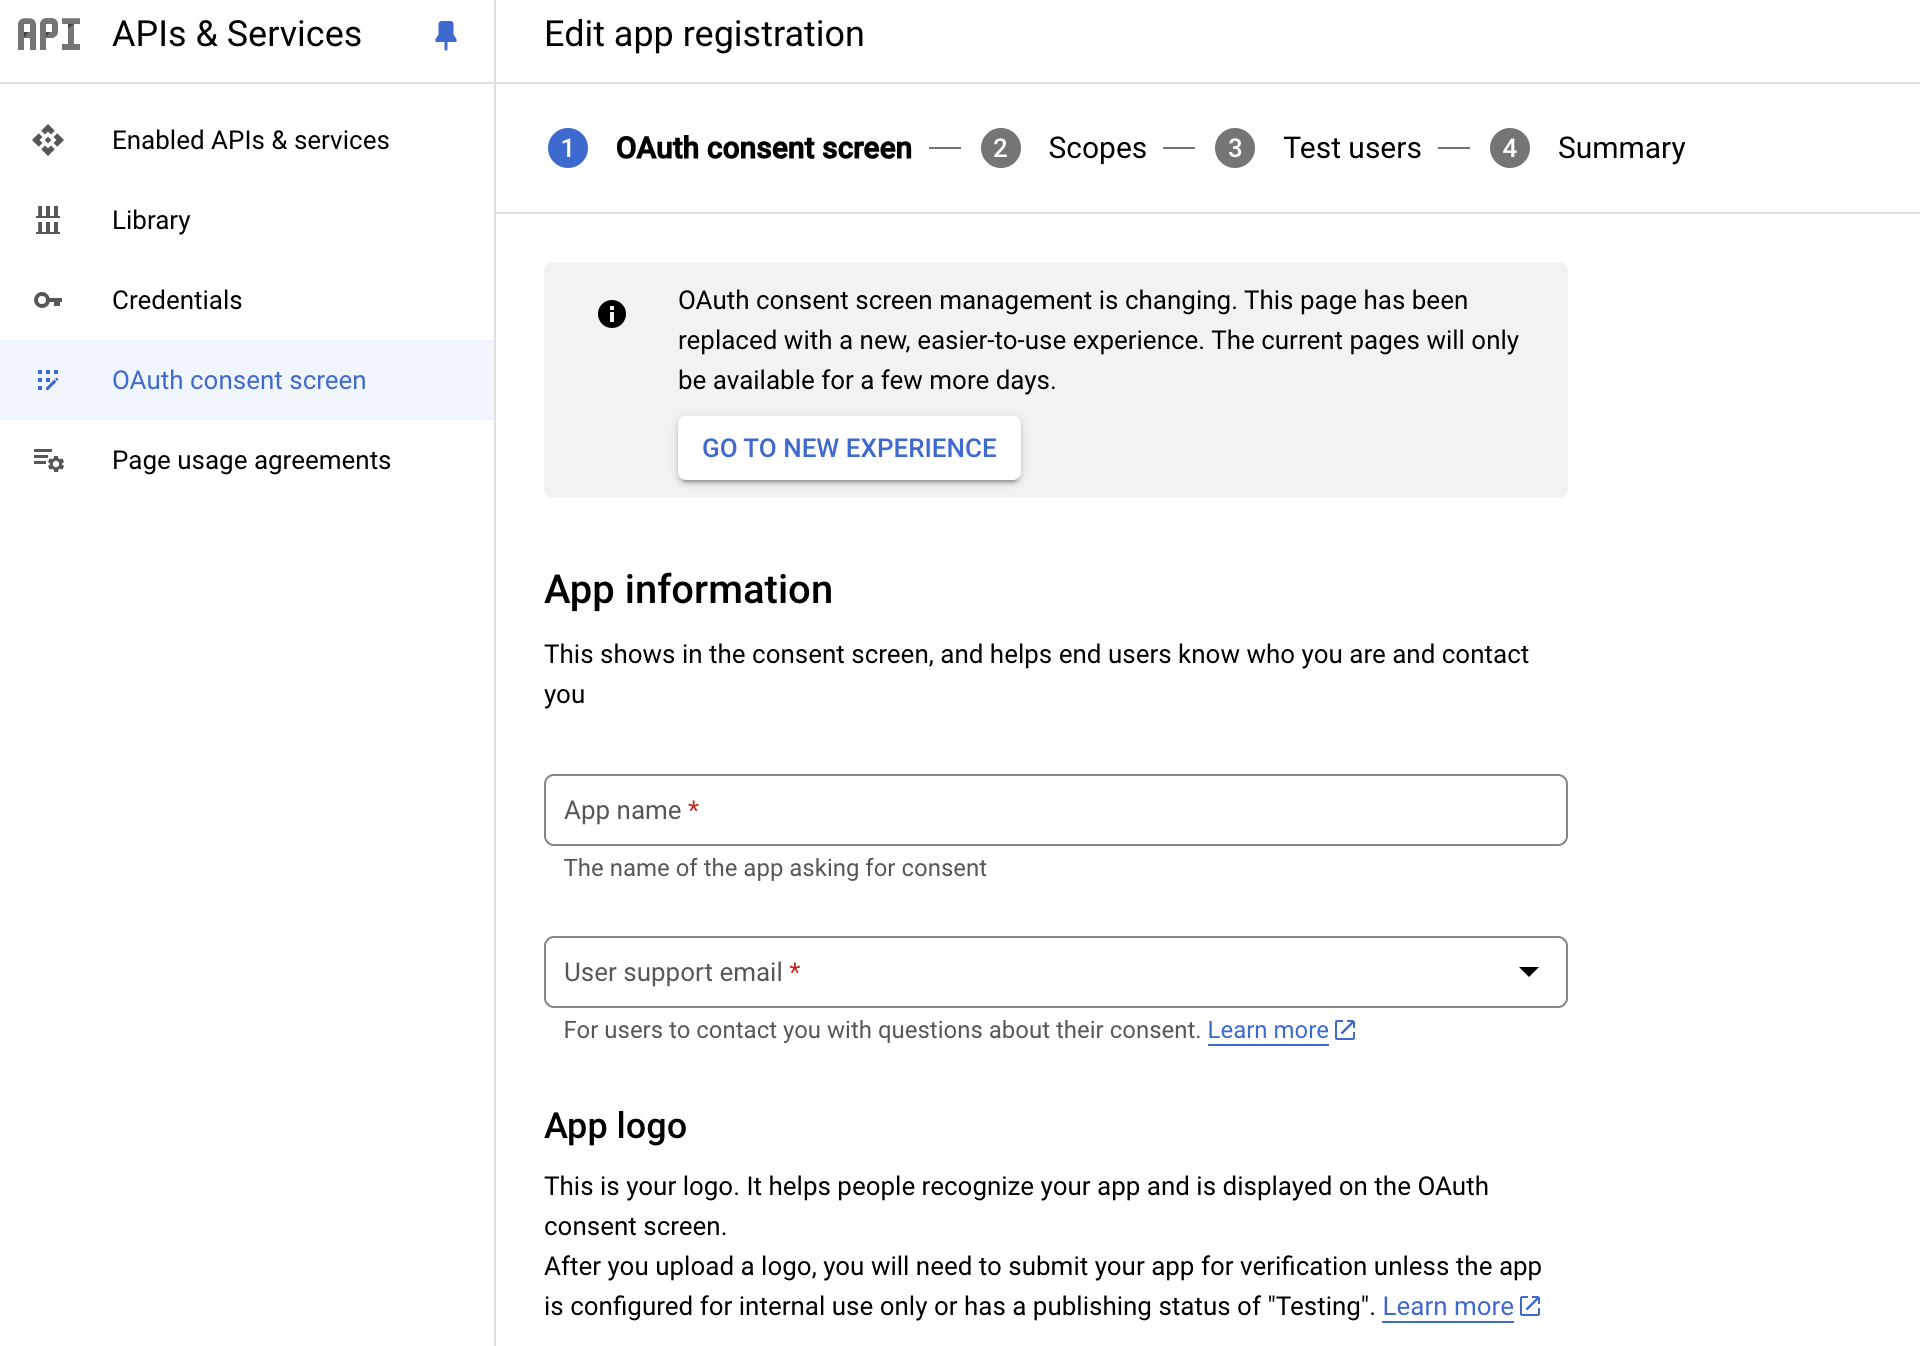
In the OAuth consent screen, enter the app information, contact email, and specify the Authorized domains where Appsmith is hosted. Click Save and Continue.
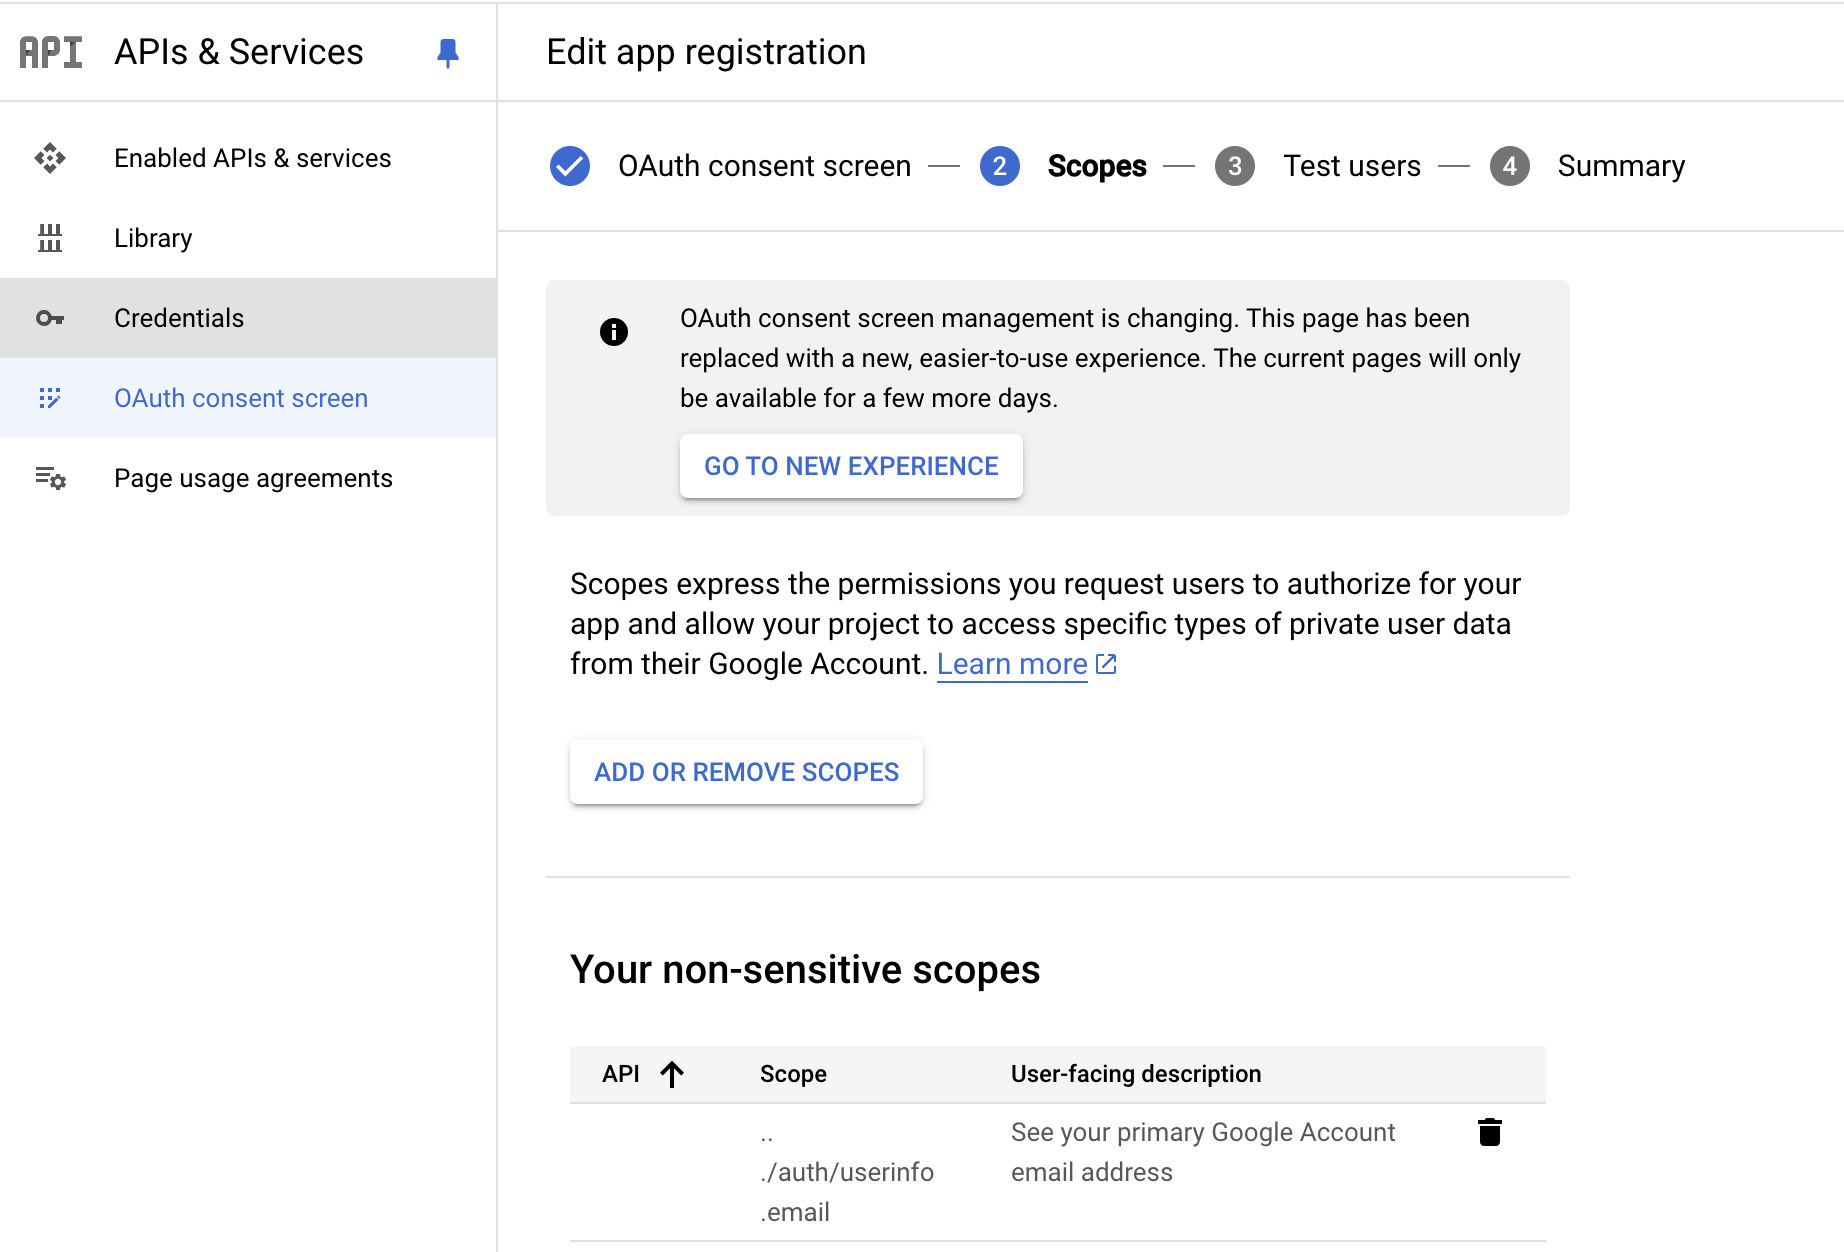
- In the Scopes section, add scopes such as
email,profile, andopenid, or others as needed. Click Save and Continue.
-
Add Test users if needed, then click Save.
-
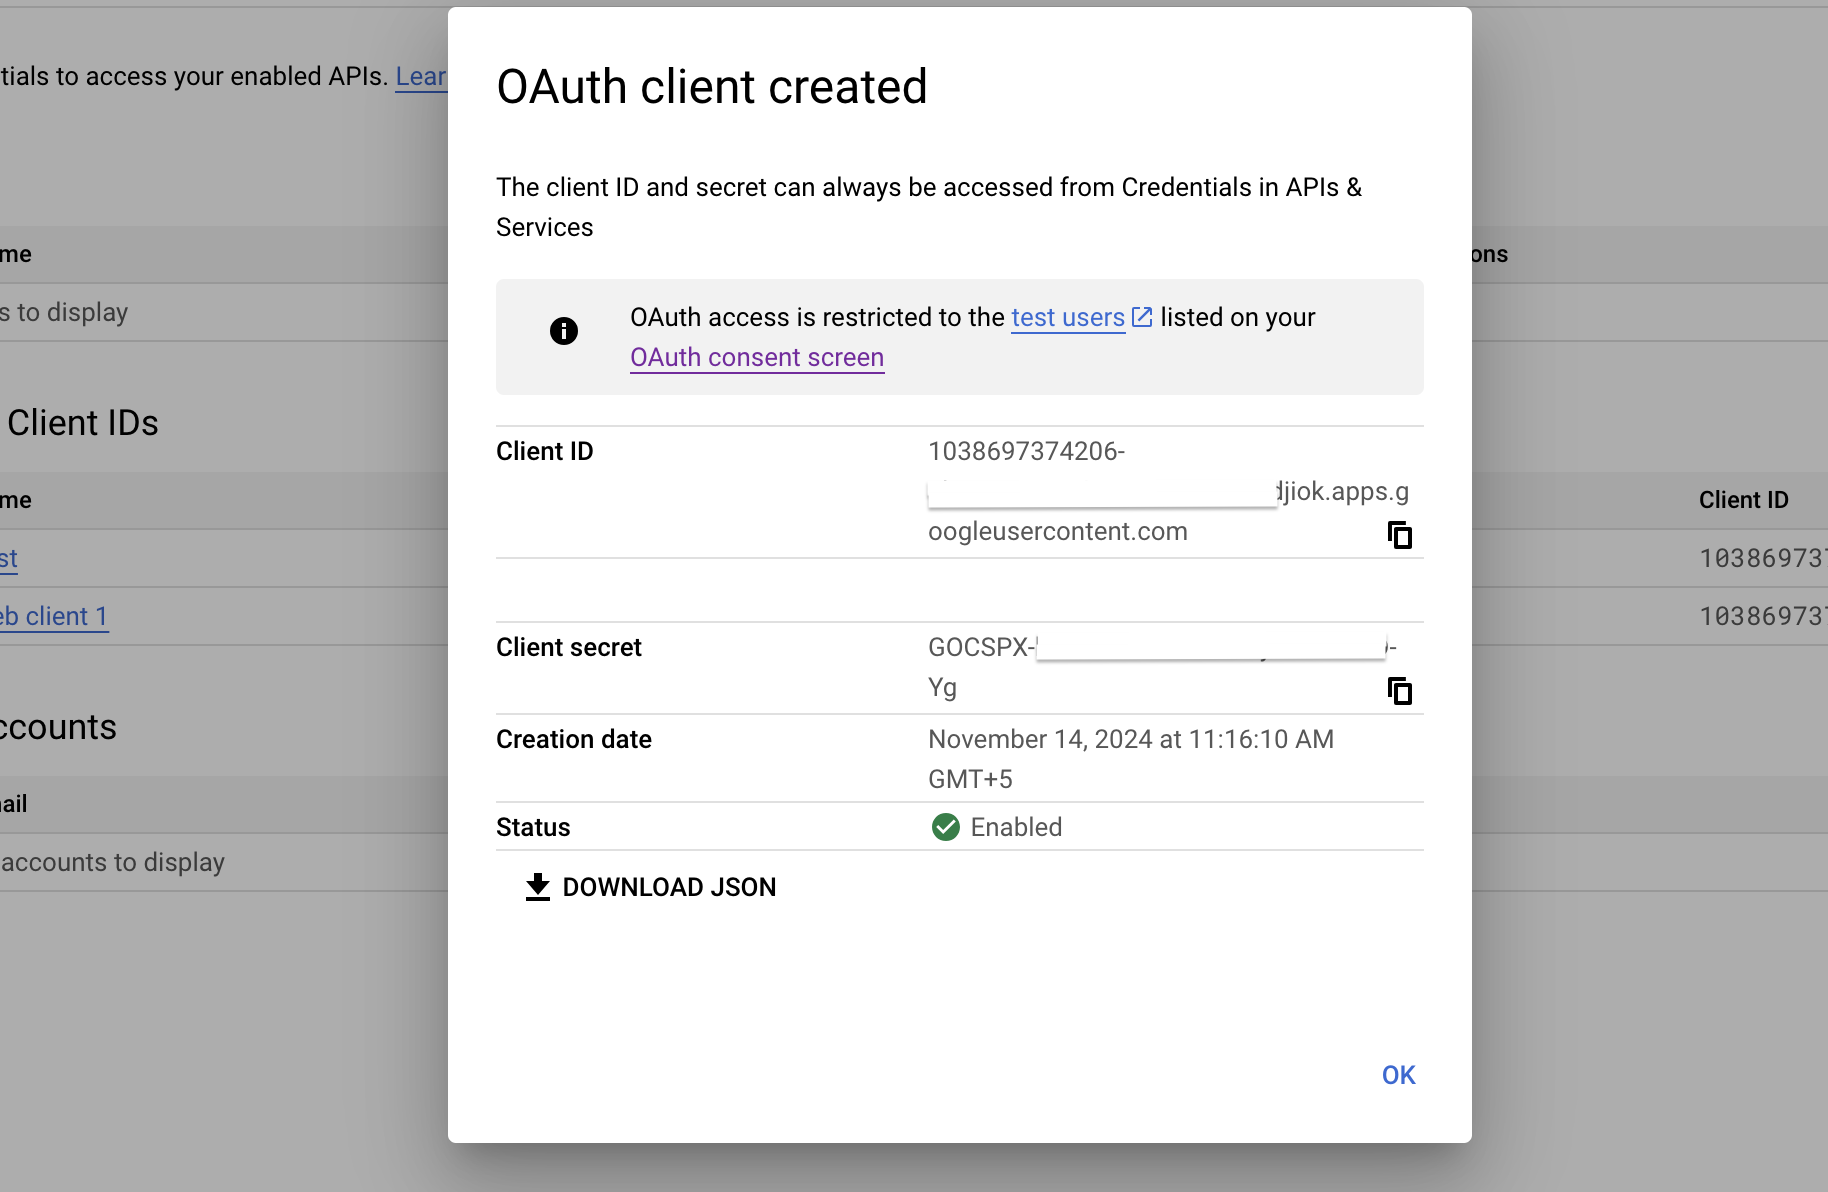
Navigate to the Credentials section, click Create Credentials, and select OAuth client ID.
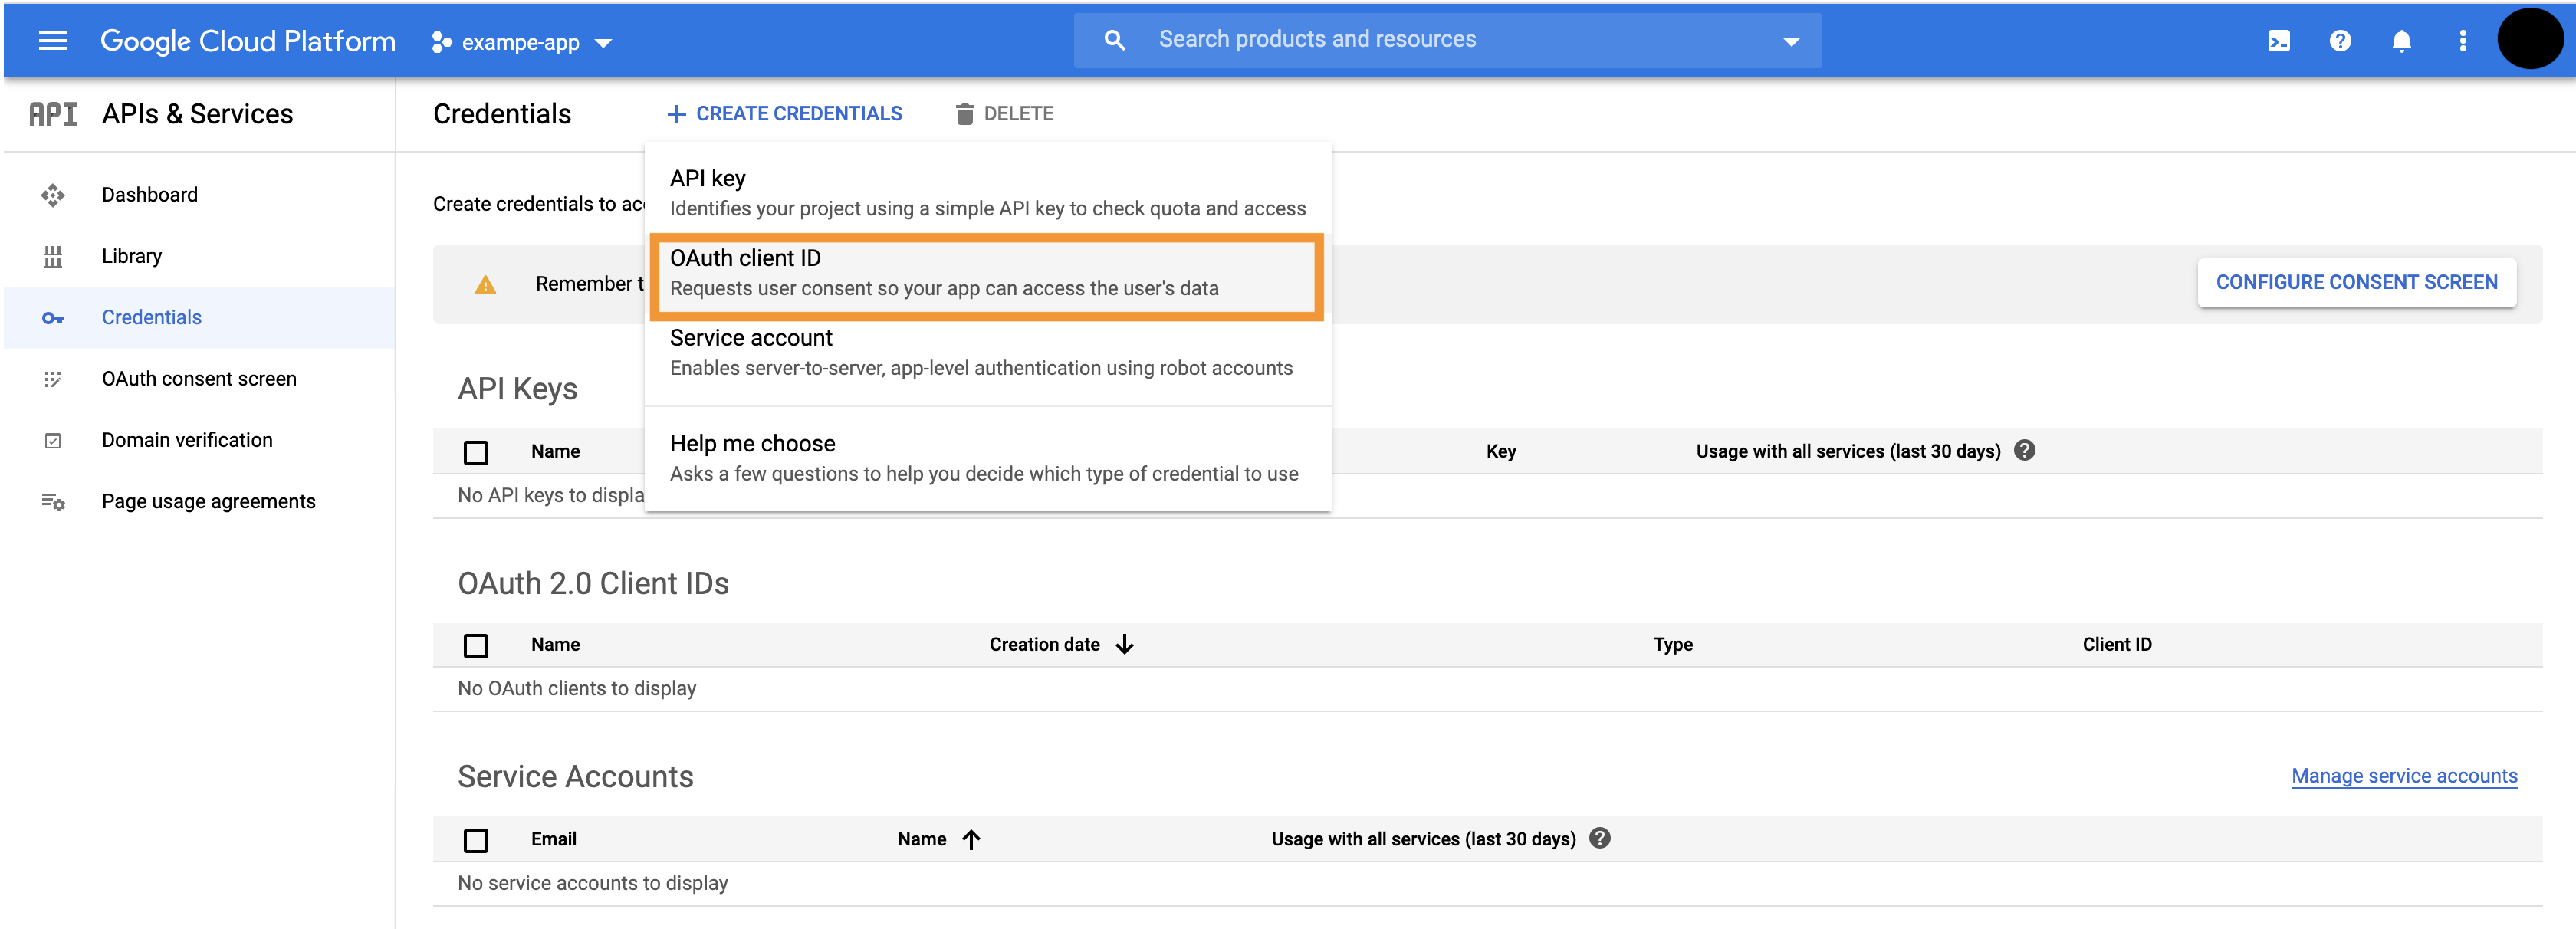
- Under Application type, select Web application. Copy the following URLs from Appsmith and paste them into the corresponding fields:
-
Authorized JavaScript origins: This is the URL where Appsmith is hosted. Copy the JavaScript origins URL from the Google configuration in Appsmith and paste it here.
-
Authorized redirect URIs: Copy the Redirect URL from the Google configuration in Appsmith (e.g.,
https://app.appsmith.com/login/oauth2/code/google) and paste it here.
- Click Create. After the OAuth client is created, copy the Client ID and Client Secret to use in Appsmith’s Google configuration.
Register Google OAuth in Appsmith
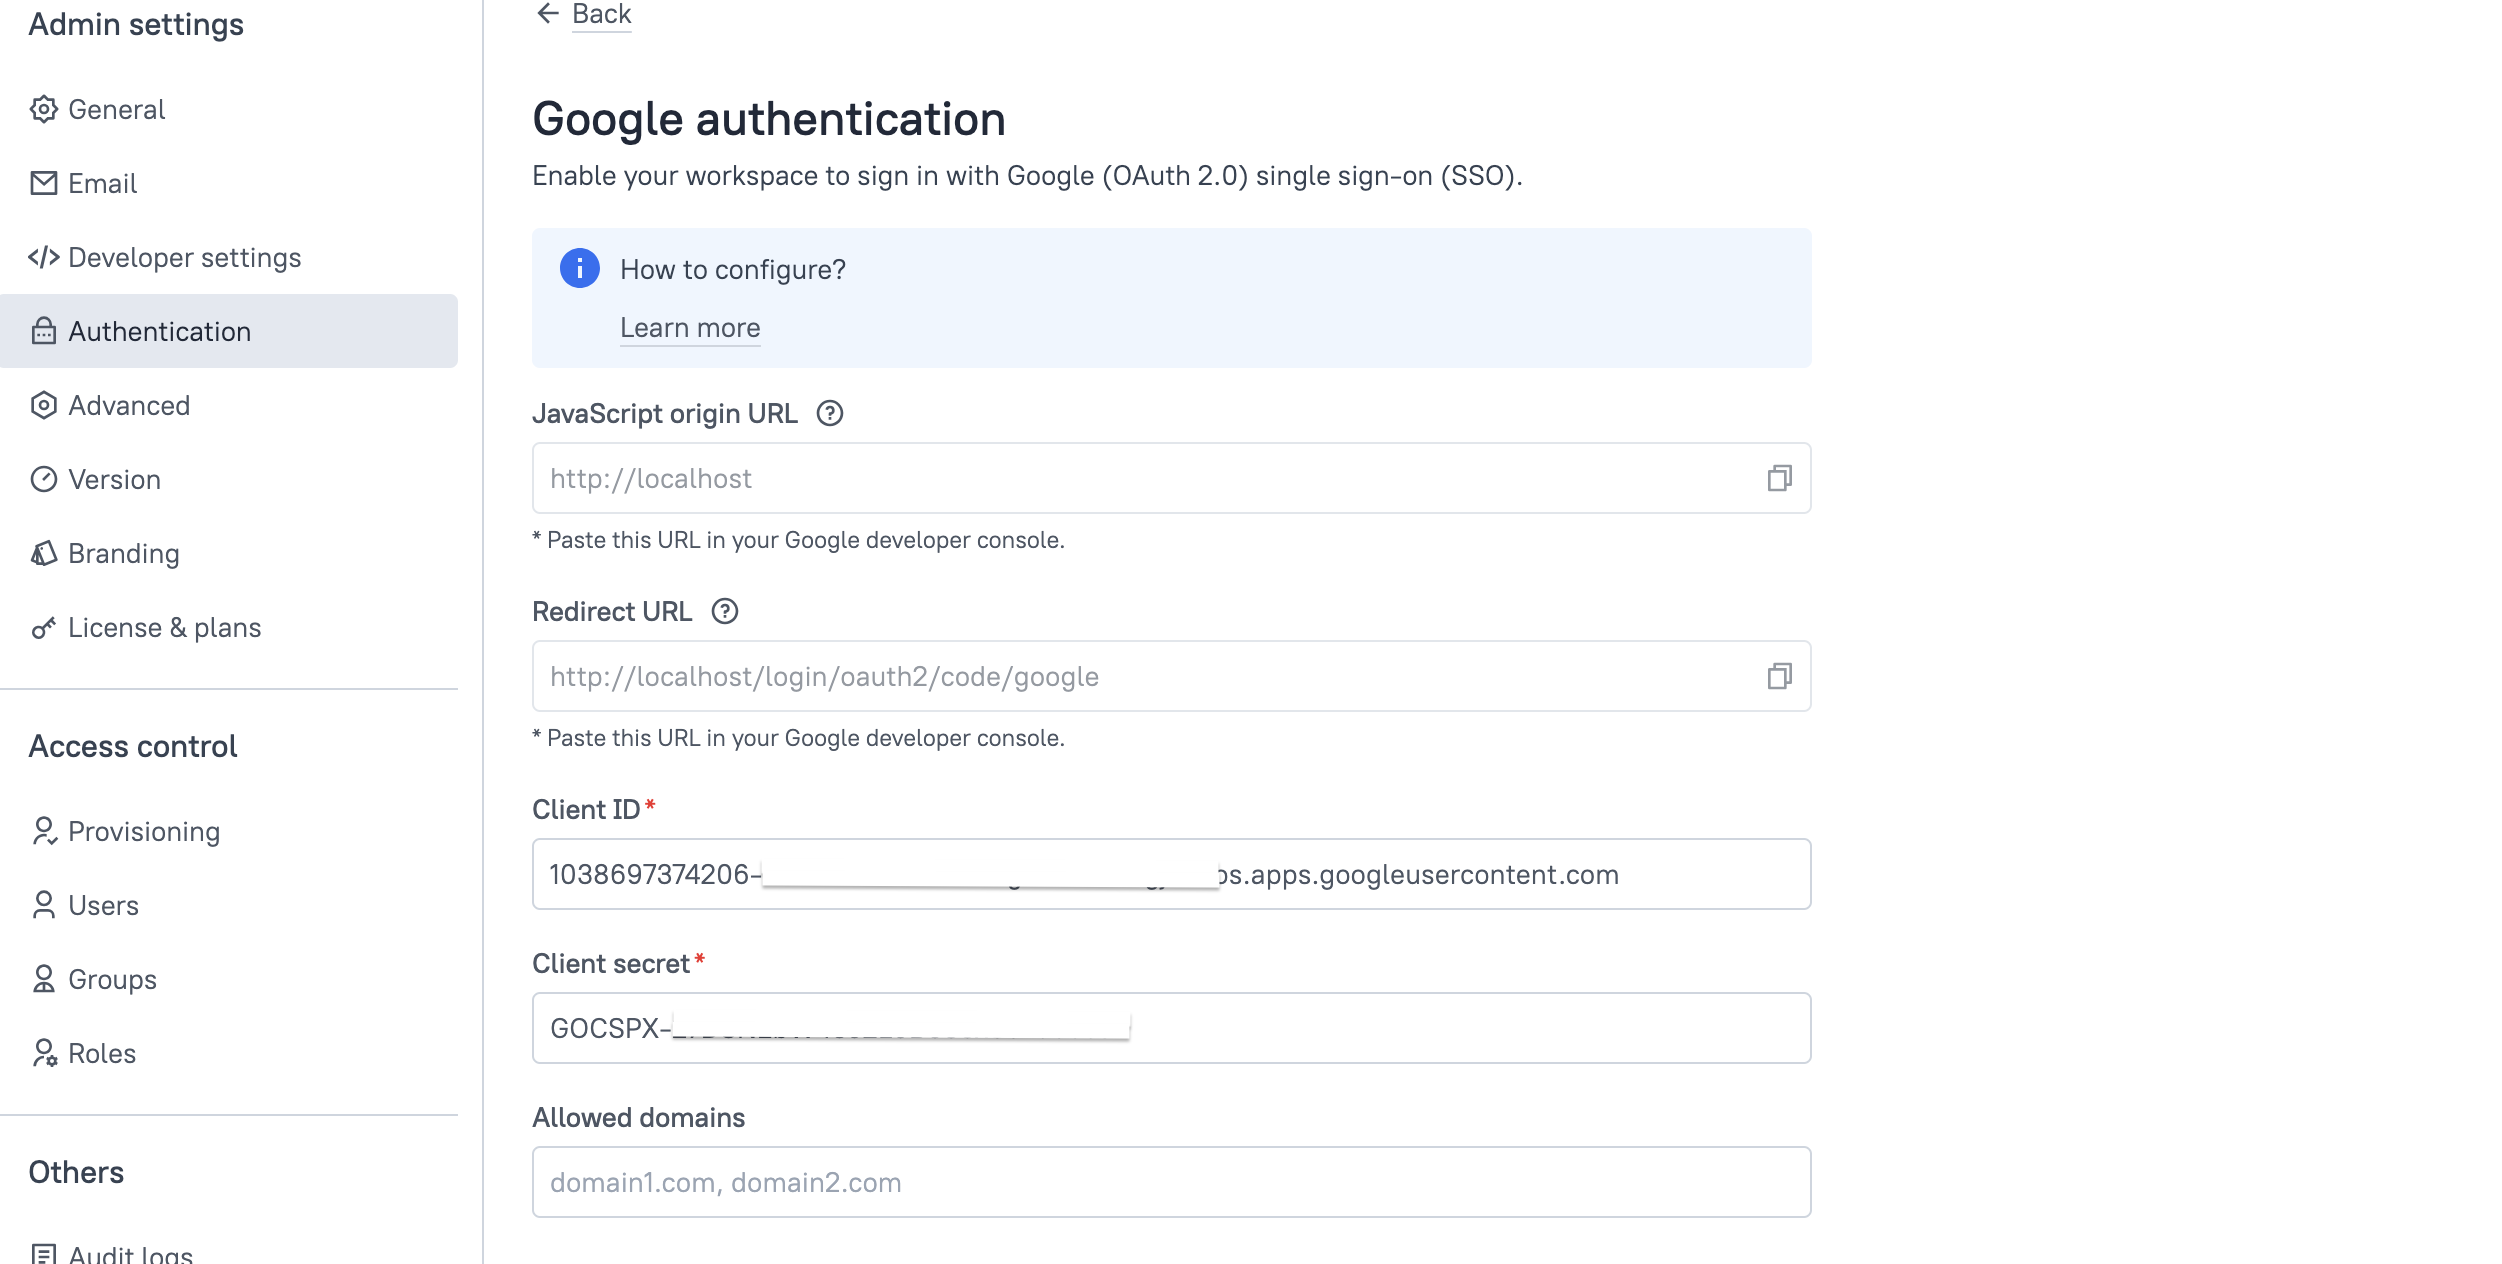
To complete the Google OAuth configuration, you have to register the provider on Appsmith. Go to Admin Settings > Authentication > Google, and follow the steps below:
-
Add the Client ID and Client Secret copied from the Google API console into the respective fields.
-
In the Allowed Domain field, add the domains where Appsmith accepts sign-ins via Google. This restricts access to specified domains, ensuring only users with emails from these domains can log in through Google.
-
Once you have added the details, click the Save & Restart button to save the configuration and restart the instance.
If you're running Appsmith on a Kubernetes cluster with an HA configuration, after completing the setup, run the following command to ensure the new authentication settings are properly applied:
kubectl rollout restart deployment/appsmith -n
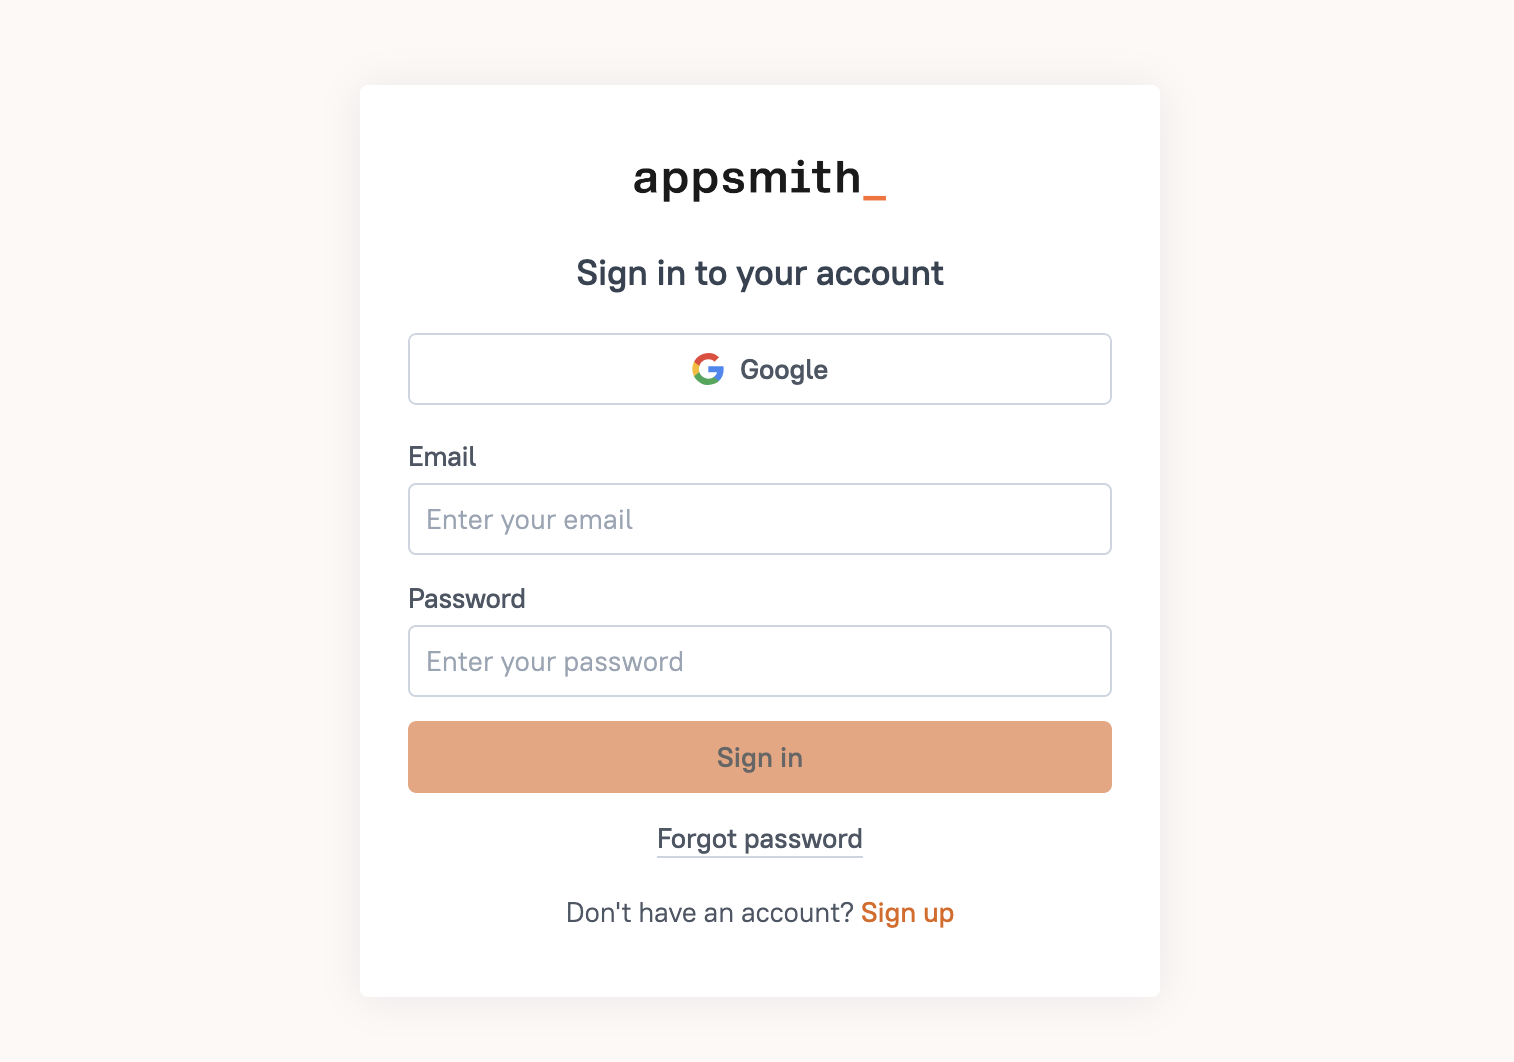
After the Appsmith instance restarts, try logging in again to your account. You'll see a login screen with the Google Login button.
See also
- Manage Installation: Learn how to manage your Appsmith instance.
- Upgrade Installation Guides: Learn how to upgrade your Appsmith installation.