Version Control With Git
Version control with Git in Appsmith provides a comprehensive solution for managing your application throughout the Software Development Life Cycle (SDLC). It allows you to effectively track changes, roll back to previous states, and collaborate with your team.
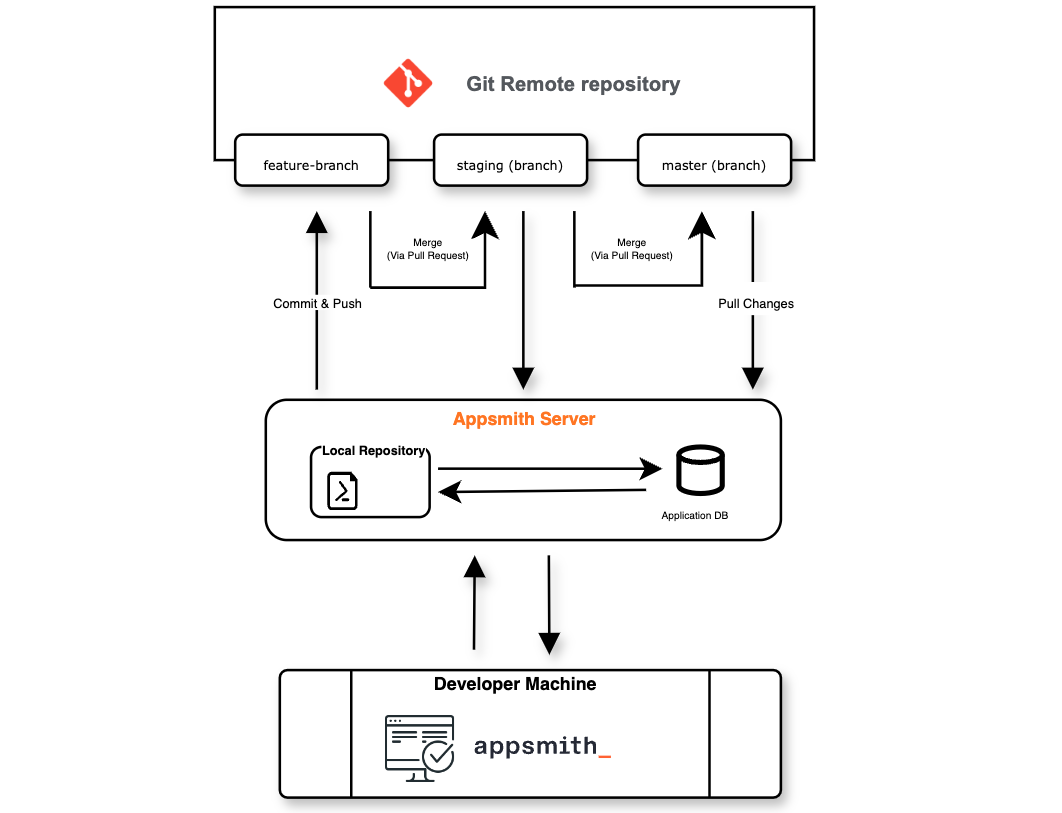
Core components
-
Version Control Integration: You can connect with any Git hosting provider of your choice, such as GitHub, GitLab, Azure, Bitbucket, and more.
-
Branch Protection: You can protect multiple branches to prevent unnecessary commits and maintain the integrity of your codebase. For more information, see Branch protection.
-
Default Branch: You can change your default branch to set different branches for various environments, such as development, staging, and production. This flexibility helps manage and isolate changes at different stages of the software development lifecycle (SDLC). For more information, see Default branch.
-
CI/CD Integration: Supports Continuous Integration and Continuous Delivery workflows, enabling automatic updates to any branch and integration with various CI/CD tools and platforms. For more information, see Continuous Delivery (CI/CD) with Git.
-
Multiple Instances: You can create separate isolated environments with different versions and configurations for each stage of the software development lifecycle (SDLC). For more information, see Multiple Environments Using Git.
Getting started
Version control in Appsmith is similar to the traditional Git workflow. For more information, you can explore the following: