Configure Multiple Environments Using Git
This guide shows you how to set up multiple instances in Appsmith using Git, making application development easier. With Multi-instance:
- You can work in an isolated environment, ensuring that any changes made in one instance do not affect the other instance.
- Configure each instance with different datasource settings to streamline development according to varied needs.
- You can collaborate within instances, allowing different teams to access specific instances; for example, QA teams can use the staging instance for their tasks.
Prerequisites
- Two separate self-hosted instances in different environments: one for Staging and the other for Production. Refer to the Appsmith installation guides for detailed instructions on setting up your Appsmith instance.
- Basic knowledge of Git.
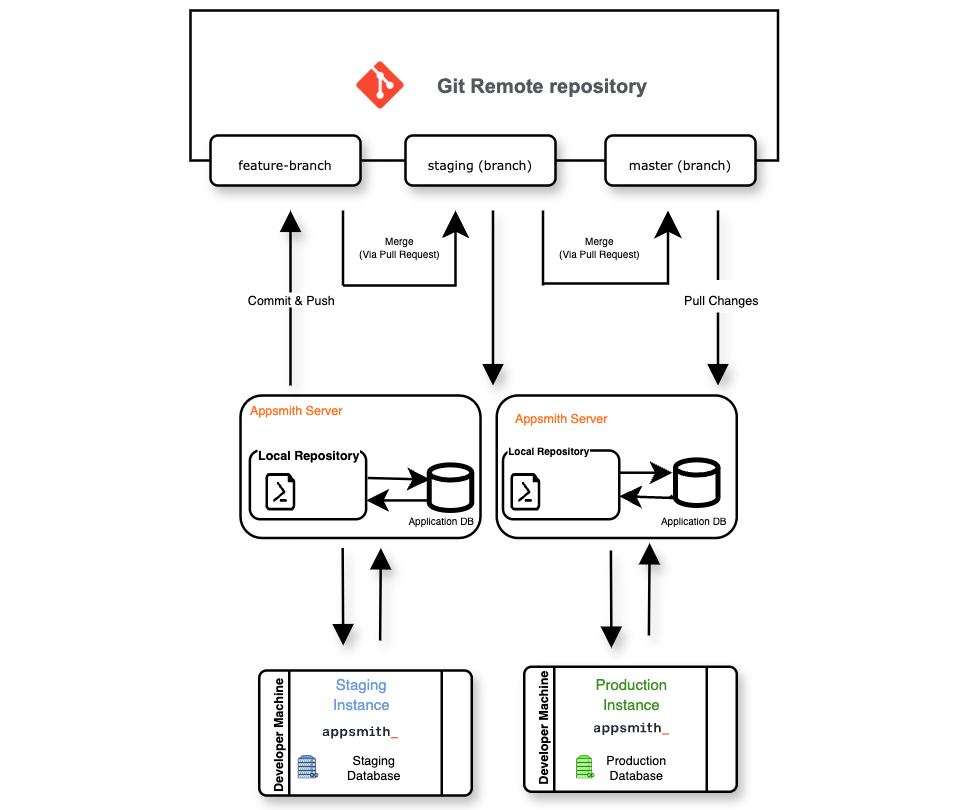
Setup instances
Follow these steps to set up multiple instances for your app:
-
Create an app within the Staging instance or connect an existing app to a Git repository. Once connected, create and check out a
stagingbranch from the defaultmasterbranch. -
In the Staging instance, configure the datasource using the
stagingdatabase configuration, then Commit and push the changes. -
In the Staging instance, open Git settings and:
- Protect the
stagingandmasterbranches. - Set the
stagingbranch as the default.
For more information see Default Branch and Branch Protection.
-
In the Production instance, click on the Create New button, select Import from Git and import the same app used in the Staging instance.
-
Once the import is complete, configure the datasource by using the
productiondatabase configuration in the Reconnect Datasources modal. -
In the Production instance:
- Protect the
masterbranch. - Set the
masterbranch as the default.
- After setting up both instances, share the app by inviting users and developers. You can assign different roles to each developer or create custom roles based on your needs.
For more information, see Roles.
- To manage your instances, follow this branching strategy.