Microsoft Entra ID(Azure AD)
To configure Appsmith to use Microsoft Entra ID (Azure AD) as an OIDC provider, follow the steps below:
Prerequisites
- A self-hosted Appsmith instance. See the installation guides for installing Appsmith.
- Before setting up Single Sign-On (SSO), ensure that you have already configured a custom domain for your instance.
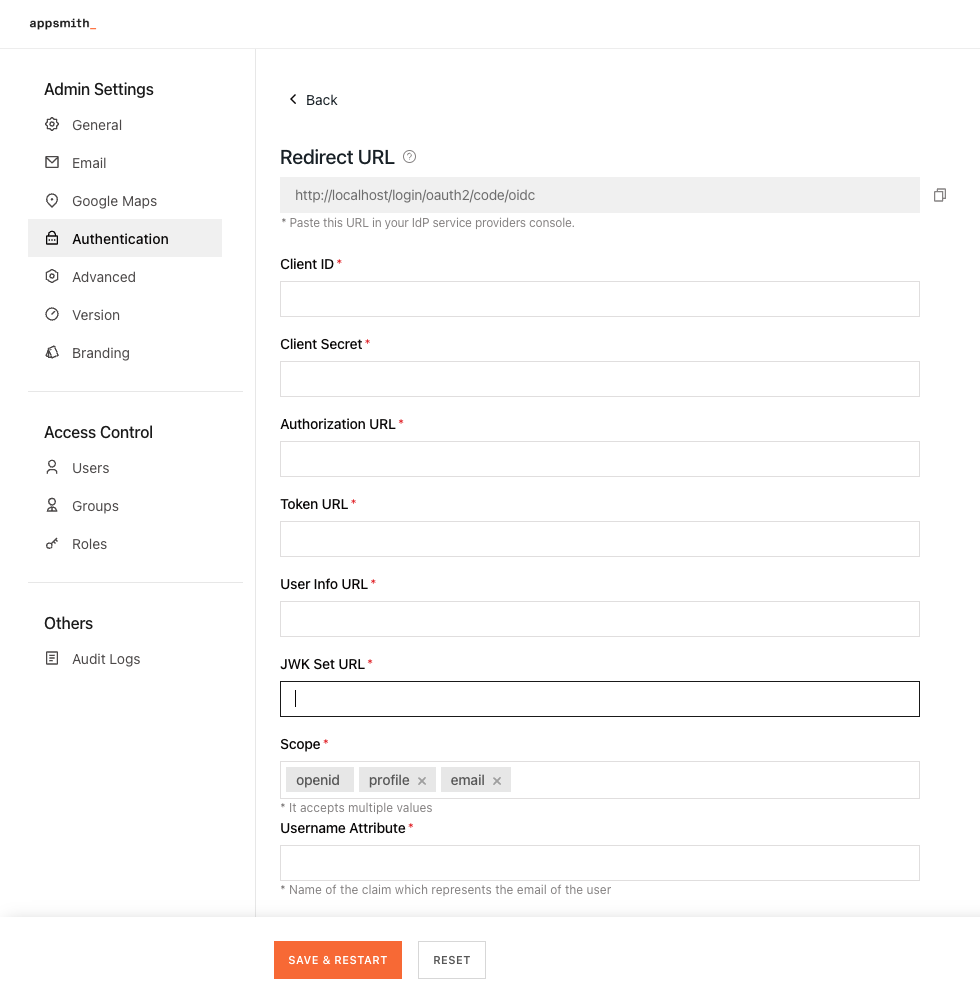
- In Appsmith, go to Admin Settings > Authentication and click Enable on OIDC.
- Copy the Redirect URL from the OIDC configuration page to add it when creating the application in Entra ID.
Create application on Entra ID
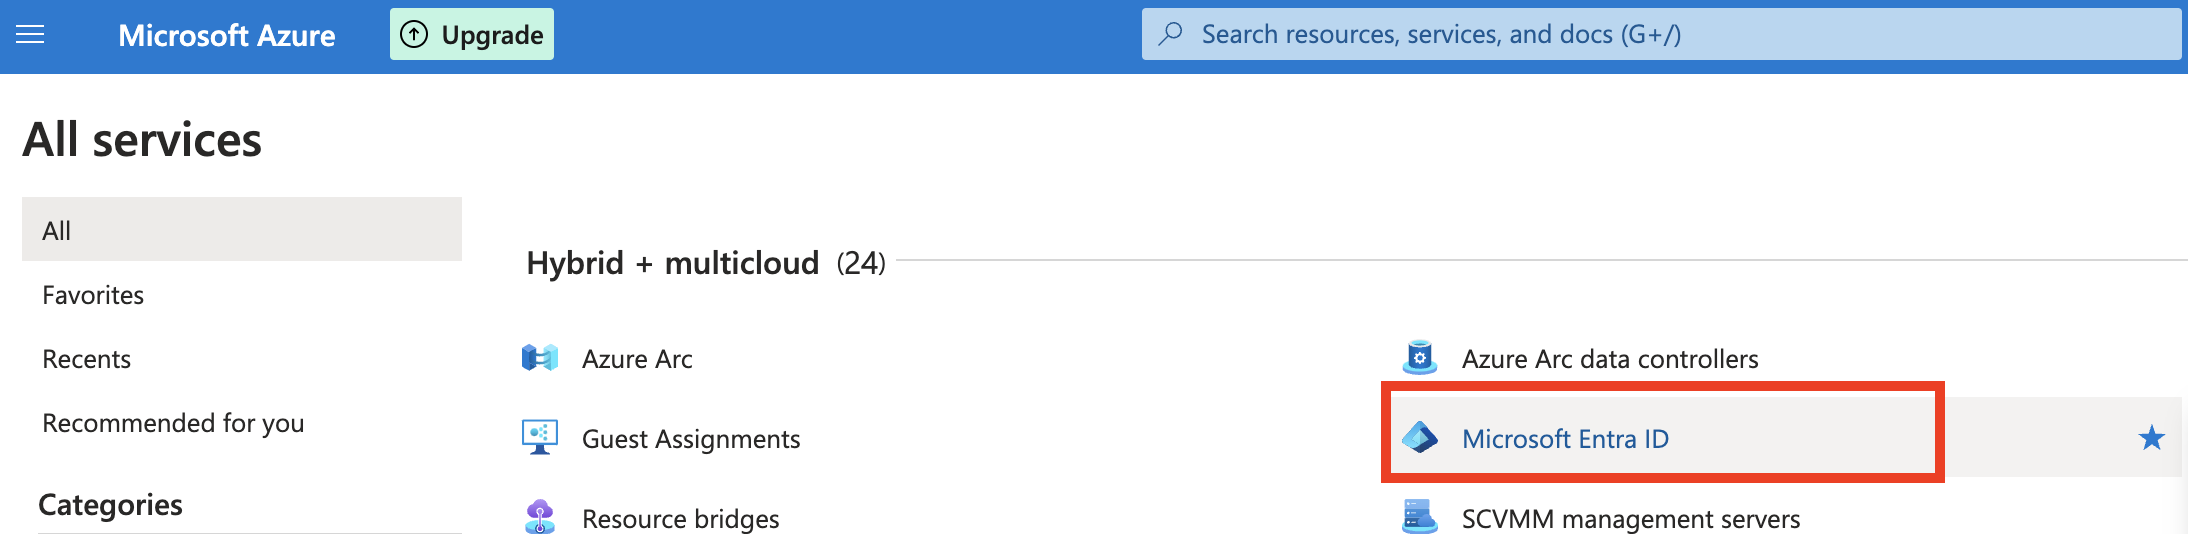
- Log in to your Azure account and under Azure Services, click Microsoft Entra ID.
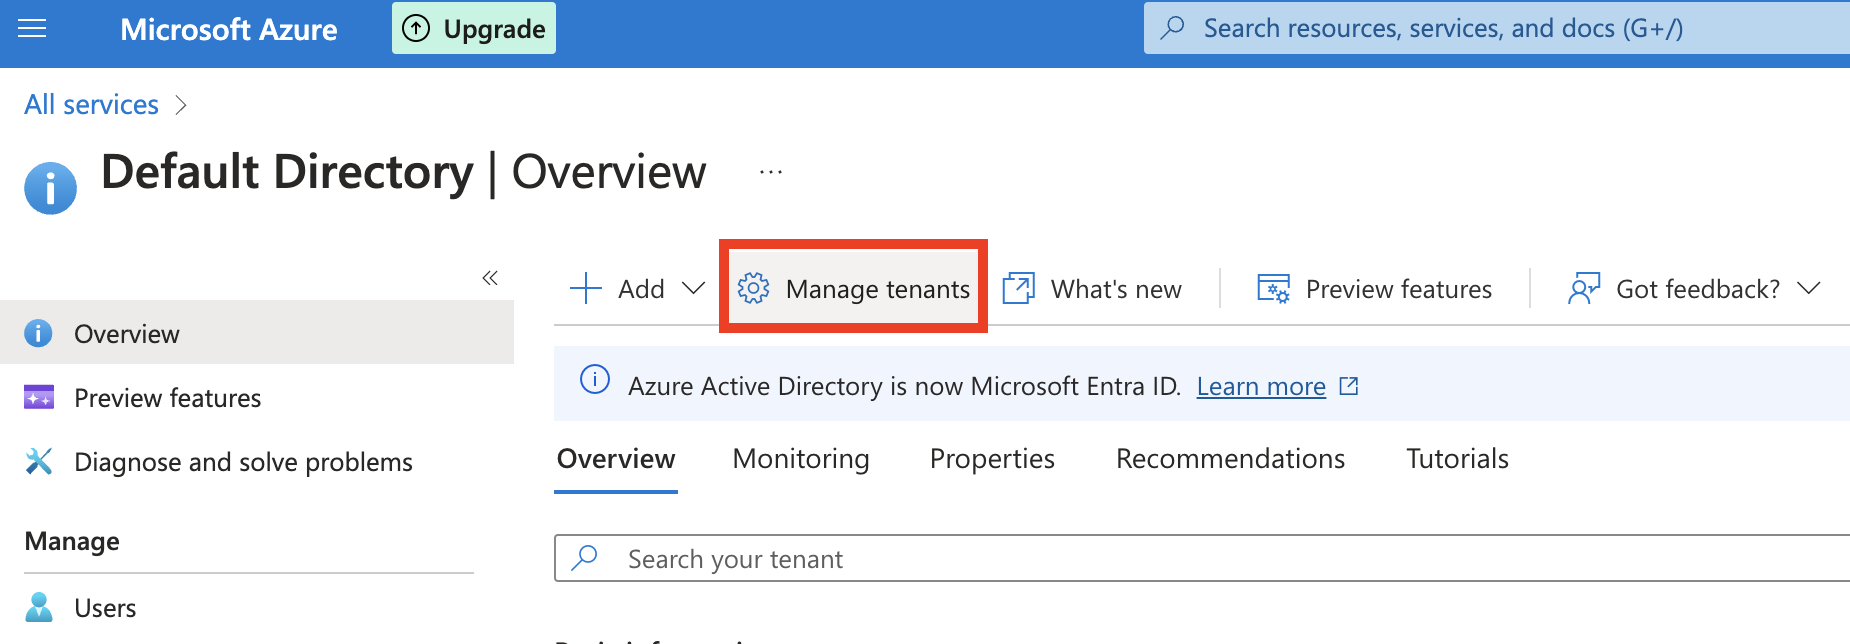
- Go to Manage Tenants from the navigation bar, select your directory and click Switch.
-
On your directory's homepage, click + Add > App Registration from the navigation bar.
-
On the Register an application page:
a. Add a name for your app.
b. Select Accounts in this organizational directory only (user-education only - Single tenant) from the options in Supported account types.
c. In Redirect URI, select the platform as Web, and add the Redirect URL copied from Appsmith's OIDC configurations in the adjacent input field.
d. Click Register.
-
On the application homepage, copy the Application (client) ID to add it later in the OIDC configurations in Appsmith.
-
To get the Client secret:
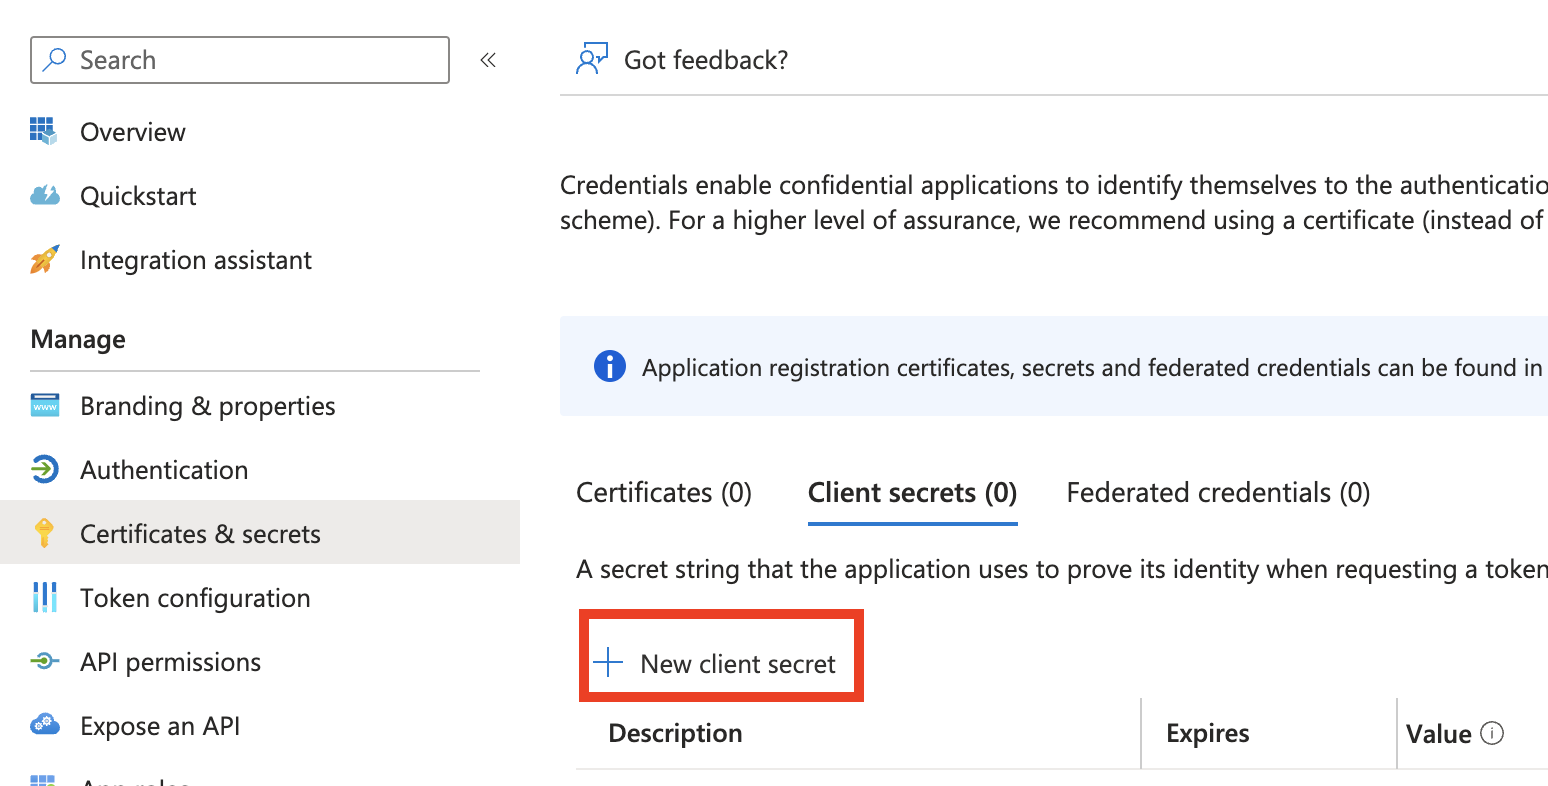
a. On the application homepage, click Add a certificate or secret from the Client credentials label.
b. On the Certificates & secrets page, go to the client secrets tab and click New client secret.
c. On Add a client secret panel, add the description and define the expiration of the key. Click Add.
d. Copy the Value of the Client secret to add it later in the OIDC configurations in Appsmith.
-
Go back to the application homepage, and click the Endpoints tab from the navigation bar.
-
In the Endpoints panel, copy and open the OpenID Connect metadata document URL in a new browser tab, and copy the following URLs from that page:
-
authorization_endpoint
-
token_endpoint
-
userinfo_endpoint
-
jwks_uri
Configure scopes on Entra ID
-
To configure scopes on Entra ID, go to API permissions from the sidebar and click Add Permission.
-
On the Request API permissions panel, select Microsoft Graph > Delegated permissions.
-
In the Select permissions section, select the following permissions from the Openid permissions dropdown:
- openid
- offline_access
- profile
-
Scroll down to the Users dropdown and select Users.Read. Click Add permissions.
-
Go back to the API permissions page and click Grant admin consent for this directory.
Register Entra ID in Appsmith
To complete the OIDC configuration, you have to register the identity provider on Appsmith. Go to Admin Settings > Authentication > OIDC, and follow the steps below:
-
Add the Application (client) ID copied from the Entra ID application in the Client ID field.
-
Add the Value of the Client secret copied from the Entra ID application in the Client Secret field.
-
Add the URLs copied from the OpenID Connect metadata document page into OIDC configurations in Appsmith as per the table below:
| OIDC configuration field | Microsoft Entra ID URL |
|---|---|
| Authorization URL | authorization_endpoint |
| Token URL | token_endpoint |
| User Info URL | userinfo_endpoint |
| JWK Set URL | jwks_uri |
- In the Scopes section, add the attributes that allow you to authorize access to user details after a user is successfully authenticated. By default, there are three scopes -
openid,email,profile.
Appsmith needs openid and email as mandatory scopes. It’s also highly recommended you use the offline_access scope to avoid errors related to expired access tokens and excessive re-login requests.
Enabling the offline_access scope allows your app to receive refresh tokens that extend the duration that your users have access to their resources. For more information, see Entra ID documentation.
-
In the Username Attribute box, specify the name of the claim as
subthat uniquely identifies the user. -
Once you have added the details, click the SAVE & RESTART button to save the configuration and restart the instance.
If you're running Appsmith on a Kubernetes cluster with an HA configuration, after completing the setup, run the following command to ensure the new authentication settings are properly applied:
kubectl rollout restart deployment/appsmith -n
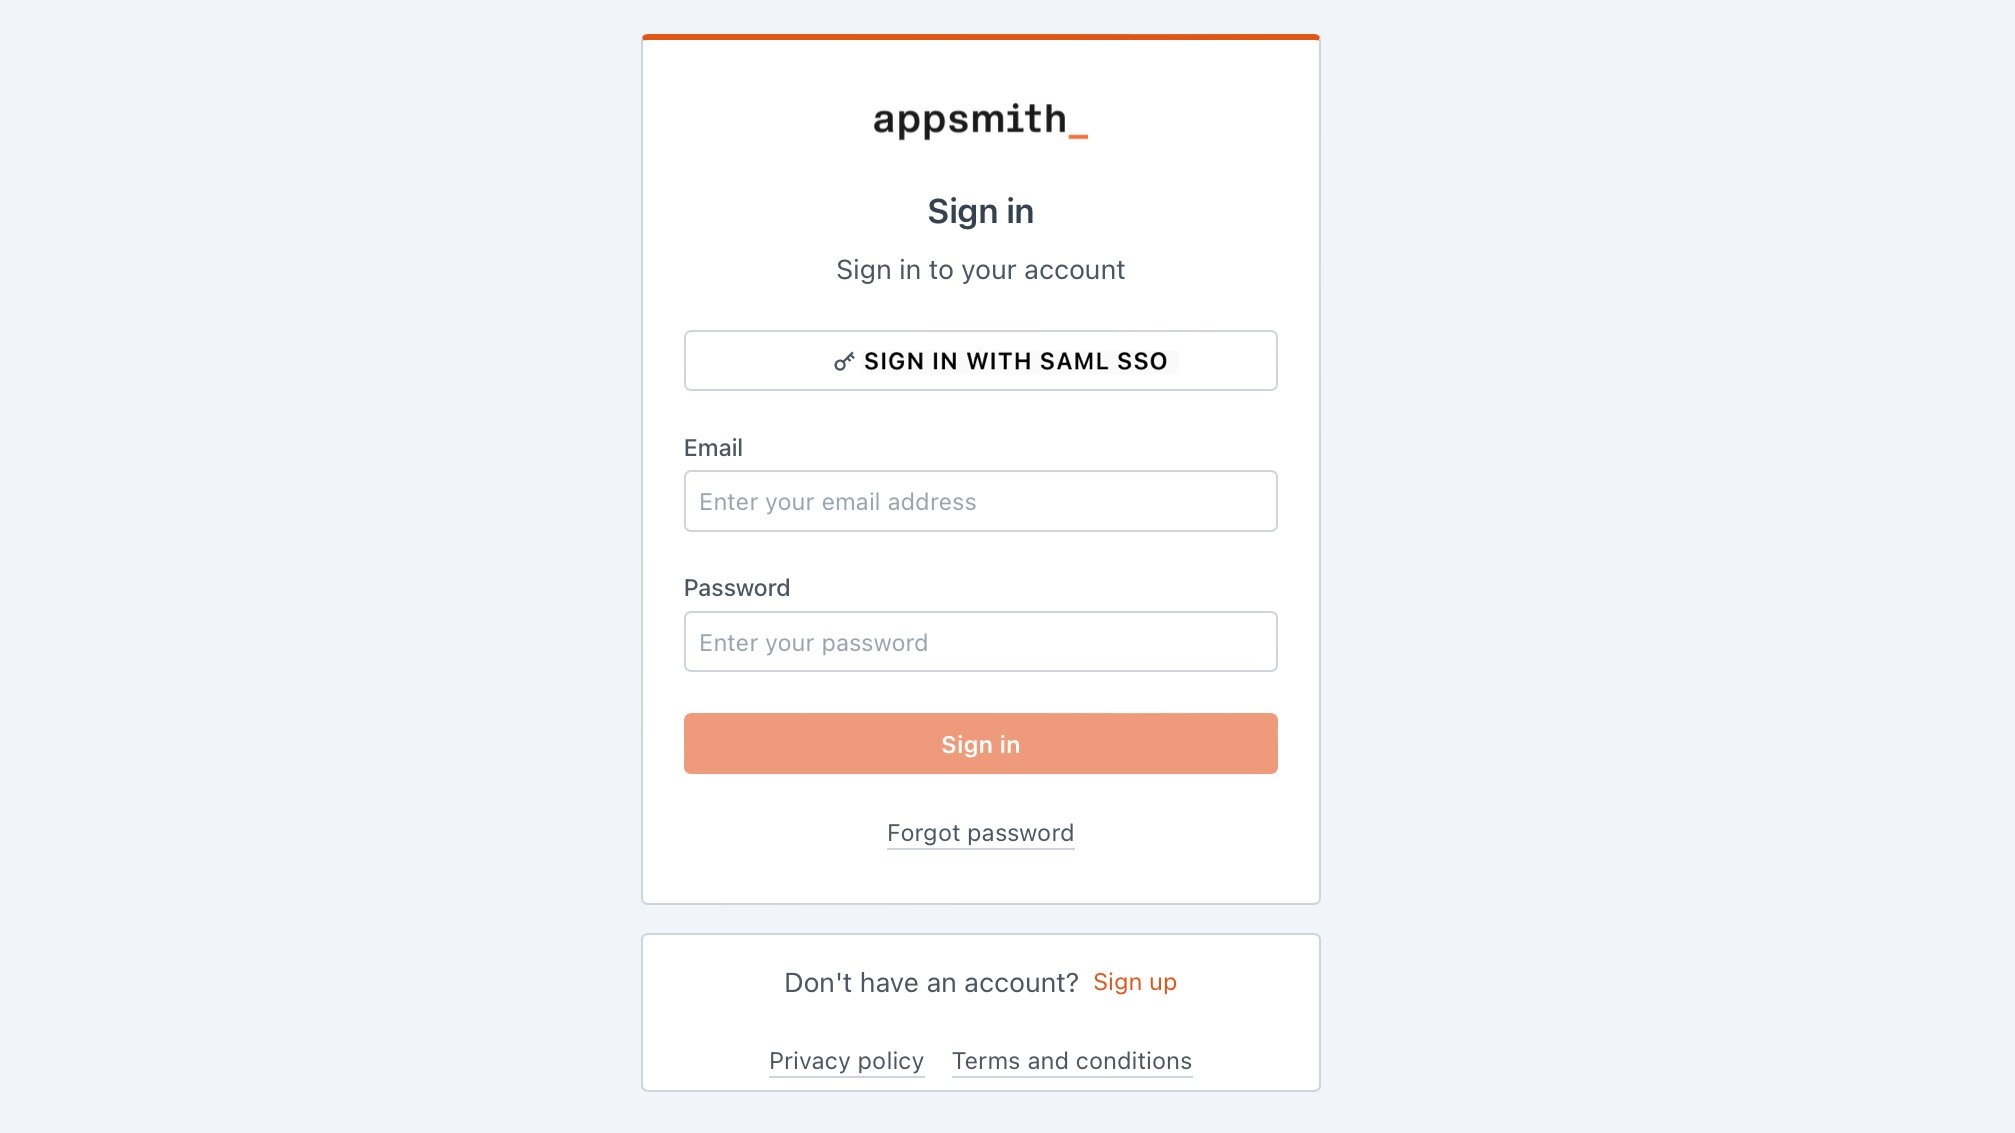
After the Appsmith instance restarts, try logging in again to your account. You'll see a login screen with the SIGN IN WITH OIDC SSO button.