Ping Identity
To configure Appsmith to use Ping Identity as an OIDC provider, follow the steps below:
Prerequisites
-
A self-hosted Appsmith instance. See the installation guides for installing Appsmith.
-
Before setting up Single Sign-On (SSO), ensure that you have already configured a custom domain for your instance.
-
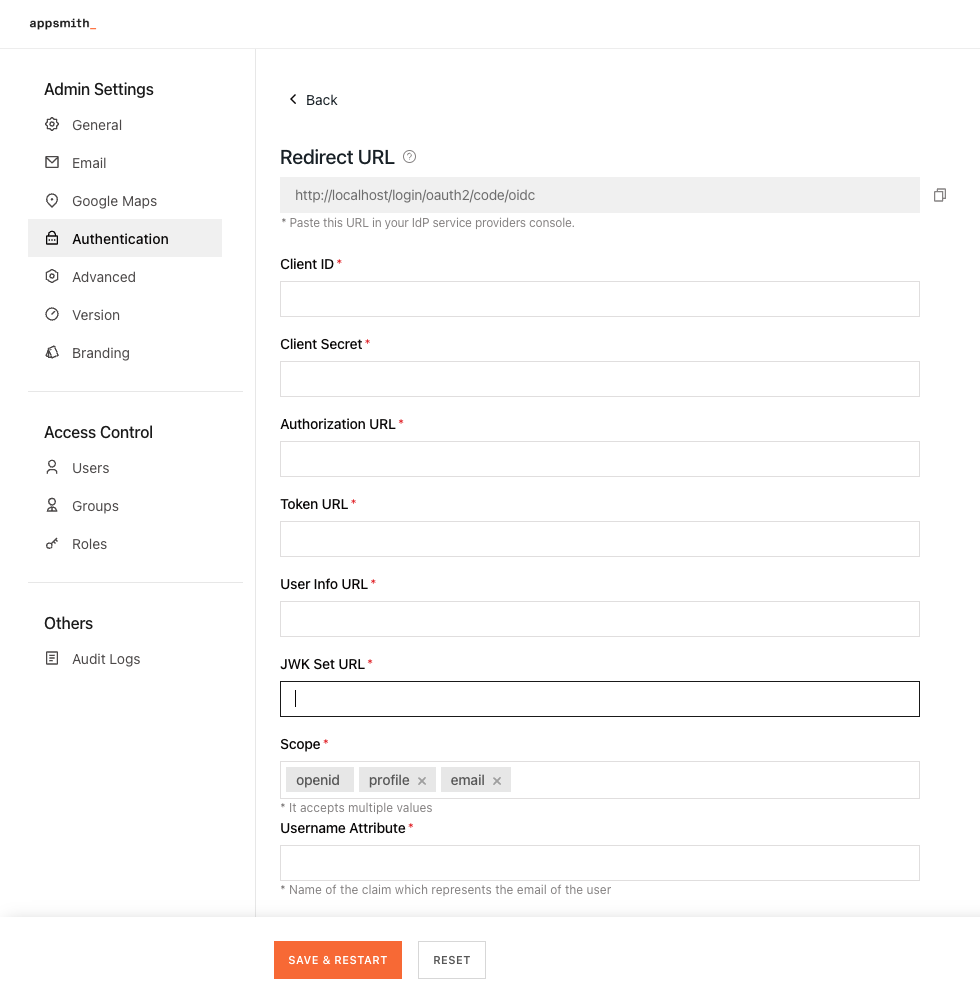
In Appsmith, go to Admin Settings > Authentication and click Enable on OIDC.
-
Copy the Redirect URL from the OIDC configuration page to add it when creating the application in Ping Identity.
Create application in Ping Identity
-
Log into your PingOne account. On the homepage, click Add Environment from the top right corner.
-
On the Create Environment screen, select Build your own solution.
a. Click PingOne SSO from Cloud Services under the Select solution(s) for your Environment section.
b. Click Next.
c. Enter the Environment name, description, Environment type, region, and license. Then click Finish.
-
Open the newly created environment and click Manage Environment.
-
From the sidebar, go to Connections > Applications.
-
On the Applications homepage, click the + icon to create a new application. On the Add Application panel:
a. Enter the application name and description.
b. Select the Application Type as OIDC Web App. Click Configure.
- Open your application, and go to the Configurations tab:
a. Click the edit ✏️ icon, and check the Refresh Token option. This allows Ping Identity to issue refresh tokens to Appsmith for refreshing access tokens when they expire.
b. Add the Redirect URL from the OIDC configurations in Appsmith into the Redirect URI field.
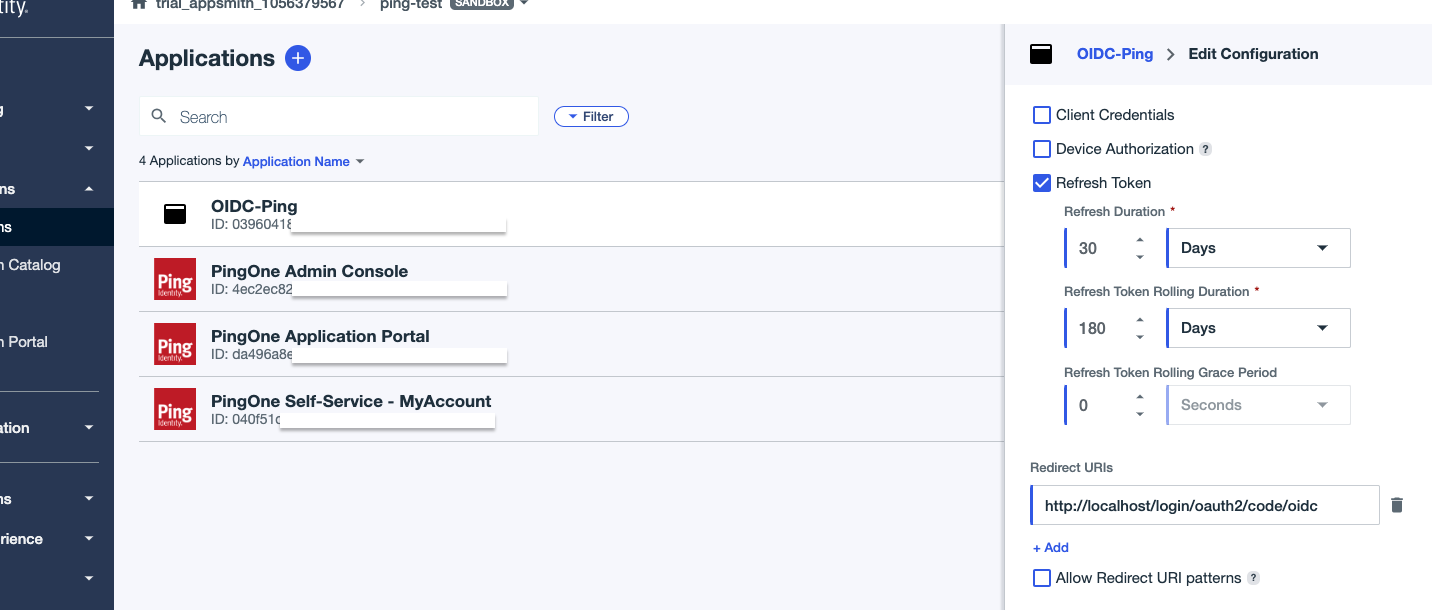
c. Copy the following URLs from the URLs dropdown to add them later in the OIDC configurations in Appsmith:
- Authorization URL
- Token Endpoint
- UserInfo Endpoint
- JWKS Endpoint
c. Scroll down to the General dropdown, and copy the Client ID and Client Secret to add them later in the OIDC configurations in Appsmith.
-
To configure the required scopes, go to the Resources tab, click the Edit icon and select openid, email, profile from the list of scopes.
-
On your application panel, switch the toggle button at the top right corner to enable user access to the application.
Register Ping Identity in Appsmith
To complete the OIDC configuration, you have to register the identity provider on Appsmith. Go to Admin Settings > Authentication > OIDC, and follow the steps below:
-
Add the Client ID and Client Secret copied from the Ping Identity application into the respective fields.
-
Add the URLs copied from the Ping Identity application into OIDC configurations in Appsmith as per the table below:
| OIDC configuration field | Ping ID URL |
|---|---|
| Authorization URL | Authorization URL |
| Token URL | Token Endpoint |
| User Info URL | UserInfo Endpoint |
| JWK Set URL | JWKS Endpoint |
-
In the Scope box, specify the scopes to be used by the application during authentication to authorize access to a user's details. By default, there are three scopes -
openid,email, andprofile. Appsmith needsopenidandemailas mandatory scopes. For more information on scopes, see Editing scopes on PingOne. -
In the Username Attribute box, specify the name of the claim which represents the email of the user. The default value is
email. -
Once you have added the details, click the SAVE & RESTART button to save the configuration and restart the instance.
If you're running Appsmith on a Kubernetes cluster with an HA configuration, after completing the setup, run the following command to ensure the new authentication settings are properly applied:
kubectl rollout restart deployment/appsmith -n
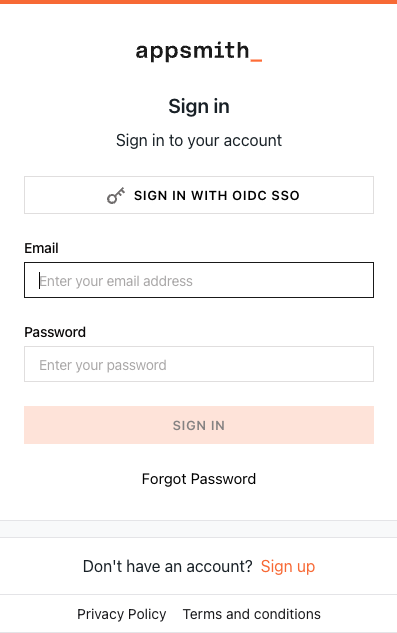
After the Appsmith instance restarts, try logging in again to your account. You'll see a login screen with the SIGN IN WITH OIDC SSO button.