Amazon Cognito
To configure Appsmith to use Amazon Cognito as an OIDC provider, follow these steps:
Prerequisites
- A self-hosted Appsmith instance. See the installation guides for installing Appsmith.
- Before setting up Single Sign-On (SSO), ensure that you have already configured a custom domain for your instance.
Create user pool
-
Log in to your AWS account. Go to Services > Security, Identity & Compliance > Cognito.
-
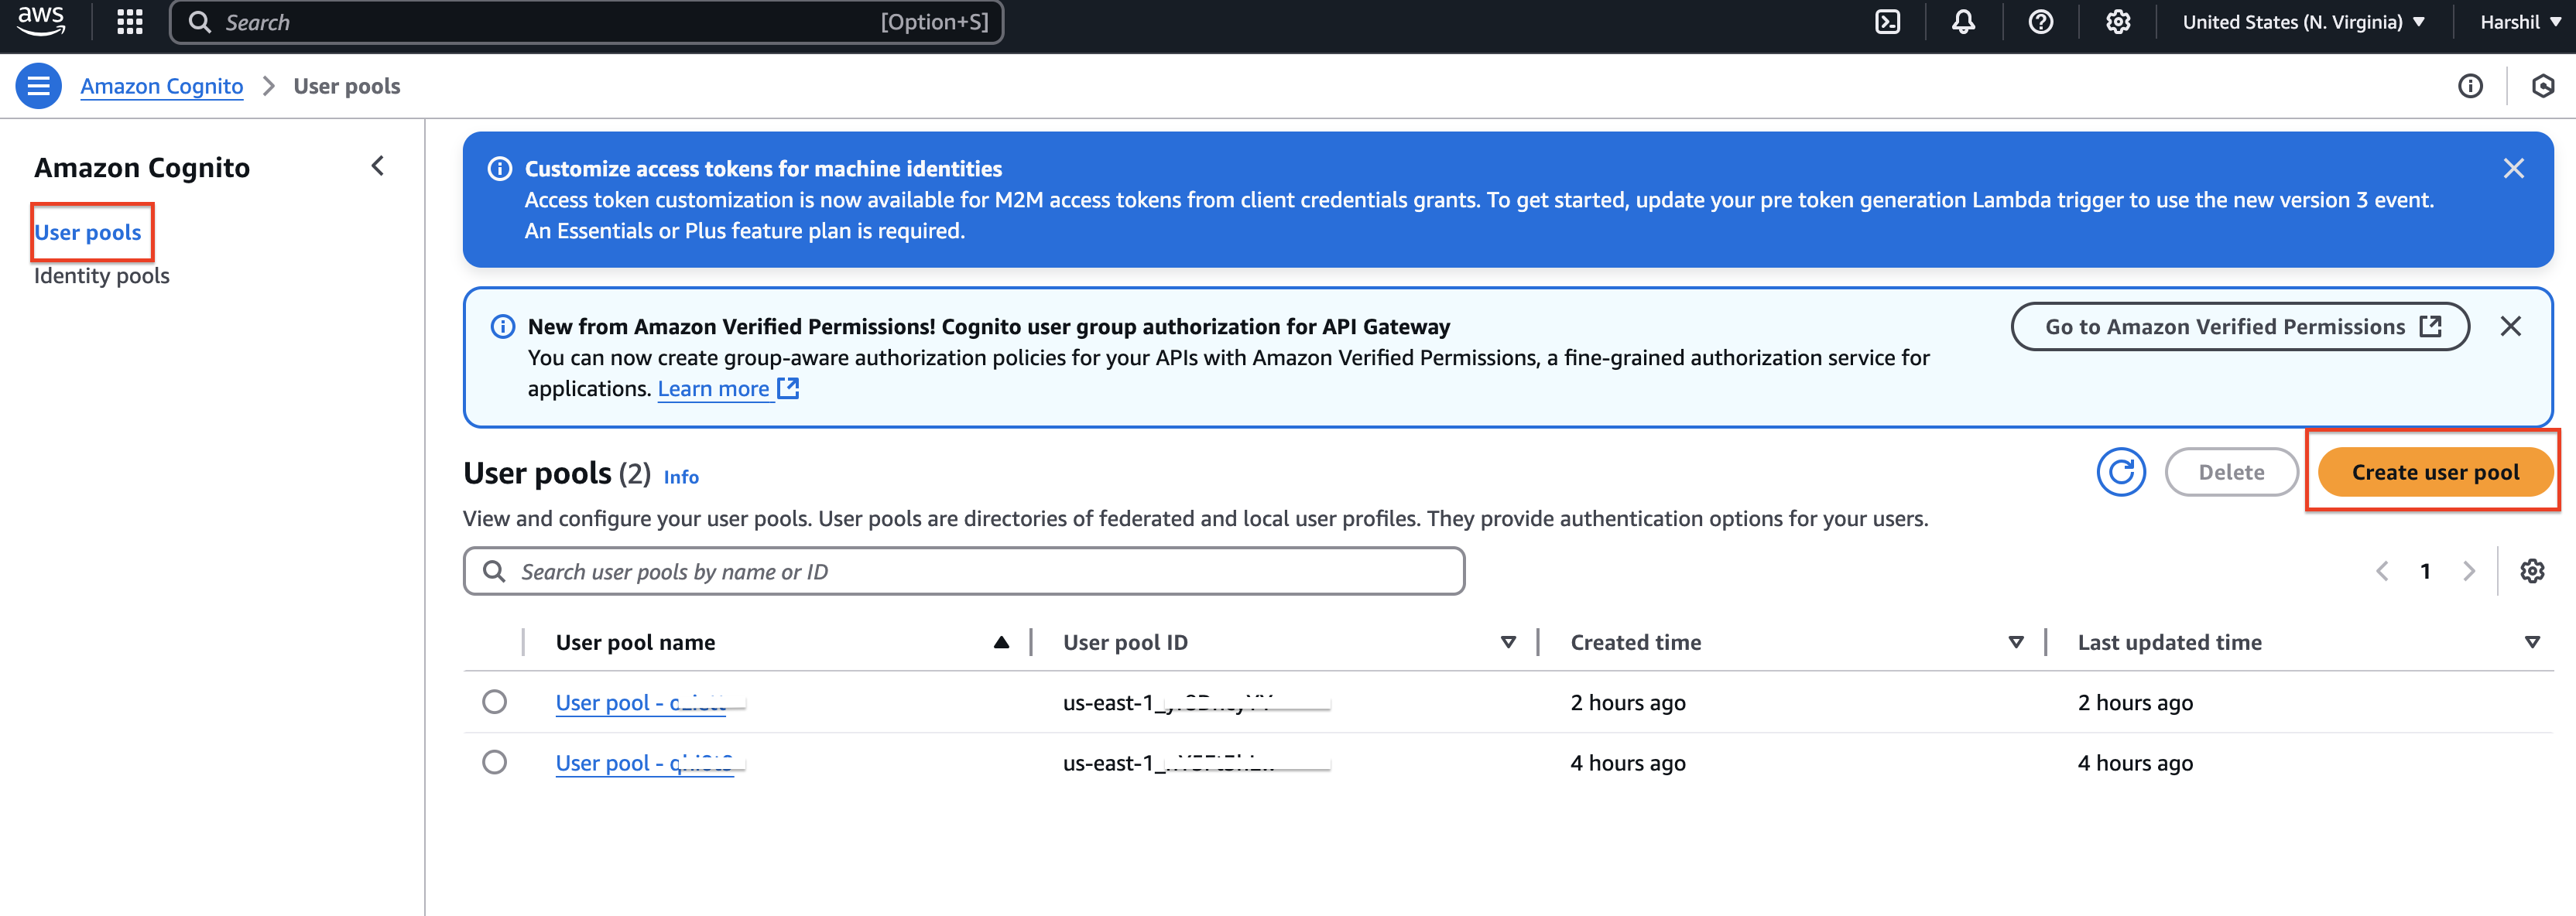
From the left-side pane, open User pools and click the Create user pool button.
- On the Set up resources for your application page, configure the following settings:
- Application type: Select Traditional web application.
- Application name: Enter a name for your application, such as Appsmith.
- Sign-in identifiers: Select Email, Phone, and Username.
- Required attributes for sign-up: Choose Profile and Email. You can select additional attributes if required based on your application's needs.
- Return URL: In the Add a return URL field, enter the Redirect URL copied from the OIDC configuration in Appsmith.

-
Click Create user directory to complete the setup. Once done, open the Overview page of the recently created User Pool.
-
From the Overview page, navigate to the App clients section using the left-side pane.
-
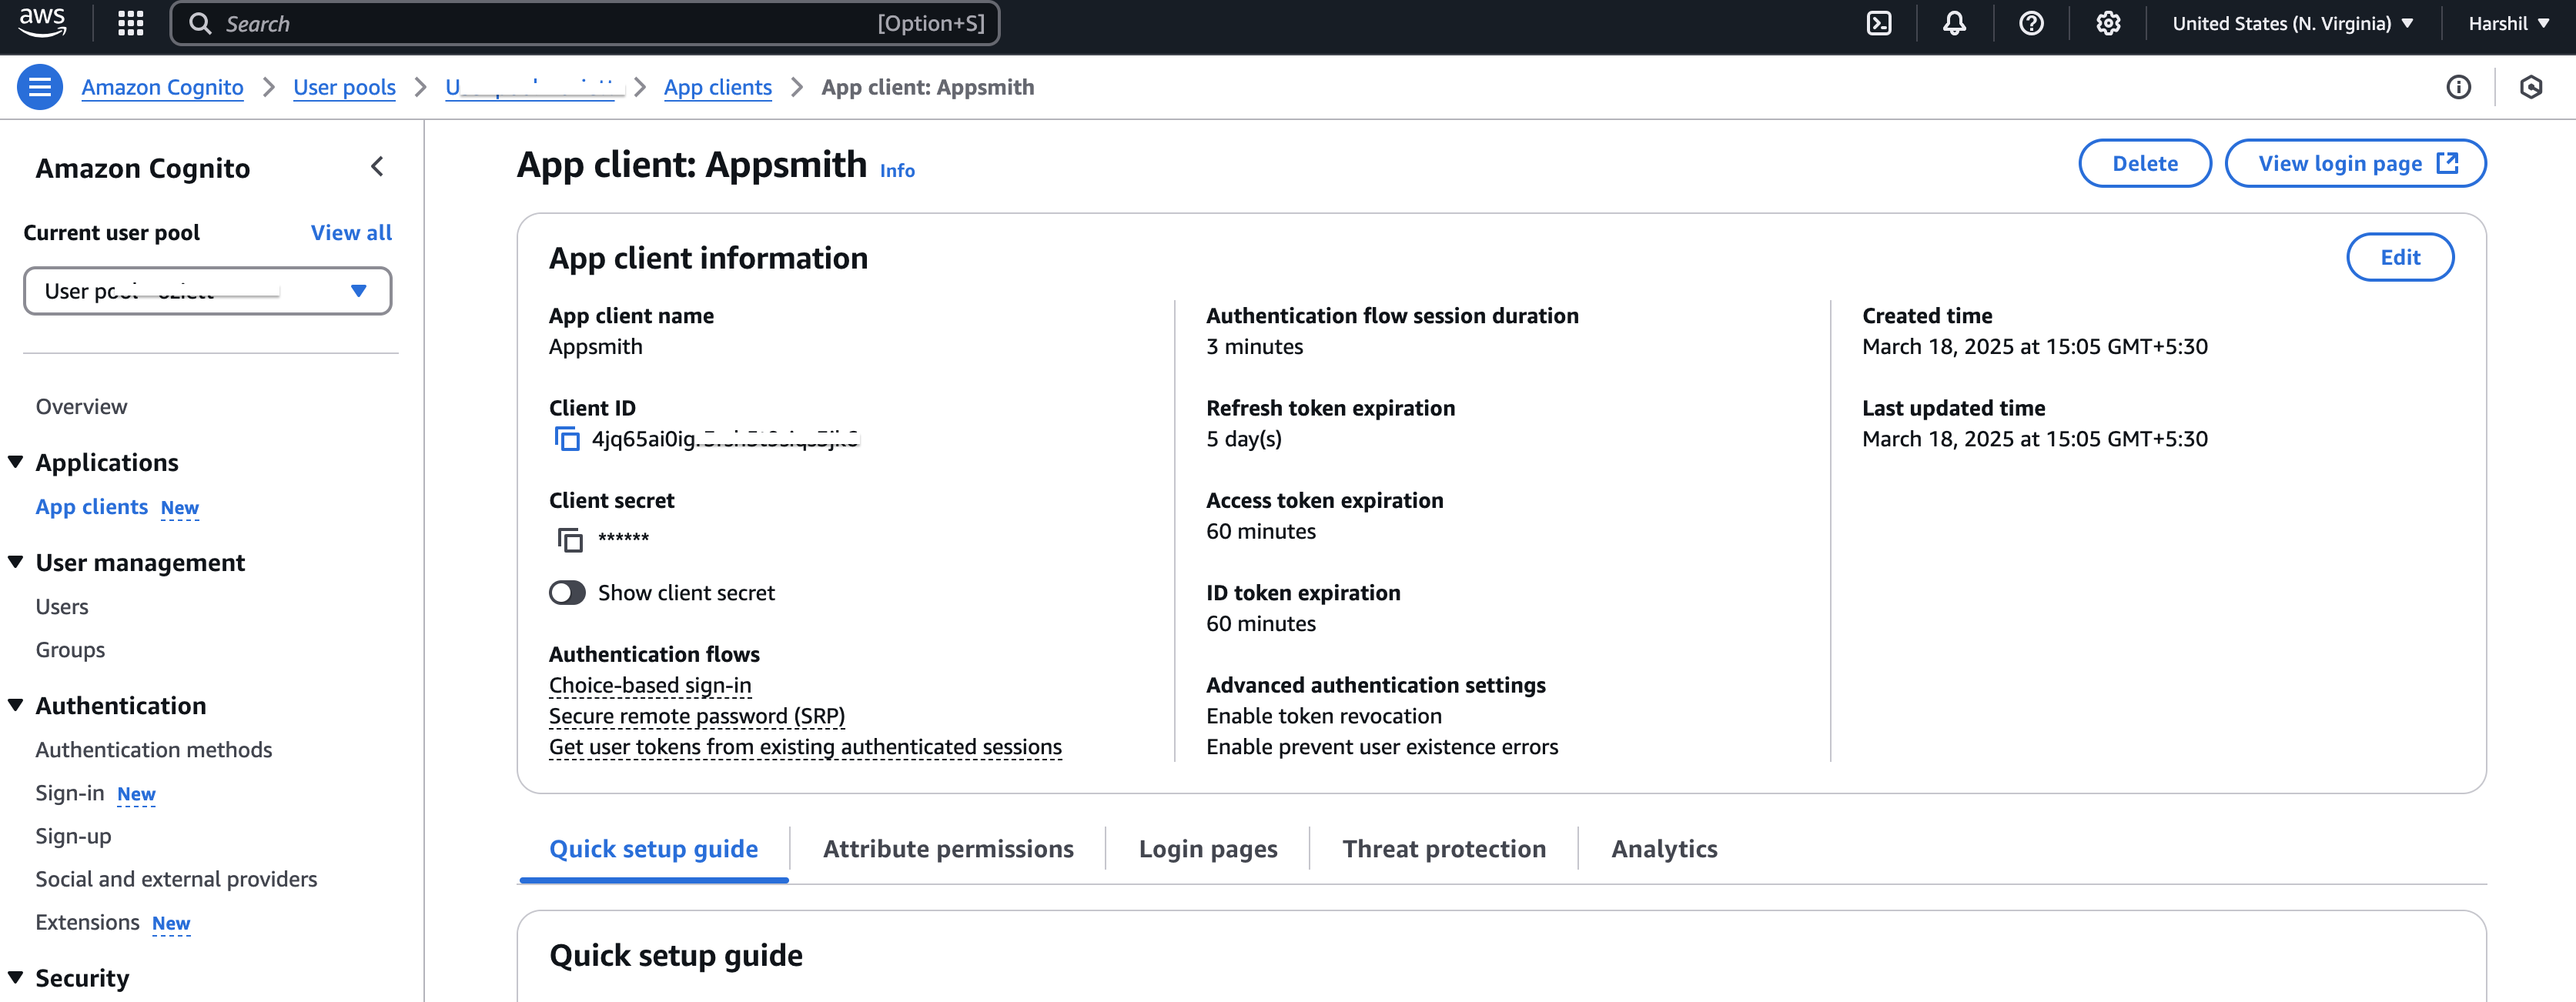
On the App clients page, open your application to view its details. The page displays the Client ID, Client Secret, login page configuration, and other settings. Copy the Client ID and Client Secret for future use.
-
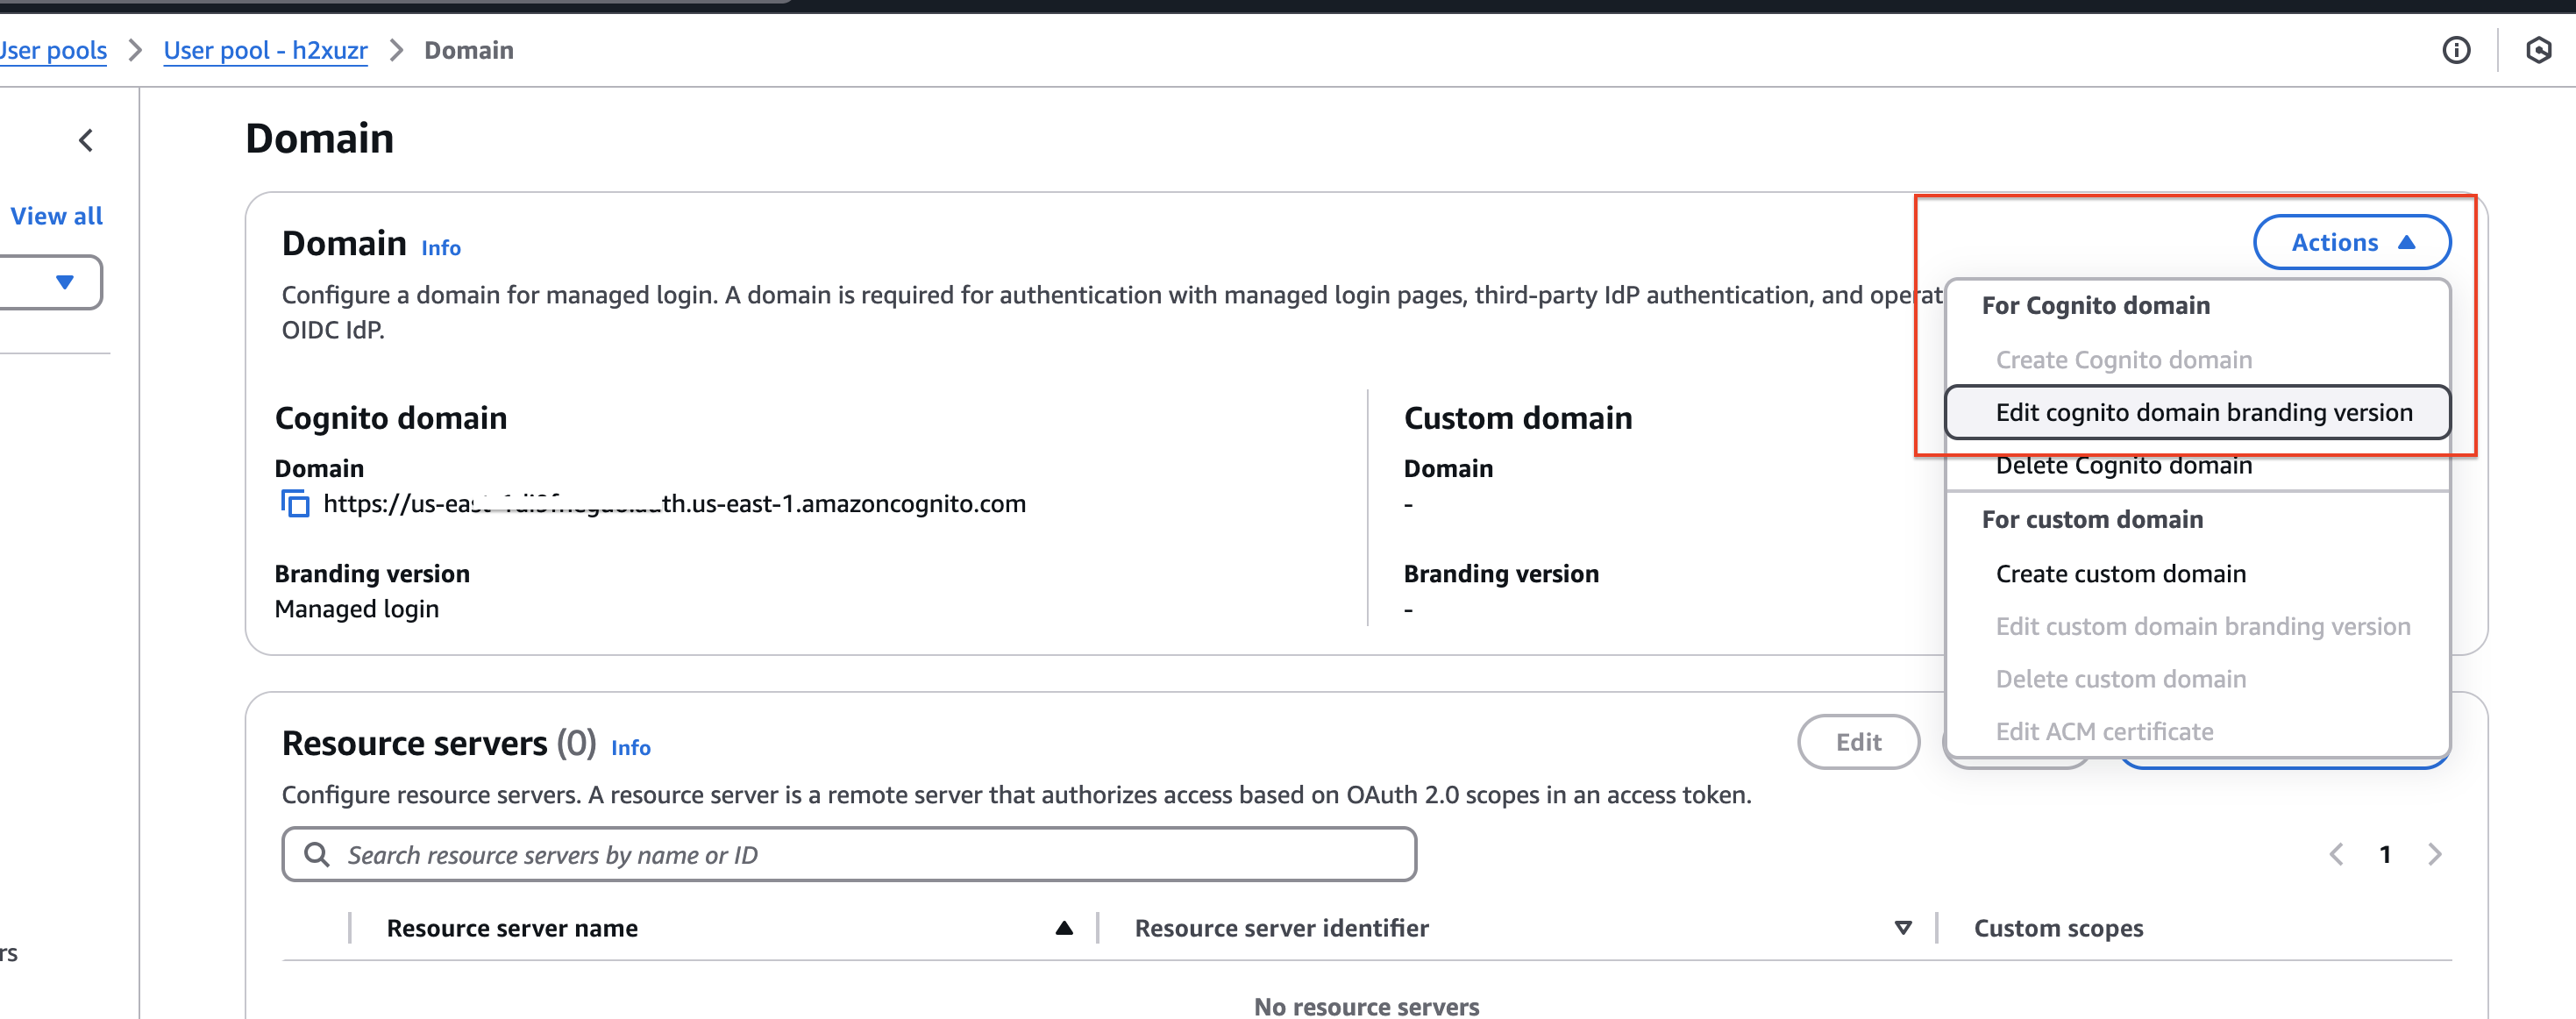
Navigate to the Domain page from the left-side navigation panel. Copy the Cognito domain for future use. If you want to set up a custom domain, configure it based on your requirements.
-
Click the Actions button and open the Cognito branding settings. Select the Hosted UI (Classic) version and save the changes.
-
Navigate to the App clients section and open the Login pages settings. Click Edit, then update the Scopes to include:
- openid
- profile
- Navigate to the Multi-Factor Authentication (MFA) and security settings. Configure MFA, password policies, and other security settings based on your requirements.
Setup Cognito SSO on Appsmith
On your Appsmith instance, go to Admin Settings > Authentication > OIDC, click Enable and follow the steps below:
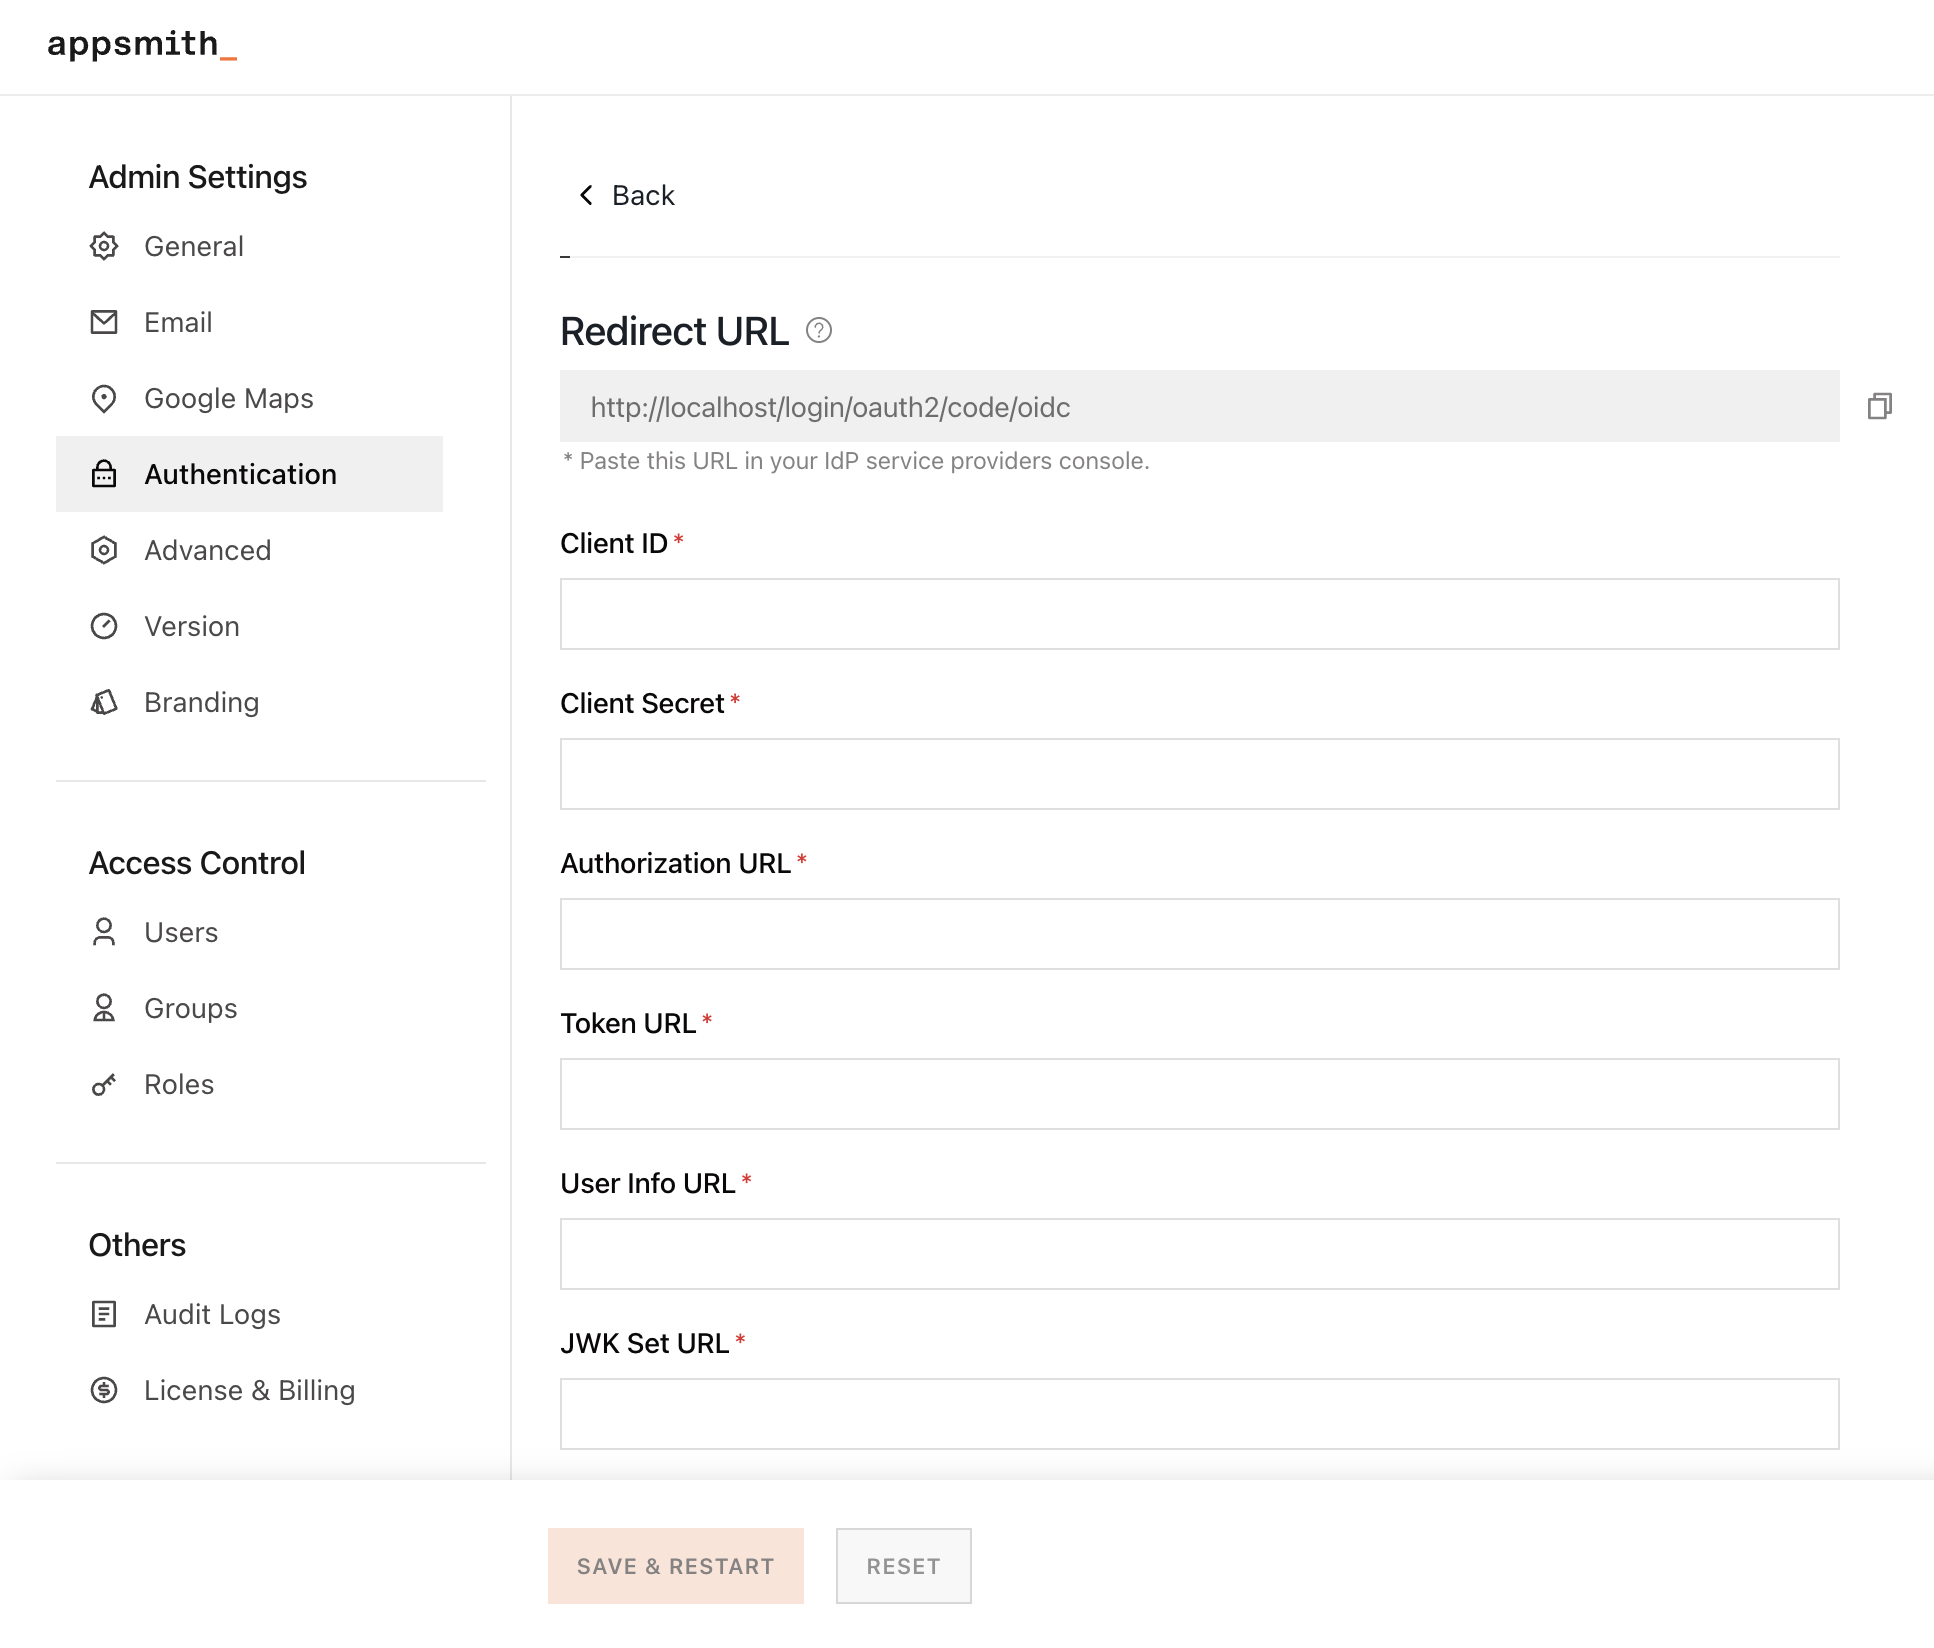
- Refer to the table below when entering data in the input boxes to configure the instance:
| Configuration field | Description |
|---|---|
| Client ID | Add the Client ID copied from the App Client in your user pool |
| Client Secret | Add the Client Secret copied from the App Client in your user pool |
| Authorization URL | Format - https://<user-pool_domain>/oauth2/authorizeuser-pool_domain - The Cognito domain you created in the above step. |
| Token URL | Format - https://<user-pool_domain>/oauth2/tokenuser-pool_domain - The Cognito domain you created in the above step. |
| User Info URL | Format - https://<user-pool_domain>/oauth2/userInfouser-pool_domain - The Cognito domain you created in the above step |
| JWK Set URL | Format - https://cognito-idp.<region>.amazonaws.com/<user-pool-id>/.well-known/jwks.jsonregion - The region's code where your AWS Cognito is set up. user-pool-id - The unique ID of the user pool you've created. |
- Save the changes and restart your application by clicking
SAVE & RESTARTbutton.
If you're running Appsmith on a Kubernetes cluster with an HA configuration, after completing the setup, run the following command to ensure the new authentication settings are properly applied:
kubectl rollout restart deployment/appsmith -n
After the Appsmith instance restarts, try logging in again to your account. You'll see a login screen with the SIGN IN WITH OIDC SSO button.