Create Custom Navigation Bar
You can customize and group menu options with a custom navigation bar. This page shows you steps to create a custom navigation bar.
To create a custom navigation bar, follow these steps:
-
Create all the pages in the application you would like to display in the custom navigation bar.
-
You can create a custom navigation bar using Buttons, Menu Buttons, or Button Groups. On the first page of your app, add a Button Group widget to hold the menu items for the navigation bar. To rearrange and configure the buttons, click the gear icon ⚙️ beside each button. You can later export the components of the navigation bar and use it in the rest of your application's pages.
-
To configure the nested menu for the nav bar, click the gear icon ⚙️ beside the Menu button of the Button Group.
-
Add the Navigate to action to each button's OnClick event to navigate to the desired page. To add action to the onClick event of the Menu items, click the gear icon ⚙️ beside the menu item.
-
To export the navigation bar, click the menu icon (three dots) beside the page. Select Export and click the widgets you want to export.
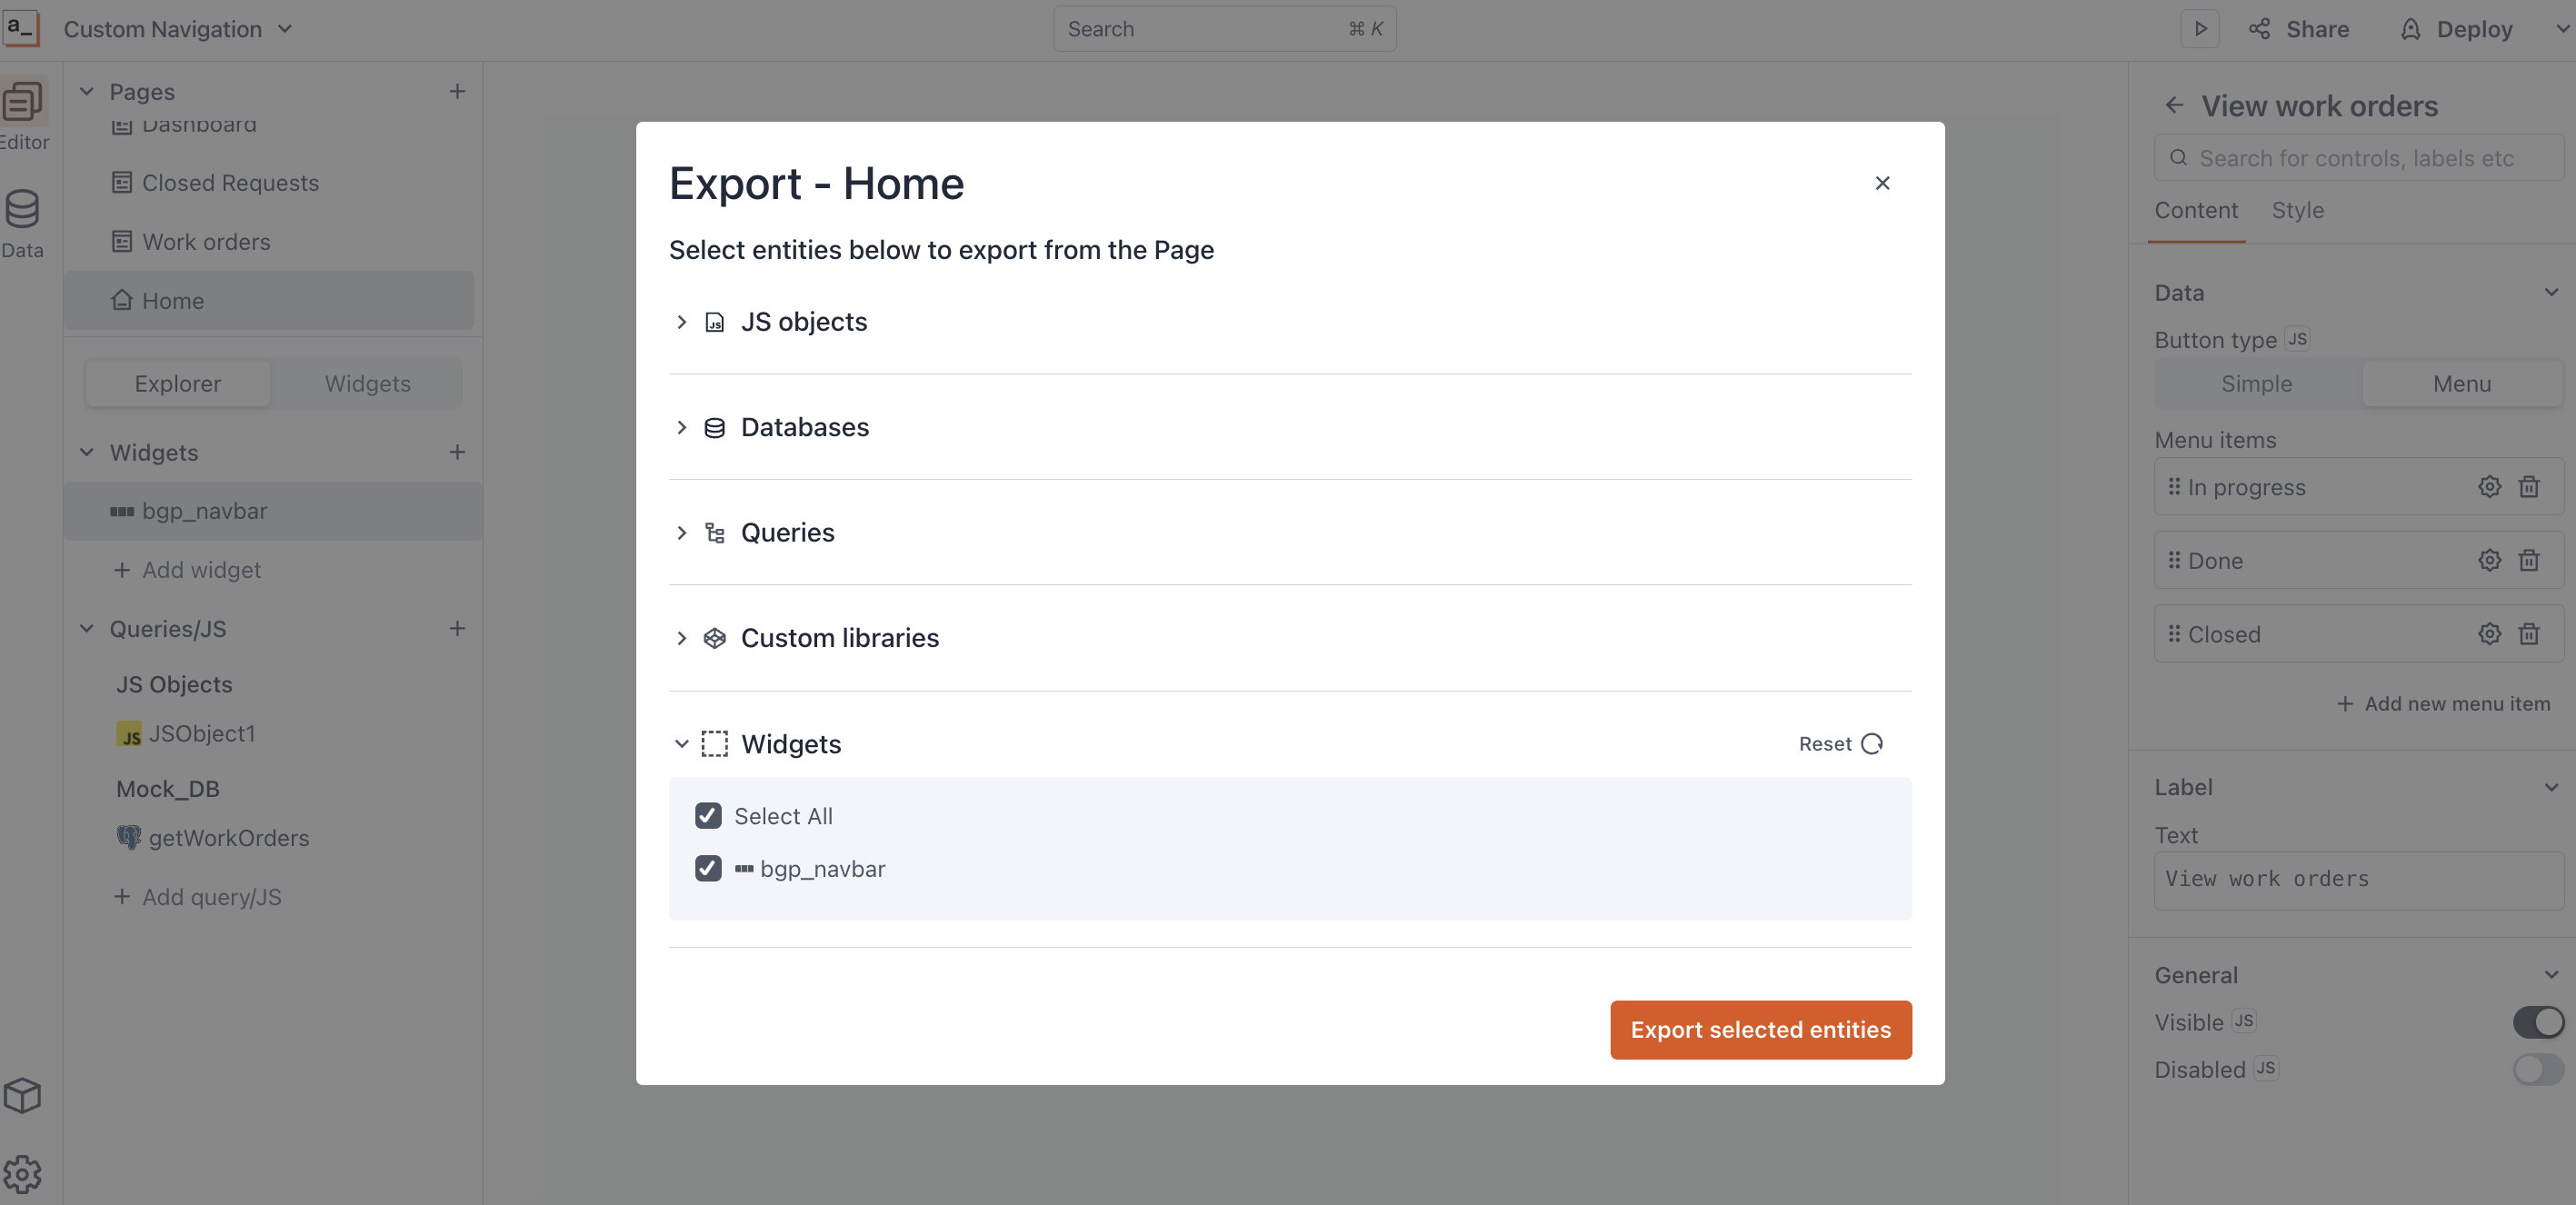
Export nav bar -
Click Export selected entities. The system downloads a JSON file containing the chosen widget details.
-
Go to the page where you want to import the navigation bar and select the Menu icon (three dots) beside the page. Select Import, and then select the downloaded JSON file. Your page now includes the navigation bar.