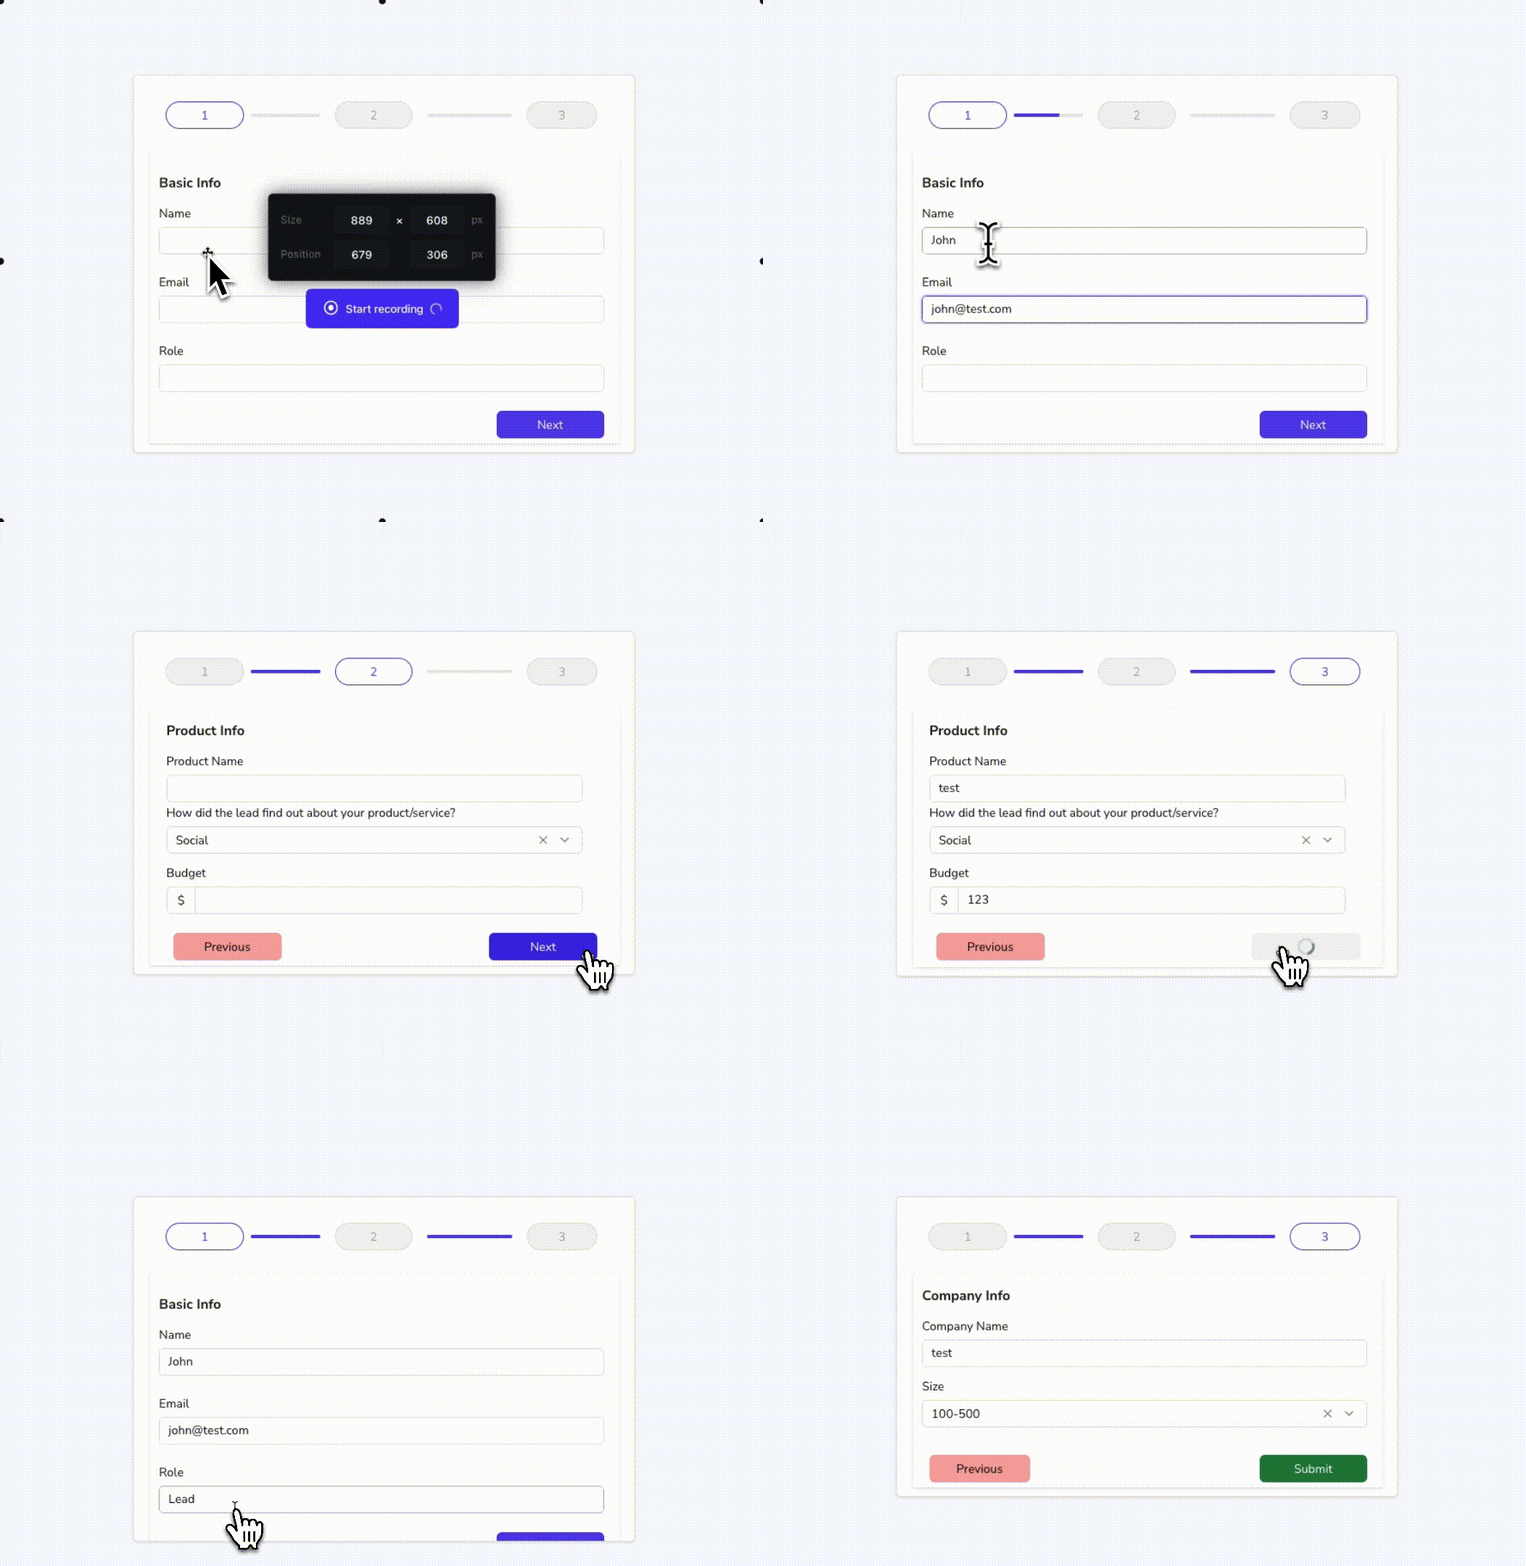
Create a Multi-step Wizard
This page shows you how to create a multi-step form using the Tabs widget, which allows you to collect user input over multiple steps. See the sample app.

Prerequisites
- A Tabs widget.
- Basic knowledge of how the storeValue() function works.
Configure the Tabs
Follow these steps to set up a Tabs widget with form fields and validation:
Example: If you want to set up a multi-step form with three tabs:
-
Add and rename tabs as required. For example, rename them to
BasicInfo,LeadInfo, andCompanyInfo. -
Drop a Form widget for each tab and add relevant widgets like Input, Select, inside the form.
-
To validate user inputs, use properties like Regex, Valid, and Required. The submit Button remains disabled until all widgets meet the defined validation criteria.
See validation examples for the Input widget.
Set up navigation
Follow these steps to navigate between Tabs using storeValue() and Button widgets:
- To navigate to the next Tab, configure the onClick event of the Button within each Tab to trigger the Store value action and specify a unique key and Tab name.
Example: On Tab 1 (BasicInfo), set the Submit Button's widget onClick event to trigger the Store value action and specify:
| Field Name | Value |
|---|---|
| Key | defaulttab |
| Value | LeadInfo |
In this configuration, defaulttab acts as a unique identifier, while the Value field represents the name of the tab you want to navigate to, which, in this case, is the next tab LeadInfo.
This setup stores the next Tab's name in the defaulttab key, which can then be used for navigation in subsequent steps.
- Similarly, to navigate to the previous tab, add a new Button widget to each tab and configure the onClick event to trigger the Store value action and specify the same unique key.
Example: on Tab 2 (LeadInfo) tab, add a new Button widget and configure its onClick event to allow users to go back to the previous tab. For this, select Store value option from the action selector and specify:
| Field Name | Value |
|---|---|
| Key | defaulttab |
| Value | BasicInfo |
In this configuration, the same defaulttab key is used to store the name of the previous tab, which, in this case, is BasicInfo. This setup stores the previous Tab's name in the defaulttab key, which can then be used for navigation in subsequent steps.
Similarly, for each Tab, configure two Button widgets - one for navigating to the next tab and another for navigating to the previous tab.
- To display the Tab based on the
storeValue, add the following code into the Default Tab property of the Tabs widget:
{{appsmith.store.defaulttab}}
This allows you to access the Tab name from the store using the defaulttab key.
-
Configure the final submit Button's onClick event to execute the update query. See how to Submit Form data.
-
Disable the Show Tabs property to hide tabs, which prevents manual selection and ensures controlled navigation.
With this setup, you can navigate between Tabs using Button widgets and the storeValue function.
You can customize the style of your Tabs by adding Buttons and Progress bar. Additionally, use the Setter methods to configure the UI elements according to your preferences.
Save Partial Data
To persistently store data while users are in the process of filling out the form, you have two options:
-
Using the
storeValuefunction to store data locally, so users can resume their form-filling journey even if they navigate away. The data gets inserted into the datasource only when the submit button (executing the update query), is triggered. -
Direct server or datasource saving to ensure real-time, and storage of user data, which can be beneficial for immediate updates or backend integration.
For partial data saving using API, follow these steps:
- Set up an API endpoint to handle the initial insertion of data on
Nextbutton's onClick event. In this step, save the details that are already filled out in the form, and set the rest of the fields as null or with default values.
Example: To insert data, add the following into the JSON body of the REST API.
{
   "name": {{user_name.text ? user_name.text : null}},
   "role": {{user_role.text ? user_role.text : null}},
   "lead_date": {{Date_created.formattedDate ? Date_created.formattedDate : null}}
   // Add more fields as needed
}
The above code dynamically constructs a JSON object with optional properties, setting them to input field values or null if unavailable.
- Following the initial data insertion, use the
storeValuefunction to save the data's unique identifier orID.
Example: To save the ID upon the successful execution of the API, add the following code in the onClick event of the Next button:
{{user_api.run().then(() => {
  storeValue('userid', Api1.data.id);
});}}
- Create a new API to update the existing record with additional data as the user advances through the form. Trigger this API execution when the user clicks on the Next buttons.
Example: For this, consider using the PATCH method, which is designed for partial updates:
//URL
https://yourapi.in/api/users/{{appsmith.store.userid}}
And in the content BODY pass the input data:
//BODY
{
   "company_name": {{company_name.text ? company_name.text : null}},
   "product_name": {{product_name.text ? product_name.text : null}},
      // Add more fields as needed
}
- When the user completes the form and clicks the final Submit button, trigger an API to send the remaining or updated data to the server.
With this setup, data is directly saved to the server as users click on the Next button. Additionally, you can implement functions to check tab status, open relevant tabs on login, and dynamically fetch and display stored data.